
Customizing your Minecraft character is one of the most accessible ways to express creativity and individuality in the game. Whether you want to resemble a favorite superhero, create a unique avatar, or simply stand out in multiplayer servers, changing your skin transforms how others see you—and how you experience the world. The process is straightforward once you understand the tools and steps involved. This guide walks you through everything from designing your first skin to troubleshooting upload issues, ensuring a smooth customization journey.
Understanding Minecraft Skins
Minecraft skins are 64×64 pixel image files that wrap around your character model, defining its appearance. There are two primary formats: the classic 64×32 layout (used before 2019) and the modern 64×64 format, which supports more detailed designs including slim arms. These skins do not alter gameplay mechanics but serve as visual representations of your player in both single-player and online environments.
Skins can be fully customized using image editing software or specialized skin editors. Once created, they’re uploaded to your Mojang account and synced across all devices where you log in with that account. This means your skin appears consistently whether you're playing on PC, console, or mobile—provided cross-platform authentication is active.
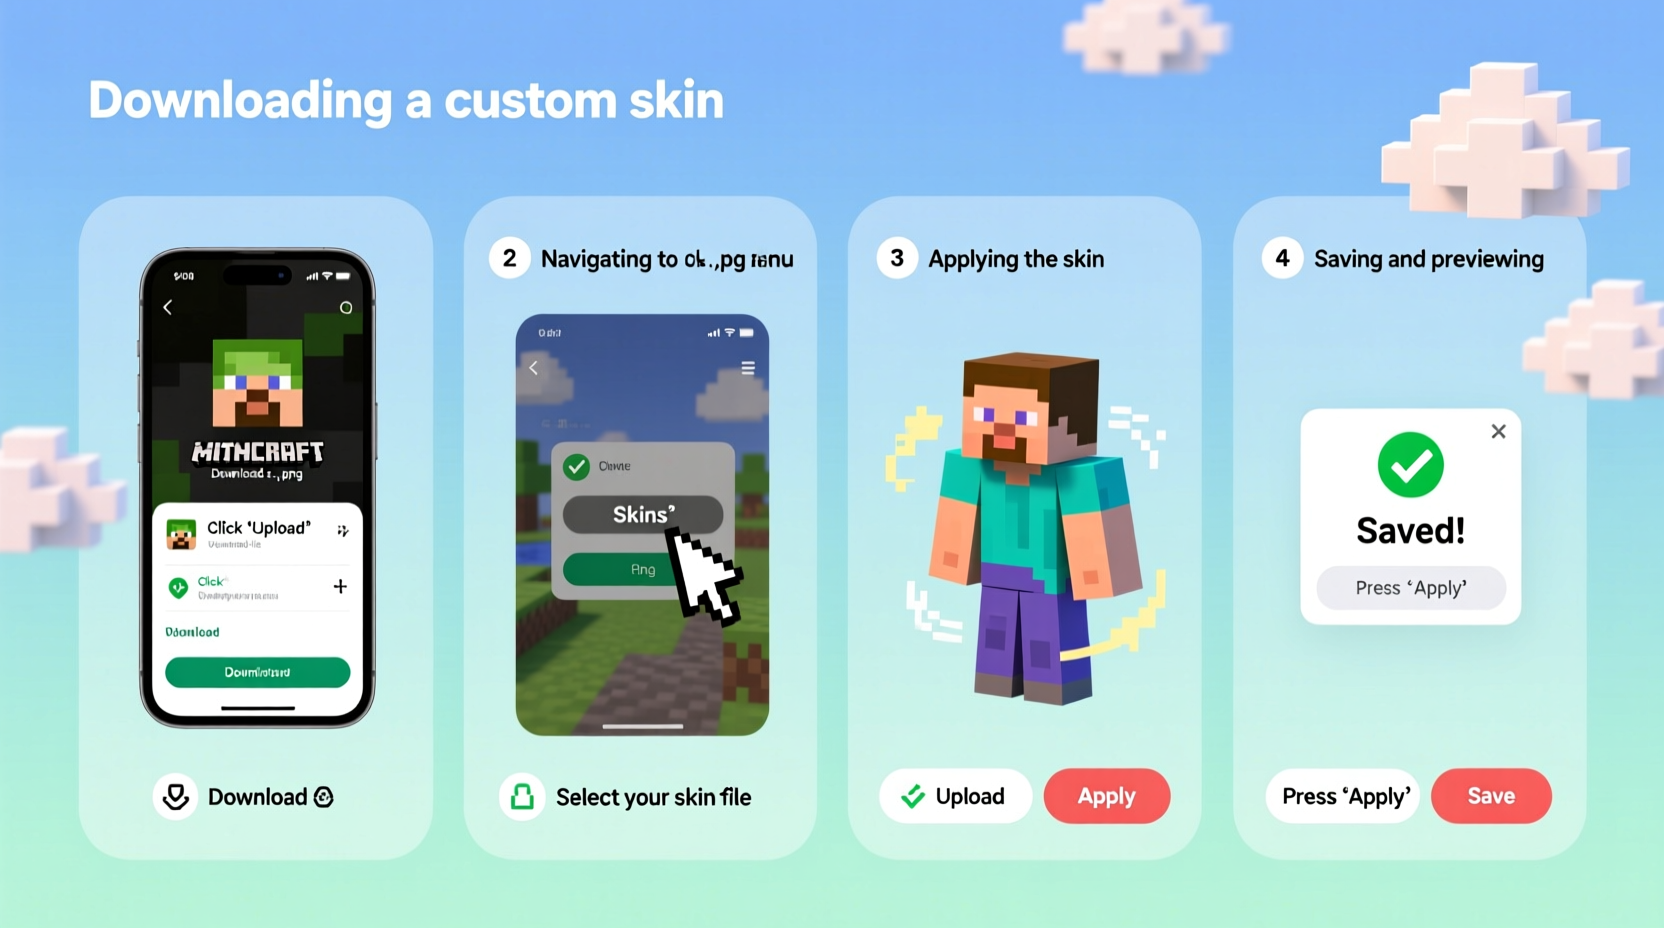
Step-by-Step Guide to Creating and Uploading a Skin
Follow this timeline to design and apply a new skin in under 20 minutes:
- Choose a Skin Editor: Use an online tool like Nova Skin, Skindex, or MineCool. These platforms offer intuitive interfaces for drawing directly on a 3D preview of the character.
- Select Your Model Type: Decide between \"Default\" (broad arms) and \"Slim\" (narrower arms, often used for anime-style or female characters). This setting affects how the sleeves and gloves render.
- Design Your Skin: Start with basic shapes—eyes, mouth, hair—then add clothing, accessories, or textures. Use reference grids to maintain symmetry and proportion.
- Download the PNG File: Once satisfied, export your creation as a .png file. Ensure it’s exactly 64×64 pixels; larger or smaller images won’t upload.
- Log Into Your Mojang Account: Go to minecraft.net and sign in with your credentials.
- Navigate to Profile Settings: Click your profile icon, go to “Skins,” and select “Upload New Skin.”
- Select Your File and Confirm: Choose the downloaded .png and click “Save.” Refresh your game client if needed.
- Verify In-Game Appearance: Launch Minecraft and check your character in the main menu or a creative world.
Best Tools and Editors for Skin Design
While advanced users may prefer Photoshop or GIMP, beginners benefit from dedicated skin editors that simplify the workflow. Below is a comparison of top options:
| Tool | Platform | Pros | Cons |
|---|---|---|---|
| Nova Skin | Web-based | Real-time 3D preview, community sharing, supports animations | Limited offline functionality |
| The Skindex | Web + App | Huge library of free skins, easy upload integration | Interface can feel cluttered |
| MineCool | Web-based | Clean UI, beginner-friendly, instant sharing | Fewer advanced editing features |
| Paint.NET / GIMP | Desktop (Windows/Linux) | Full control over layers and effects | Steeper learning curve |
For those interested in animation or layered effects (like glowing eyes or flowing capes), Nova Skin provides built-in support. Meanwhile, desktop programs allow greater precision for complex pixel art techniques.
Common Mistakes and How to Avoid Them
- Ignoring Arm Width Settings: Choosing the wrong model type leads to misaligned sleeves. If your character has narrow arms in-game but you designed for default width, parts will stretch incorrectly.
- Using Non-PNG Formats: Only .png files are accepted. Attempting to upload .jpg or .gif results in failure.
- Exceeding Pixel Dimensions: Even slight deviations from 64×64 cause errors. Resize carefully in your editor before export.
- Forgetting Transparency Rules: Transparent pixels are ignored by the game engine. Use solid colors instead of alpha channels for visibility.
- Not Testing Before Final Upload: Preview your skin in a test environment first. Some details may look distorted when wrapped around the 3D model.
“Good skin design balances creativity with technical constraints. The best skins work within the grid, not against it.” — Lena Torres, Digital Artist & Minecraft Community Moderator
Mini Case Study: From Idea to In-Game Identity
James, a high school student and avid Minecraft player, wanted to represent his passion for astronomy in-game. He began by sketching a concept featuring a starry cloak, telescope accessory, and galaxy-patterned suit. Using Nova Skin, he mapped constellations onto the back layer and added subtle glow effects via light gray shading. After three iterations and feedback from friends, he finalized the design. Upon uploading, he noticed the gloves looked off due to incorrect model selection. Switching to “Slim” arms fixed the alignment. Within days, other players on his server asked how he made such a detailed skin. James later shared his template on The Skindex, receiving over 500 downloads.
This example shows that even novice designers can produce professional-quality results with patience and the right tools.
Checklist: Ready to Change Your Skin?
- ✅ Back up your current skin file
- ✅ Choose between Default and Slim model
- ✅ Design using a reliable editor (Nova Skin, Skindex, etc.)
- ✅ Export as 64×64 .png with no transparency
- ✅ Log into your Mojang account at minecraft.net
- ✅ Navigate to Skins > Upload New Skin
- ✅ Select file and confirm upload
- ✅ Restart Minecraft to see changes
- ✅ Test in multiplayer or LAN world for full visibility
FAQ
Can I use custom skins on all versions of Minecraft?
Yes, but only if you own the official version and use a Mojang or Microsoft account. Bedrock Edition (mobile/consoles) supports skins through marketplace purchases or manual imports, while Java Edition relies solely on account-level uploads.
Do I need to pay to change my skin?
No. Uploading custom skins is completely free. However, some third-party sites may offer premium templates or editing services for a fee. Official Mojang skin changes cost nothing.
Why isn't my new skin showing up in-game?
This usually happens due to caching. Try restarting the game, relogging your account, or checking your internet connection. Also verify that the upload was successful on the website and that the file met size/format requirements.
Conclusion: Make Your Mark in the Blocky World
Your Minecraft skin is more than just a texture—it’s your digital identity in a vast, collaborative universe. With simple tools and a bit of imagination, anyone can craft a look that reflects their personality, interests, or artistic flair. The process empowers players to engage creatively beyond building and survival, fostering deeper connections in multiplayer communities. Now that you know how to design, upload, and troubleshoot skins confidently, there’s no reason to stay stuck with the default steve or alex.


 浙公网安备
33010002000092号
浙公网安备
33010002000092号 浙B2-20120091-4
Comments
No comments yet. Why don't you start the discussion?