
Building a structure begins with a solid foundation—literally. Footings are the unseen backbone of any construction project, transferring the load of walls, columns, or entire buildings into the ground. Pouring too little concrete risks structural failure; pouring too much wastes time, materials, and money. The key lies in accurate calculation. This guide walks you through every stage of determining how much concrete you need for footings, from initial measurements to final ordering—with precision and confidence.
Understanding Footings and Their Role
Footings are thick slabs of reinforced concrete placed below ground level that support the foundation and prevent settling or shifting. They distribute concentrated loads over a broader area of soil, ensuring stability. Common types include continuous spread footings (for walls), isolated footings (for columns), and combined footings (for closely spaced supports).
The amount of concrete required depends on several factors: footing dimensions (width, depth, length), number of sections, local building codes, and soil conditions. Getting these calculations right ensures compliance with engineering standards and avoids costly rework.
“Accurate concrete estimation starts with understanding what the footing must do—not just how big it looks.” — James Ralston, Structural Engineer, 15+ years in residential and commercial design.
Step-by-Step Process to Calculate Concrete Volume
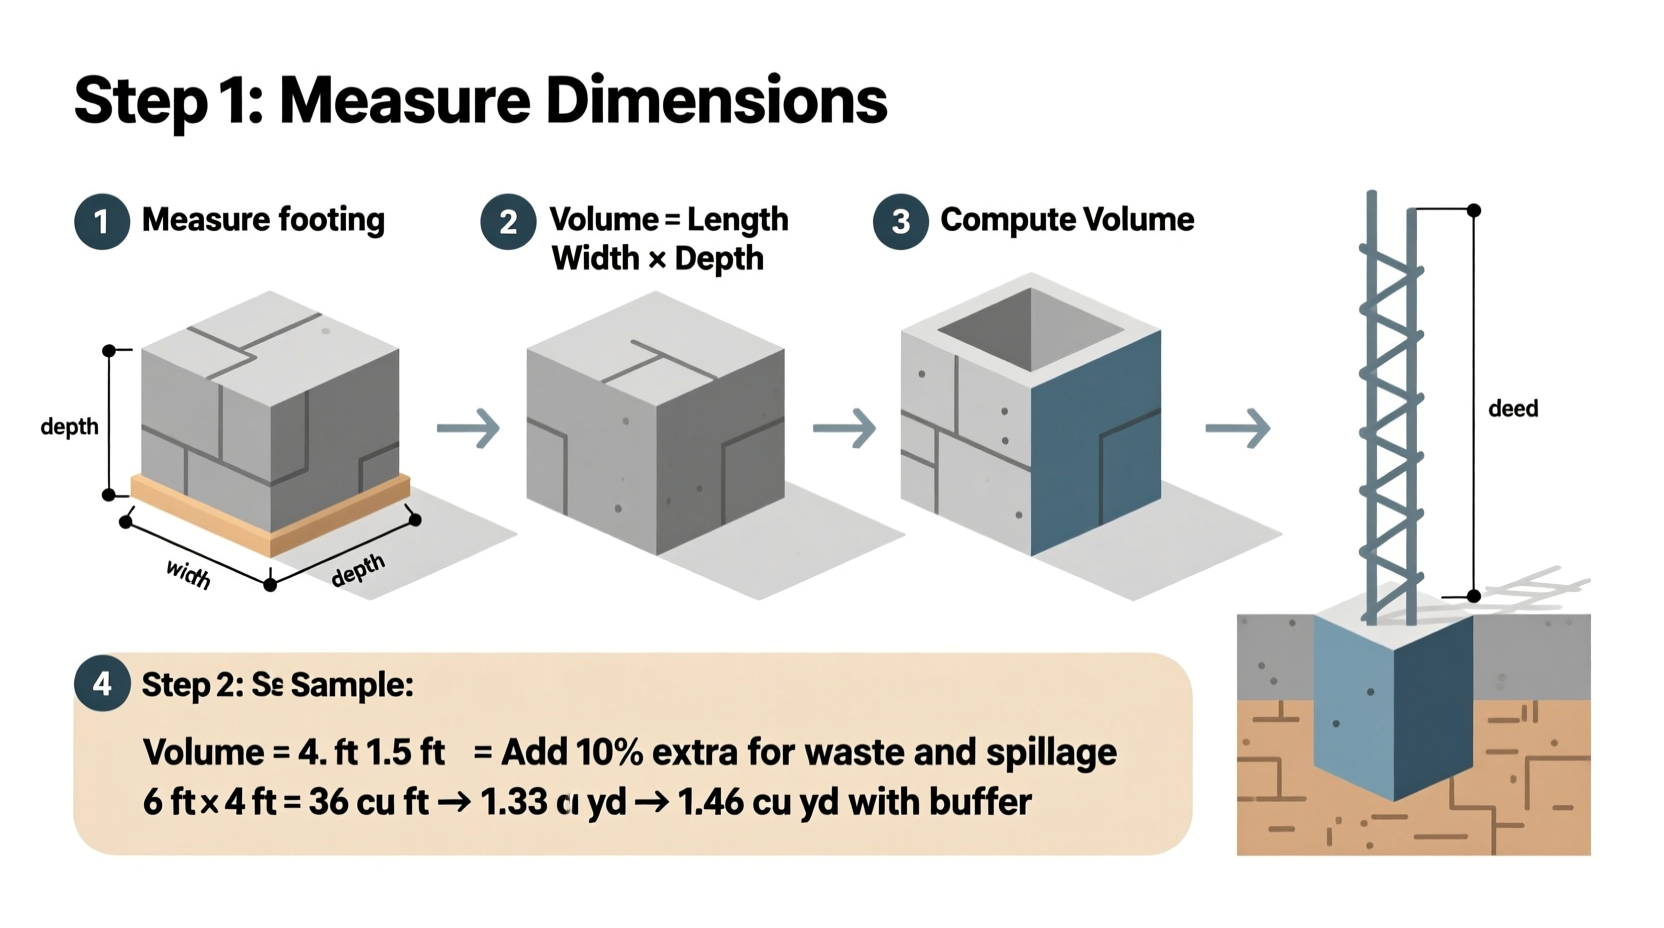
Calculating concrete for footings involves converting physical dimensions into cubic volume, typically measured in cubic feet or cubic yards. Follow this sequence to ensure accuracy:
- Review Construction Plans: Identify all footing types, lengths, widths, and depths. Note variations such as stepped footings or changes in thickness.
- Break Down the Project: Divide the total layout into manageable segments (e.g., Section A: front wall, Section B: rear wall).
- Measure Each Segment: Use a tape measure or laser tool to confirm dimensions if working on-site without finalized blueprints.
- Calculate Volume Per Segment: Apply the formula: Volume = Length × Width × Depth.
- Convert to Cubic Yards: Since most suppliers sell concrete by the cubic yard, divide cubic feet by 27 (because 1 cubic yard = 27 cubic feet).
- Add a Waste Factor: Include a 5–10% buffer for spillage, over-excavation, or minor design adjustments.
- Sum Total Requirements: Combine all segment totals to get the final order quantity.
Practical Example: Calculating Concrete for a Residential Foundation
Consider a single-story home with a perimeter foundation wall supported by continuous spread footings. The plan calls for footings that are 16 inches wide, 8 inches deep, and run 120 linear feet around the structure.
First, convert all measurements to feet:
- Width: 16 inches = 1.33 feet
- Depth: 8 inches = 0.67 feet
- Length: 120 feet
Now calculate volume:
120 ft × 1.33 ft × 0.67 ft = 106.87 cubic feet
Convert to cubic yards:
106.87 ÷ 27 ≈ 3.96 cubic yards
Add a 7% waste factor:
3.96 × 1.07 ≈ 4.24 cubic yards
Rounded up, order **4.5 cubic yards** to ensure full coverage without running short during the pour.
Handling Complex Layouts
If the structure includes interior load-bearing walls with separate footings, repeat the process for each section. For example, an internal footing measuring 30 feet long, 12 inches wide (1 ft), and 8 inches deep (0.67 ft):
30 × 1 × 0.67 = 20.1 cubic feet → 20.1 ÷ 27 ≈ 0.74 cubic yards Add 10% waste: 0.74 × 1.10 ≈ 0.81 cubic yards
Total concrete needed: 4.24 + 0.81 = 5.05 cubic yards → Order **5.5 cubic yards** to account for real-world variables.
Common Pitfalls and How to Avoid Them
Even experienced contractors can misestimate due to overlooked details. Below is a comparison of best practices versus typical mistakes.
| Do’s | Don’ts |
|---|---|
| Double-check all dimensions against blueprints | Assume standard sizes without verifying |
| Include extra for footings under columns or piers | Only measure perimeter walls |
| Use consistent units (all in feet) | Mix inches and feet in calculations |
| Add 5–10% waste allowance | Order exact calculated volume |
| Confirm trench depth on-site before pouring | Rely solely on estimated excavation depth |
Checklist: Pre-Pour Concrete Verification
Before placing your concrete order, go through this checklist to avoid delays or shortages:
- ✅ All footing trenches have been inspected and approved
- ✅ Reinforcement (rebar or mesh) is properly installed
- ✅ Formwork is secure and correctly aligned
- ✅ Final dimensions verified on-site
- ✅ Weather forecast checked (avoid pouring in heavy rain)
- ✅ Pump truck or delivery access confirmed
- ✅ Labor crew scheduled and ready
- ✅ Extra tools on hand (floats, screeds, vibrators)
Frequently Asked Questions
How accurate do my measurements need to be?
Very accurate. Even a half-inch error in depth across 100 feet can result in nearly 3 extra cubic feet of concrete—or a shortfall that compromises structural continuity. Use calibrated tools and verify twice.
Can I mix different batches of concrete on the same pour?
You can, but consistency matters. Different slump levels or air entrainment between batches may lead to visible seams or weak joints. Coordinate with your supplier to maintain uniform mix design throughout the pour.
What if I miscalculate and run out during the pour?
Running short mid-pour creates cold joints, which weaken the footing. If possible, stop at a control joint location. Otherwise, prepare for reduced structural performance. Always err on the side of slightly over-ordering—it's far less risky than stopping mid-pour.
Final Tips for Efficiency and Accuracy
To streamline the process and reduce errors, consider using digital tools. Many free online concrete calculators allow input in feet/inches and output in cubic yards. Advanced users may employ CAD software or takeoffs from architectural drawings for large-scale projects.
For repetitive footing designs, create a template calculation sheet in Excel. Input variables like length, width, and depth, and let formulas handle conversions and totals. This reduces manual math errors and speeds up estimating for future jobs.
“Efficiency doesn’t come from rushing—it comes from preparing so thoroughly that execution feels effortless.” — Maria Tran, Project Manager at Summit Foundations Inc.
Conclusion
Calculating concrete for footings is not guesswork—it’s a critical engineering task that demands attention to detail. By following a structured approach, validating measurements, and planning for contingencies, you ensure strong, compliant foundations every time. Whether you're building a small shed or a multi-room home, precise concrete estimation protects your investment, saves resources, and sets the stage for everything that follows.


 浙公网安备
33010002000092号
浙公网安备
33010002000092号 浙B2-20120091-4
Comments
No comments yet. Why don't you start the discussion?