
Custom badges are a powerful tool for enhancing player engagement in Roblox games. They serve as milestones, rewards, and achievements that give players a sense of progression and accomplishment. Whether you're running a roleplay experience, an obstacle course, or a simulation game, well-designed badges can increase retention and encourage exploration. This guide walks through the entire process—from planning to publishing—so you can create meaningful, visually appealing badges that resonate with your audience.
Understanding Badges in Roblox
In Roblox, badges are digital rewards that players earn by completing specific actions within a game. Unlike developer products or in-game currency, badges are non-monetary but highly motivational. They appear on a player’s profile and act as social proof of their accomplishments.
Each badge is tied to a unique event or condition in your game—such as defeating a boss, reaching level 10, or finding a hidden area. Once triggered, the badge is automatically awarded via Roblox’s badge system using server-side scripting.
“Badges transform gameplay into a journey. Players don’t just play—they strive.” — Jordan Lee, Roblox Developer & UX Consultant
Step-by-Step: How to Create a Custom Badge
Step 1: Plan Your Badge Strategy
Before diving into the development side, define what each badge represents. Ask yourself:
- What behavior or achievement should this badge reward?
- Is it rare (hard to obtain) or common (for participation)?
- Does it fit the theme of my game?
- Will it encourage replayability?
For example, a haunted mansion game might include badges like “Ghost Hunter” (defeat all ghosts), “Escape Artist” (complete the escape room), and “Midnight Explorer” (play between 12 AM and 6 AM).
Step 2: Design the Badge Image
Every badge needs a 512x512 PNG image with transparency support. The design should be clear, recognizable even at small sizes, and aligned with your game’s aesthetic.
Use graphic design tools like Canva, Photoshop, or GIMP. Keep these best practices in mind:
- Use bold shapes and minimal detail for clarity.
- Avoid tiny text—it won’t be readable on profiles.
- Incorporate colors from your game’s palette.
- Save with transparent background (.png format).
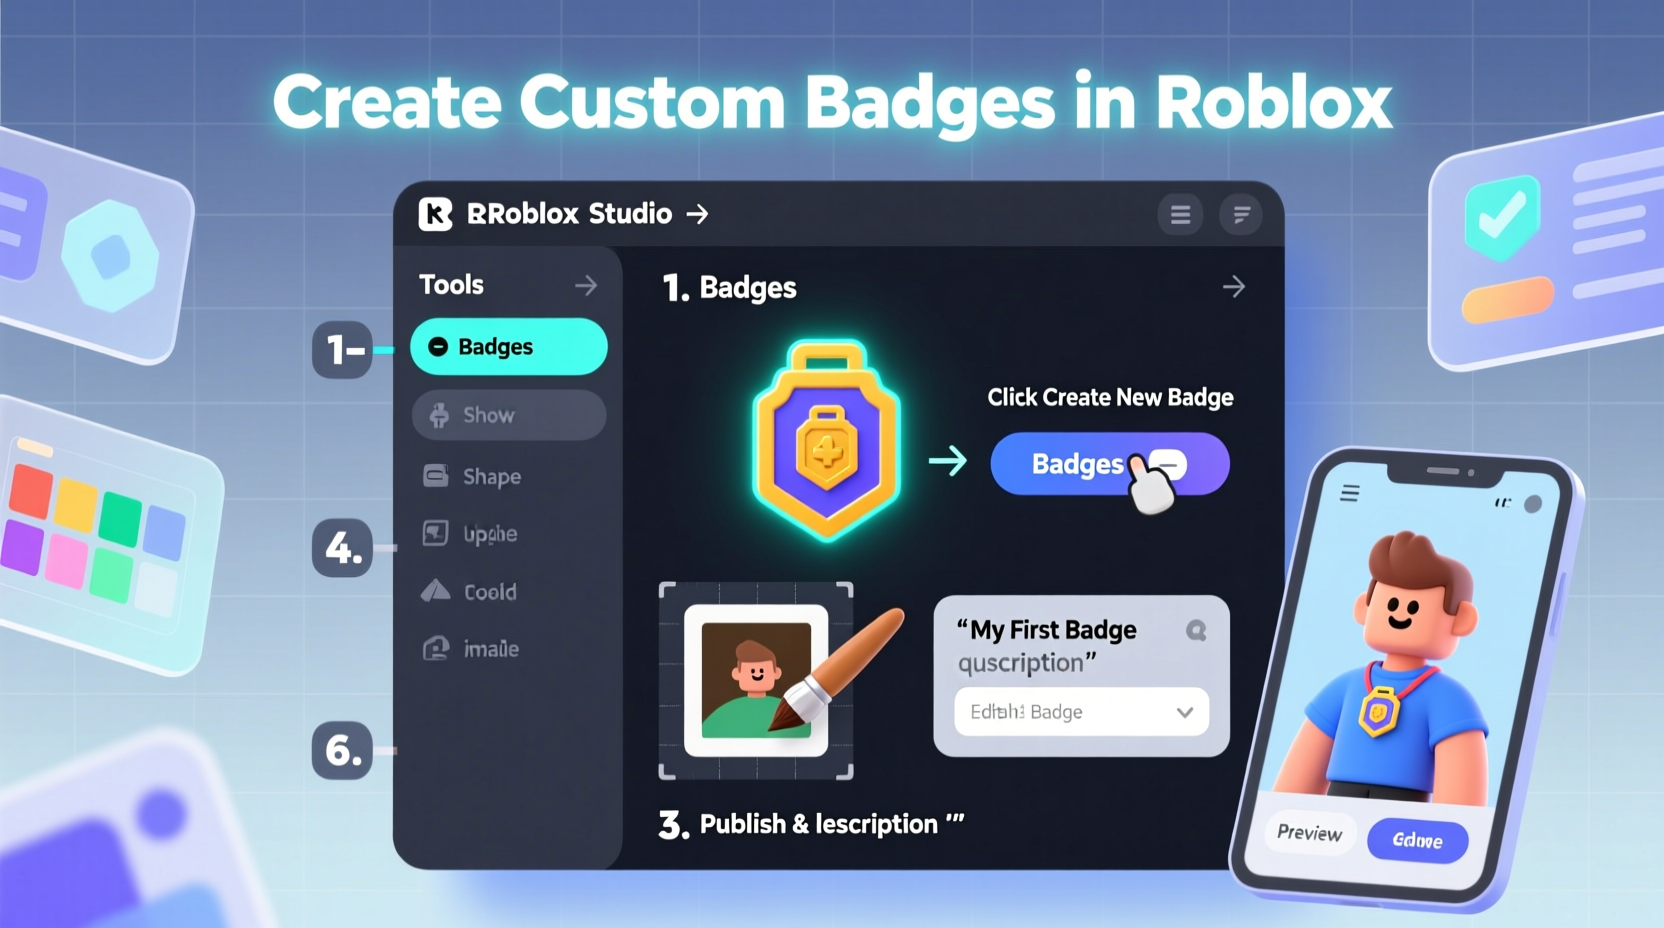
Step 3: Upload the Badge to Roblox
- Go to the Roblox Creator Dashboard.
- Select your game from the list.
- Navigate to the \"Monetization\" tab, then click “Badges”.
- Click “Create Badge”.
- Upload your 512x512 image.
- Enter a name (e.g., “Treasure Finder”), description (e.g., “Found the hidden chest in Level 3”), and choose visibility (public or private).
- Decide whether the badge appears in the Recent Awards section on your game page.
- Click “Submit”.
After submission, Roblox reviews the badge for compliance with community standards. Approval usually takes under 24 hours.
Step 4: Assign a Badge ID and Script the Trigger
Once approved, Roblox assigns a unique Badge ID. You’ll need this to award the badge programmatically.
In Roblox Studio, open your game project and insert a Script inside a ServerScriptService. Use the following Lua code structure:
local BadgeService = game:GetService(\"BadgeService\")
local Players = game:GetService(\"Players\")

local BADGE_ID = 12345678 -- Replace with actual badge ID

Players.PlayerAdded:Connect(function(player)
    player.CharacterAdded:Connect(function(char)
        -- Example: Award badge when player touches a part
        local part = workspace.BonusArea -- Assume this is a named part
        part.Touched:Connect(function(hit)
            local hitPlayer = game.Players:GetPlayerFromCharacter(hit.Parent)
            if hitPlayer == player then
                local hasBadge = BadgeService:UserHasBadgeAsync(player.UserId, BADGE_ID)
                if not hasBadge then
                    BadgeService:AwardBadge(player.UserId, BADGE_ID)
                end
            end
        end)
    end)
end)
This script checks when a player enters a specific area and awards the badge only once per player.
Step 5: Test Thoroughly Before Release
Never skip testing. Use a test account to simulate earning the badge. Check for:
- Correct trigger conditions.
- No duplicate awards.
- Proper visibility on the player’s profile.
- Performance impact (ensure scripts aren’t running unnecessarily).
You can also use print() statements or Roblox’s Output window to debug issues during playtesting.
Checklist: Launching a Successful Badge
- ☐ Plan badge purpose and placement
- Define what action triggers it and why it matters.
- ☐ Design high-quality 512x512 PNG
- Ensure clarity, branding alignment, and transparency.
- ☐ Upload and submit for review
- Use correct naming and descriptive text.
- ☐ Retrieve Badge ID after approval
- This is essential for scripting.
- ☐ Implement secure Lua logic
- Prevent exploits and ensure one-time awards.
- ☐ Test across multiple accounts
- Verify consistency and fix bugs.
- ☐ Monitor post-launch feedback
- Adjust difficulty or visuals based on player response.
Common Pitfalls and Best Practices
| Do’s | Don’ts |
|---|---|
| Use badges to highlight key gameplay moments | Spam players with too many badges |
| Design icons that reflect your game’s world | Use generic symbols unrelated to your theme |
| Secure scripts against duplication exploits | Run badge logic on the client side |
| Balance rarity and accessibility | Create badges that are impossible or trivial to get |
| Update badge descriptions for clarity | Leave vague or confusing explanations |
UserHasBadgeAsync() before awarding to prevent duplicates—a common oversight that leads to exploit abuse.
Real Example: “Skybound Explorer” Badge in AeroRise
AeroRise, a popular flying adventure game, introduced a badge called “Skybound Explorer” for players who discovered all five floating islands. Initially, the badge was awarded immediately upon joining, due to a script error. After receiving player reports, the developer fixed the logic to require interaction with each island’s beacon.
The revised version increased engagement by 34% over two weeks. Players began exploring more thoroughly, and forum discussions about “hidden” areas surged. This case shows how a simple fix transformed a broken feature into a compelling incentive.
Frequently Asked Questions
Can I change a badge’s image or description after it’s published?
No. Once a badge is approved, its image and core details cannot be edited. If changes are needed, you must create a new badge and retire the old one by not awarding it anymore.
How many badges can I create for one game?
Roblox allows up to 100 badges per game. Use them strategically—focus on quality over quantity to maintain prestige.
Can players lose a badge once earned?
No. Badges are permanent. If a badge was awarded incorrectly, the only option is to remove it manually via moderation tools (rare and discouraged).
Final Thoughts and Next Steps
Creating custom badges in Roblox is more than a technical task—it’s an opportunity to deepen player connection. A well-placed badge can turn a routine action into a memorable achievement. By combining thoughtful design, solid scripting, and strategic placement, you elevate your game from functional to unforgettable.
Start small: launch one meaningful badge, observe how players respond, and iterate. Over time, build a badge ecosystem that reflects your game’s soul. Your players will notice—and they’ll keep coming back to earn more.


 浙公网安备
33010002000092号
浙公网安备
33010002000092号 浙B2-20120091-4
Comments
No comments yet. Why don't you start the discussion?