
Dry ice—the solid form of carbon dioxide—is widely used for cooling, special effects, and preserving perishables during transport. While it's commonly purchased from suppliers, some curious hobbyists and science enthusiasts wonder if it’s possible to make dry ice at home. The answer is yes—but with significant caveats. Creating dry ice requires handling high-pressure gases and extreme temperatures, so safety must be the top priority. This guide walks through the process methodically, outlines essential precautions, and provides practical insights for those considering a DIY approach.
Understanding Dry Ice and Its Properties
Dry ice sublimates at -78.5°C (-109.3°F), meaning it transitions directly from solid to gas without becoming liquid. This property makes it ideal for rapid cooling and fog effects in theatrical or culinary applications. It’s also denser than regular ice and doesn’t leave behind water residue, which is useful in shipping frozen goods.
Commercially, dry ice is made by compressing and cooling gaseous CO₂ into liquid, then rapidly expanding it to form snow-like flakes that are compressed into blocks or pellets. Replicating this at home isn't about building an industrial machine—it's about safely triggering the phase change using a CO₂ source and controlled release.
Essential Equipment and Materials
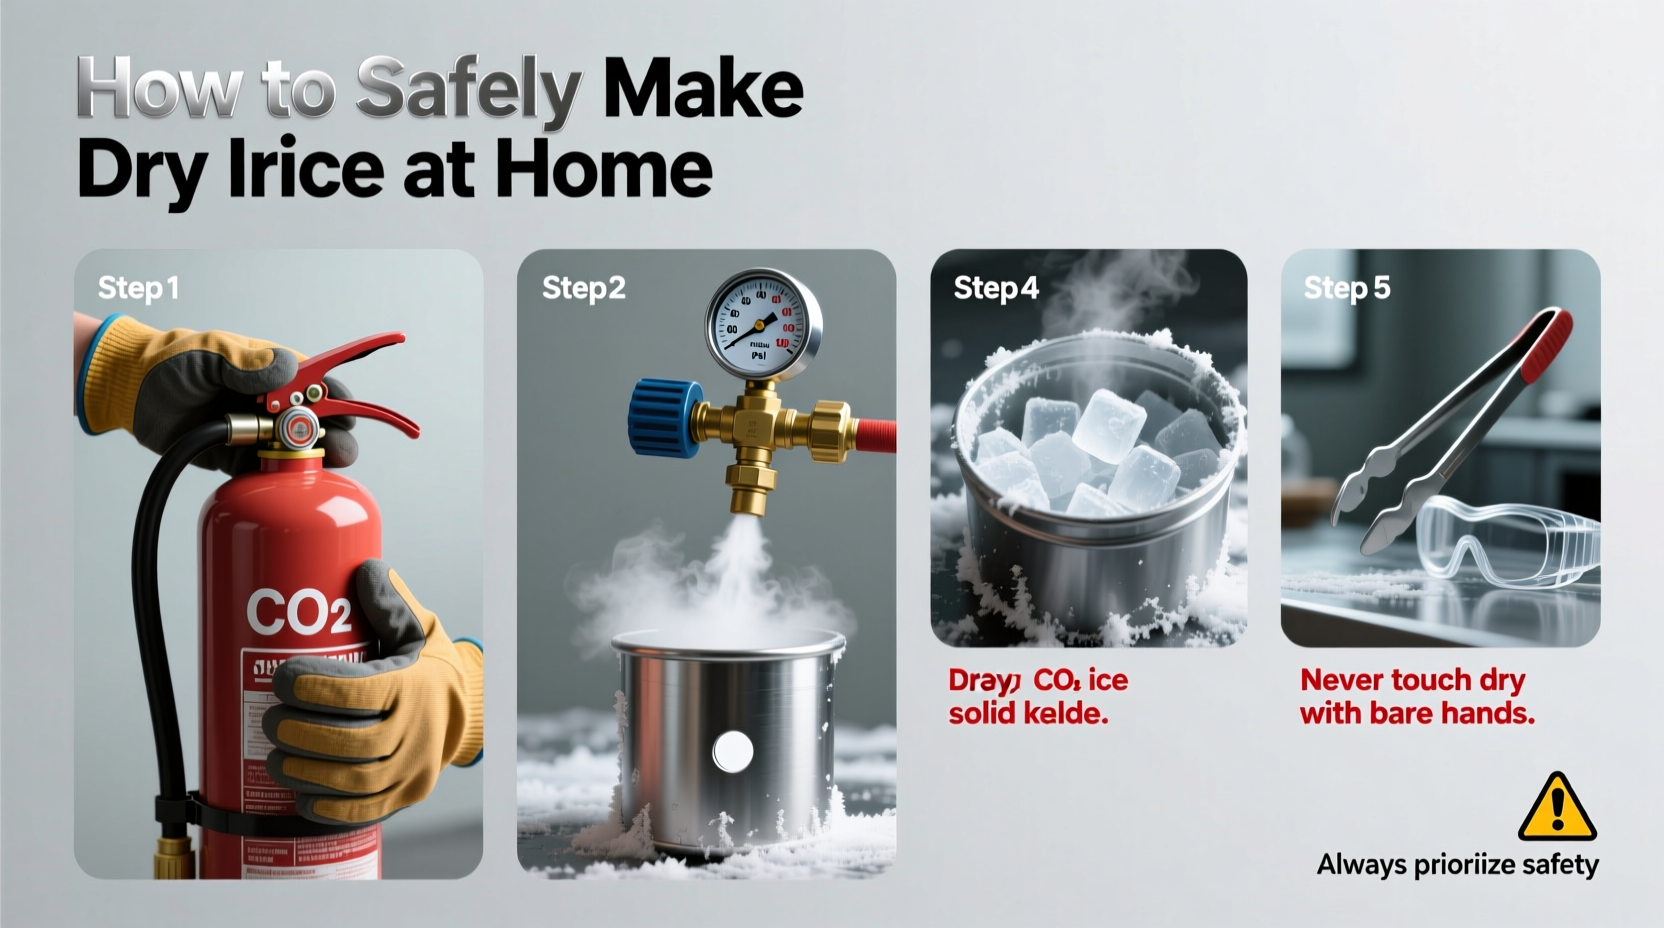
Making dry ice at home requires specific tools and access to a pressurized CO₂ source. While you won’t create large quantities like commercial units, small batches are feasible with care.
- Liquid CO₂ Tank: Typically used in soda dispensers, paintball guns, or aquarium systems. Must contain liquid CO₂ under high pressure (around 800 psi at room temperature).
- CO₂ Regulator with High-Pressure Gauge: Controls flow and ensures safe release. A dual-stage regulator is preferred.
- Aluminum or Steel Cloth Pouch: To collect the dry ice \"snow\" formed during expansion.
- Heavy-Duty Insulated Gloves: Cryogenic gloves rated for -100°C or lower.
- Safety Goggles and Face Shield: Protects eyes and face from flying particles and cold burns.
- Well-Ventilated Area: CO₂ gas displaces oxygen; working outdoors or in a ventilated garage is mandatory.
It’s critical to note: You cannot make dry ice from baking soda and vinegar or other household chemicals. Those reactions produce gaseous CO₂, but not under the pressure or temperature needed for liquefaction or solidification.
Step-by-Step Process to Make Dry Ice
The core principle relies on the Joule-Thomson effect: when high-pressure liquid CO₂ expands rapidly, it cools dramatically and forms solid CO₂ snow.
- Prepare Your Workspace
Choose an open, well-ventilated area away from children and pets. Avoid enclosed spaces. Lay down a tarp or tray to catch debris. - Inspect the CO₂ Tank and Regulator
Ensure the tank is upright and securely fastened. Check for leaks using soapy water on connections. Attach the regulator tightly and confirm the outlet valve is closed. - Attach the Metal Mesh Pouch
Securely fasten a fine aluminum mesh or steel wool pouch over the regulator’s discharge nozzle. This will capture the forming dry ice while allowing gas to vent. Use heat-resistant tape or clamps if necessary. - Open the Tank Valve Slowly
Wearing full protective gear, slowly open the main valve on the CO₂ cylinder. Then, gradually open the regulator’s output valve. You’ll hear a hissing sound, and white fog (condensed moisture) will appear. - Collect the Dry Ice Snow
Within seconds, solid CO₂ flakes will begin accumulating in the pouch. Continue releasing gas for 30–60 seconds. Do not exceed 90 seconds to avoid freezing the regulator. - Close Valves and Discharge Pressure
Shut the regulator first, then the tank valve. Open the regulator slightly to release residual pressure before disconnecting. - Compress the Snow (Optional)
If you have a mold or press, transfer the snow and compress it into a puck. Otherwise, store the fluffy snow in an insulated cooler with the lid slightly ajar.
“Dry ice production, even in small scale, involves real hazards. Only attempt it if you understand gas behavior, pressure risks, and cryogenic safety.” — Dr. Alan Prescott, Industrial Safety Consultant
Safety Guidelines and Common Risks
Handling CO₂ and dry ice poses several dangers. Awareness and preparation reduce risk significantly.
| Risk | Description | Prevention |
|---|---|---|
| Cold Burns | Contact with skin causes frostbite in seconds. | Always wear cryogenic gloves and long sleeves. |
| Asphyxiation | CO₂ gas accumulates at ground level, reducing oxygen. | Work only in ventilated areas; never in basements or cars. |
| Pressure Buildup | Sealing dry ice in containers leads to rupture. | Use vented coolers; never use glass or sealed plastic. |
| Regulator Freezing | Moisture freezes in valves, causing malfunction. | Limit release time; warm regulator between uses. |
Real-World Example: A Science Educator’s Experience
Mark Tolbert, a high school chemistry teacher in Colorado, uses homemade dry ice for classroom demonstrations. He keeps a 5-pound CO₂ tank from a soda fountain system and follows strict protocols. “I only make dry ice once a month, always outdoors during lab prep hour,” he explains. “Students love seeing cloud effects in water or shrinking balloons, but I emphasize safety every time. We do a dry run with gloves and goggles before any demo.”
Mark stores the collected snow in a labeled Styrofoam cooler for up to 24 hours. “The yield is small—maybe 100 grams per session—but it’s enough for three or four experiments. It’s not about volume; it’s about controlled learning.”
Frequently Asked Questions
Can I make dry ice without a CO₂ tank?
No. Household methods like mixing vinegar and baking soda produce too little gaseous CO₂ and lack the pressure needed for liquefaction. Without liquid CO₂ under pressure, solidification is impossible.
How long does homemade dry ice last?
In a standard insulated cooler, expect 18–24 hours of usable life. Fluffy snow sublimates faster than compressed blocks. For longer storage, minimize air space and keep the container partially open.
Is it legal to make dry ice at home?
Yes, in most regions. However, owning and operating a CO₂ tank may require compliance with local fire codes or transportation regulations. Always check municipal guidelines before purchasing equipment.
Final Thoughts and Responsible Practice
Making dry ice at home is technically feasible but not trivial. It demands respect for physics, careful preparation, and unwavering attention to safety. While the process offers educational value and niche utility, it’s often more practical—and safer—to purchase dry ice from reputable suppliers, especially for larger needs.
For those committed to trying it, start small. Conduct a test run with no collection pouch simply to observe the expansion and fog formation. Confirm your ventilation, gear, and emergency plan before attempting full production. Document each step, learn from minor setbacks, and never rush the process.


 浙公网安备
33010002000092号
浙公网安备
33010002000092号 浙B2-20120091-4
Comments
No comments yet. Why don't you start the discussion?