
Wearing a watch that fits perfectly enhances both comfort and style. Unfortunately, many off-the-shelf watches come with bracelets sized for average wrists, which often means excess links. Rather than visiting a jeweler or wearing an ill-fitting timepiece, you can adjust the length yourself. With the right tools and careful attention, removing links from a metal watch bracelet is a manageable DIY task. This guide walks you through each stage—from identifying pin types to reassembling the bracelet—ensuring a professional result without damaging your watch.
Understanding Your Watch Bracelet Type
Not all watch bracelets are created equal. Before attempting any adjustments, identify the type of links and pins used in your bracelet. Most metal bands fall into two categories: push-pin and screw-in pins. Push-pins are held in place by spring tension and can be removed with pressure, while screw-in pins require turning with a precision tool. Using the wrong method can damage the pins or links, so correct identification is crucial.
Check the inside of your bracelet links for small arrows stamped near the pin holes. These indicate the direction in which the pins should be pushed out. If no arrows are present, examine whether the pin ends look threaded. Threaded pins mean your watch uses screw-in hardware. Another clue: luxury brands like Rolex or Omega typically use solid end links and hidden screw pins, whereas mid-range or fashion watches often use simpler push-pin systems.
Essential Tools You’ll Need
Attempting this job without the proper tools increases the risk of scratching the case or breaking a pin. Here’s what you should have on hand:
- Pin removal tool or small hammer and punch set – Precision is key; avoid using nails or improvised objects.
- Jeweler’s screwdriver set – For watches with screw-in pins.
- Pliers with smooth jaws – To handle tiny pins without crushing them.
- Magnifying glass or illuminated magnifier – Small components are hard to see with the naked eye.
- Soft cloth or watch holder – Prevents scratches on the case and band.
- Tweezers – Useful for retrieving fallen pins or springs.
Investing in a dedicated watch link removal kit (available online for under $20) pays off quickly if you own multiple timepieces. These kits usually include a pin press, alignment block, and various drivers tailored for different pin sizes.
Step-by-Step Process to Remove Watch Links
Follow this sequence carefully to avoid misalignment or lost components:
- Measure your wrist size: Use a flexible tape measure around the wrist where you wear the watch. Add about 1–2mm for comfort. Compare this to your current bracelet length to determine how many links need removal.
- Lay the watch on a soft surface: Place it face-down on a microfiber cloth to protect the crystal and case.
- Identify removable links: Some bracelets have designated links marked for removal, often located symmetrically on each side. Removing these maintains balance and aesthetics.
- Locate the pin direction: Refer to the stamped arrows on the inner links. If absent, test gently on a less visible link first.
- Secure the bracelet: Use a rubber pad or a bench block with a groove to hold the link steady while applying force.
- Drive out the pin: Align your punch tool with the pin and tap lightly with a hammer or twist the pin press clockwise. Apply even pressure. For screw-in pins, use a precision screwdriver to turn counterclockwise.
- Remove the link(s): Once the pin is partially extracted, pull it the rest of the way with pliers. Detach the link carefully.
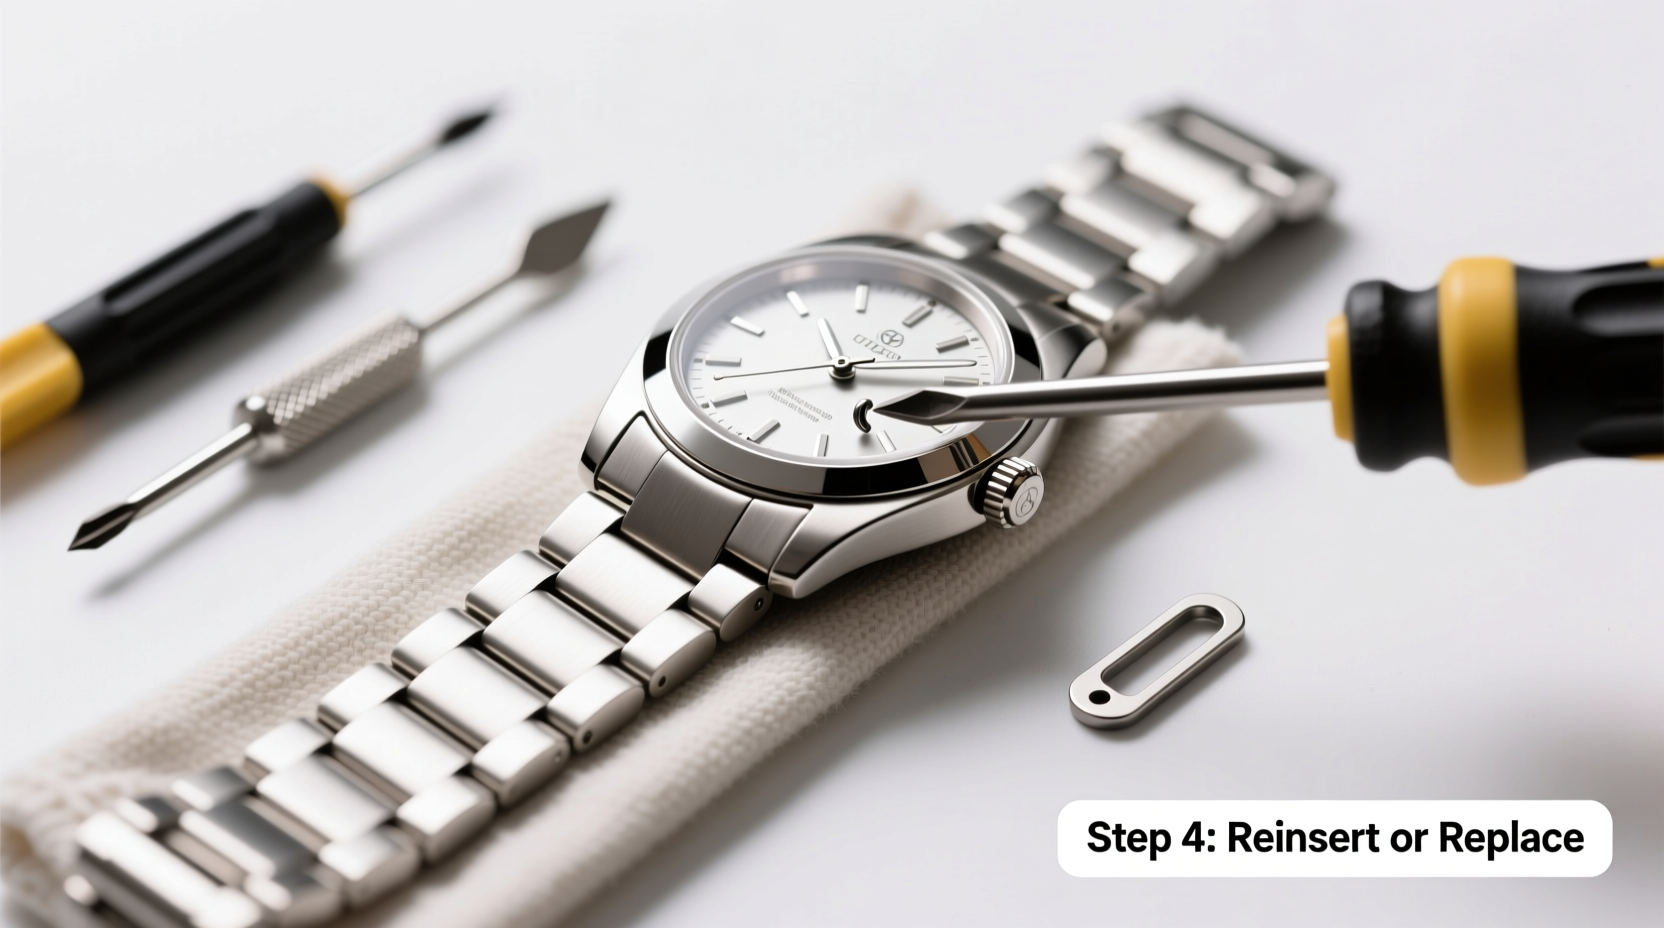
- Reattach remaining links: Reinsert the pin from the correct side (following arrow direction), then tap or screw it back in securely.
- Test fit and check alignment: Put the watch on your wrist. The clasp should close smoothly, and links should lie flat without gaps.
“Even experienced hobbyists make mistakes when rushing. Patience and precision matter more than speed when adjusting a metal bracelet.” — Daniel Reeves, Master Watchmaker
Common Mistakes and How to Avoid Them
DIY watch adjustments can go wrong, but most errors are preventable. Below is a comparison of best practices versus common pitfalls:
| Do’s | Don’ts |
|---|---|
| Work slowly and double-check pin direction before applying force. | Rush the process or assume all pins are the same. |
| Keep pins and tiny parts in a tray or magnetic mat. | Work over open spaces where small pieces can roll away. |
| Clean the bracelet before starting to improve visibility. | Use excessive force—this can bend pins or damage link holes. |
| Recheck clasp function after reassembly. | Leave pins slightly loose; they may dislodge during wear. |
Real-Life Example: Adjusting a Stainless Steel Dive Watch
Mark, an avid swimmer, bought a new dive watch online. When it arrived, the bracelet was too large, sliding around his slim wrist. Instead of shipping it to a service center, he decided to resize it himself. After checking YouTube videos specific to his model, he confirmed it used push-pins with directional arrows. He gathered his tools, laid out a clean workspace, and removed two links—one from each side—to maintain symmetry. During reassembly, he accidentally inserted one pin backward, causing resistance when closing the clasp. Referring back to his earlier photo, he corrected the error. The final fit was snug and secure, and Mark saved $30 in adjustment fees—all within 30 minutes.
Frequently Asked Questions
Can I reuse the removed pins?
Yes, in most cases. Push-pins made of hardened steel can be reused if they remain straight and undamaged. However, if a pin is bent or stripped, replace it with a new one matching the diameter and length. Many jewelers sell replacement pin kits by size.
What if my watch has hidden screws inside the end links?
This is common in higher-end models. You’ll need a very fine screwdriver—often 0.8mm or 1.2mm—to remove the tiny Allen or Phillips screws. Work under magnification and avoid slipping, which can mar the finish. After resizing, apply a tiny drop of thread locker (like Loctite 222) to prevent vibration loosening.
Is it safe to resize a gold or plated bracelet at home?
Extra caution is required. Gold-filled or plated bracelets can scratch easily, and the plating may wear off at stress points. If unsure, consult a professional. Solid gold bracelets should generally be adjusted by a qualified jeweler due to material softness and value.
Final Checklist Before You Begin
Before picking up your tools, run through this quick checklist to ensure success:
- ✅ Identified pin type (push vs. screw-in)
- ✅ Measured wrist and calculated number of links to remove
- ✅ Gathered all necessary tools
- ✅ Prepared a clean, well-lit workspace
- ✅ Photographed the bracelet in its current state
- ✅ Verified clasp mechanism works properly pre-adjustment
Conclusion
Removing links from your watch bracelet at home is a practical skill that saves time and money. With careful preparation and attention to detail, you can achieve a custom fit that rivals professional service. Whether you're adjusting a daily wearer or a special occasion piece, the ability to maintain your timepieces adds value to your collection. Now that you’re equipped with the knowledge and steps, take the next step—resize your watch with confidence.


 浙公网安备
33010002000092号
浙公网安备
33010002000092号 浙B2-20120091-4
Comments
No comments yet. Why don't you start the discussion?