
Measuring current in milliamps (mA) is a routine task for electricians, electronics hobbyists, and technicians. However, unlike voltage or resistance, measuring current requires the multimeter to become part of the circuit itself—introducing risks if done incorrectly. A misplaced probe or incorrect setting can blow a fuse, damage equipment, or even cause injury. This guide walks you through the correct, safe procedure for measuring milliamp currents using a standard digital multimeter, ensuring both accuracy and safety.
Why Measuring Milliamps Is Different
When you measure voltage, the multimeter connects in parallel with the circuit. Resistance is measured with power off and probes across a component. But current measurement—especially in the milliamp range—requires the meter to be inserted directly into the current path, meaning the circuit must be broken and the meter placed “in series.” This interrupts the flow of electrons so they pass through the meter, allowing it to count them.
This method introduces two critical concerns: safety and instrument protection. Most multimeters have separate input jacks and internal fuses for low-current (mA) measurements. Exceeding these limits—even briefly—can destroy the meter or its fuse. That’s why understanding your tool’s specifications and following proper procedures is non-negotiable.
Essential Equipment and Safety Precautions
Before connecting anything, gather the right tools and prepare your workspace. Working with live circuits demands respect and preparation.
- Digital multimeter rated for mA measurements (typically up to 200mA or 10A on a separate jack)
- Test leads in good condition, with no cracked insulation
- Safety glasses to protect against accidental sparks
- Insulated gloves (optional but recommended for higher-energy circuits)
- Circuit diagram or clear understanding of where to break the circuit
- Power source isolation—know how to disconnect power quickly
Ensure the multimeter is set to measure DC or AC current as appropriate. Most low-power electronic devices use DC, so this guide focuses on DC milliamp readings. Confirm that your meter’s battery is strong—a weak battery can lead to inaccurate readings or erratic behavior.
“Never assume a circuit is safe. Even low-voltage systems can deliver harmful current under fault conditions.” — James Reed, Electrical Safety Instructor at NEETC
Step-by-Step Guide to Measuring Milliamps Safely
Follow this sequence carefully. Each step minimizes risk while maximizing measurement reliability.
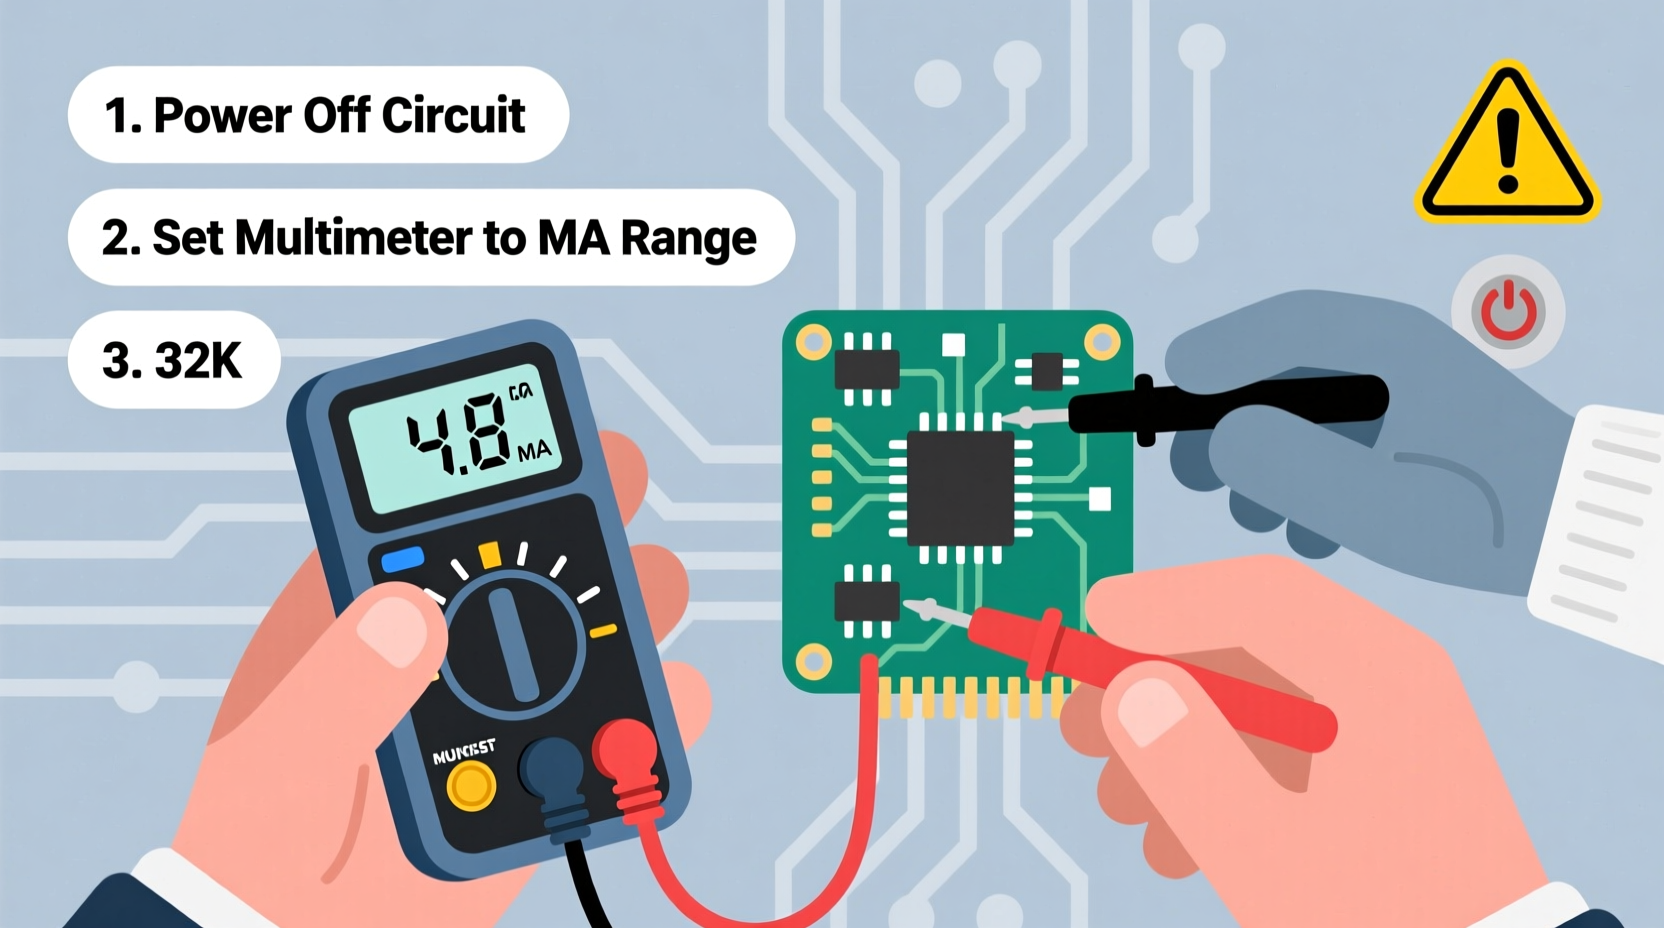
- Turn off the power to the circuit. This is the most crucial safety step. Unplug the device or switch off the breaker.
- Identify the measurement point. Determine where current enters or exits the load (e.g., between the positive supply and the device’s power pin).
- Break the circuit. Physically disconnect one side of the power path. You’ll insert the multimeter here to complete the circuit again—this time with the meter in-line.
- Set the multimeter dial to mA (milliamps). Choose DC mA unless measuring AC systems. Plug the red test lead into the “mA” or “µA/mA” jack—never the high-current “10A” jack unless measuring above 200mA.
- Connect the probes in series. Place the red probe on the power source side of the break and the black probe on the load side. The current now flows from the source, through the meter, into the device.
- Double-check connections. Ensure no stray wires are touching and that probes are secure.
- Reapply power. Turn the circuit back on. Observe the reading. If the display shows “OL,” “1,” or an overload symbol, power off immediately—the current exceeds the meter’s capacity.
- Record the reading. Note the value in milliamps. If the reading is very low (e.g., 0.5 mA), consider switching to µA mode for better resolution.
- Power down before disconnecting. Turn off the circuit again before removing the meter to avoid arcing or shorting.
- Restore the original circuit. Reconnect the break point and return the red probe to the voltage/ohms jack to prevent damage during future use.
Common Mistakes and How to Avoid Them
Even experienced users make errors when measuring current. These mistakes often stem from complacency or misunderstanding the process.
| Mistake | Consequence | How to Prevent |
|---|---|---|
| Measuring current in parallel like voltage | Creates a short circuit, blows fuse | Always break the circuit and connect in series |
| Using the 10A jack for small currents | Reduced accuracy, potential misreading | Use mA jack for currents under 200mA |
| Leaving probe in mA jack after use | Fuse blows if used for voltage test | Return red probe to VΩ jack after each current test |
| Ignoring polarity in DC circuits | Negative reading, confusion | Ensure red is toward power source, black toward load |
Real-World Example: Diagnosing a Battery-Powered Device
Consider a portable LED flashlight that isn’t turning on. You suspect a short or excessive drain. The device runs on two AA batteries (3V). Here’s how milliamp testing helps.
You disconnect the spring terminal connected to the battery’s negative end. With the multimeter set to DC mA and probes in the correct jacks, you place the red probe on the battery contact and the black probe on the flashlight’s chassis (completing the circuit). Power is applied. The meter reads 1.2A—far above the expected 100–150mA draw. This indicates a short circuit, likely in the LED driver or wiring. Without this measurement, you might have replaced batteries or assumed the switch was faulty. The milliamp reading quickly points to an internal fault.
This example shows how precise current measurement saves time and prevents misdiagnosis.
Frequently Asked Questions
Can I measure milliamps without breaking the circuit?
No, not with a standard multimeter. Current must flow through the meter, requiring a physical break in the circuit. However, clamp meters with milliamp sensitivity (rare) can measure current without disconnection using magnetic field detection—but these are specialized tools.
What happens if I exceed the mA limit on my multimeter?
Most meters have a fused mA input. Exceeding the limit (usually 200mA) will blow the internal fuse, cutting off current measurement capability. Some meters may sustain permanent damage. Always check the manual for maximum ratings and replace fuses only with identical types.
Why does my multimeter show a negative value when measuring DC current?
A negative reading means current is flowing in the reverse direction. Swap the probes: red should face the power source, black toward the load. The magnitude is still accurate; only the sign changes based on probe orientation.
Final Checklist Before Every Measurement
- ✅ Power is OFF before connecting the meter
- ✅ Red probe is in the mA input jack
- ✅ Dial is set to DC or AC mA as needed
- ✅ Circuit is physically broken at the test point
- ✅ Probes are connected in series (source → red, black → load)
- ✅ No loose wires or exposed metal causing shorts
- ✅ Safety gear (glasses) is worn
- ✅ After use: power off, disconnect, return red probe to VΩ jack
Conclusion: Master Precision with Confidence
Testing milliamps isn’t inherently dangerous—but it demands attention, preparation, and adherence to best practices. By treating every current measurement as a potential hazard, you protect both yourself and your equipment. Whether you’re debugging a microcontroller circuit, checking sensor draws, or troubleshooting a malfunctioning gadget, accurate milliamp readings provide invaluable insight. Now that you understand the correct procedure, common pitfalls, and real-world applications, you’re equipped to measure current safely and effectively. Make these steps second nature, and your multimeter will remain a reliable ally for years to come.


 浙公网安备
33010002000092号
浙公网安备
33010002000092号 浙B2-20120091-4
Comments
No comments yet. Why don't you start the discussion?