
Transferring domain ownership is a routine task for businesses, freelancers, and website owners—whether you're selling a domain, handing over a project, or reorganizing digital assets. However, even a minor oversight can lead to email outages, website downtime, or loss of control. The key to a seamless transition lies in preparation, coordination, and understanding the technical and administrative layers involved.
This guide walks through every phase of a secure domain transfer, ensuring your site stays online, your emails keep flowing, and your DNS settings remain intact throughout the process.
Understanding Domain Ownership and Access Layers
Before initiating a transfer, it's essential to distinguish between three critical components:
- Domain Registrar Account: Where the domain is registered (e.g., GoDaddy, Namecheap, Google Domains).
- DNS Hosting: Where your DNS records are managed (may be the same as the registrar or a third party like Cloudflare).
- Administrative Control: The contact listed as the registrant with full authority over renewal, transfers, and privacy settings.
Ownership transfer involves changing the registrant information at the registry level. However, if DNS hosting is external, changes to nameservers must not be altered during the transfer unless intentionally migrating services.
“Over 60% of domain-related outages during ownership changes stem from unintended DNS modifications.” — ICANN Post-Transfer Incident Report, 2023
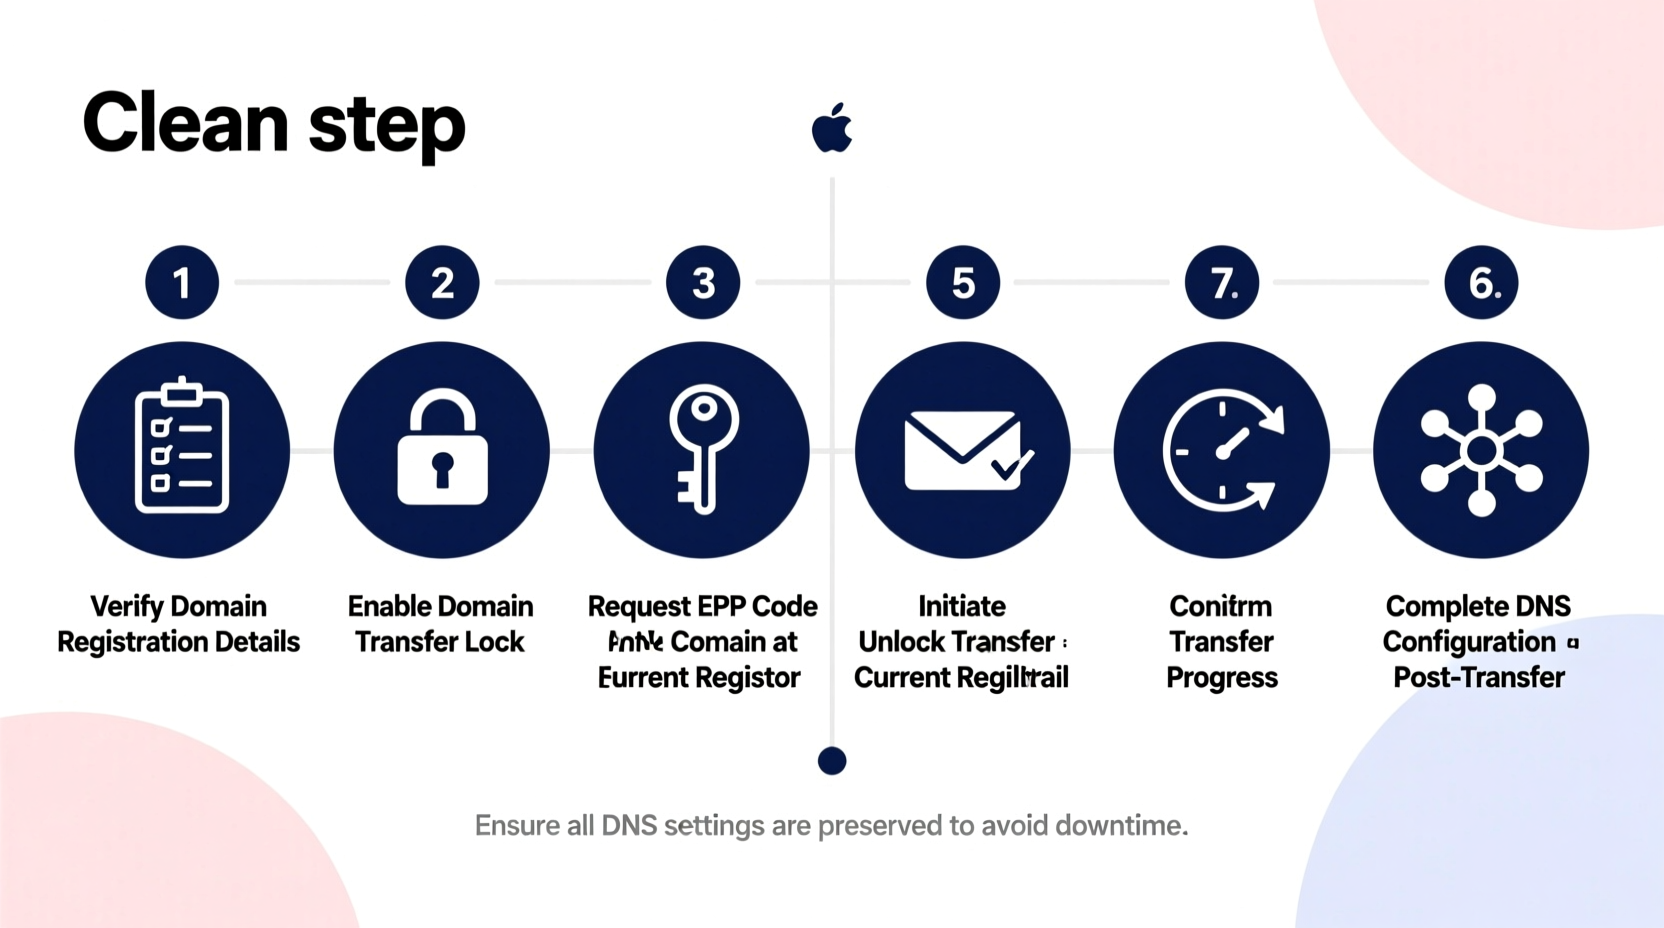
Step-by-Step Timeline for a Safe Domain Transfer
Follow this structured timeline to minimize risks and maintain continuity.
- Day 1–3: Pre-Transfer Audit
- Document current DNS records (A, MX, CNAME, TXT, etc.).
- Verify that WHOIS privacy is disabled (if enabled).
- Ensure the domain is unlocked for transfer.
- Confirm the domain is not within 60 days of registration or recent transfer (ICANN policy).
- Day 4: Initiate Transfer Request
- Log into the current registrar account.
- Request an authorization (EPP) code.
- Update the registrant email address to the new owner’s verified email (if required by the registrar).
- Submit transfer request to the gaining registrar (new owner’s provider).
- Day 5–7: Approve and Monitor
- The new owner checks their email for approval requests from both the current and new registrars.
- Approve the transfer on both ends—this often requires two confirmations.
- Monitor domain status; it should show “Pending Transfer” but remain active.
- Day 8–14: Finalize and Verify
- Once approved, the transfer completes within 5–7 days.
- Log into the new registrar account and verify all DNS settings match the original configuration.
- Test website access, email delivery, SSL certificates, and subdomains.
- Day 15: Post-Transfer Lockdown
- Re-enable WHOIS privacy if desired.
- Set auto-renewal to prevent accidental expiration.
- Remove old admin access from the previous registrar account.
Critical Checklist for a Smooth Transition
Use this checklist to ensure no detail is overlooked.
- ✅ Back up all DNS records
- ✅ Disable WHOIS privacy temporarily
- ✅ Unlock the domain at the current registrar
- ✅ Obtain EPP authorization code
- ✅ Confirm new owner’s email is verified
- ✅ Avoid changing nameservers during transfer
- ✅ Test website and email post-transfer
- ✅ Enable transfer lock after completion
Common Pitfalls and How to Avoid Them
Mistakes during domain transfer often stem from miscommunication or misunderstanding of roles. Below is a comparison of best practices versus common errors.
| Do’s | Don’ts |
|---|---|
| Keep DNS hosting unchanged unless planned | Change nameservers mid-transfer without backup |
| Use the EPP code only once and securely | Share the EPP code publicly or via unencrypted channels |
| Verify both parties’ registrar accounts are in good standing | Assume the transfer will auto-approve without confirmation |
| Wait 24–48 hours post-transfer before making DNS edits | Edit DNS immediately after transfer completion |
Real Example: A Freelancer Transfers a Client’s Domain
Jamie, a web developer, built a site for a client and hosted the domain under her personal Namecheap account during development. When the project concluded, she needed to transfer ownership without disrupting the live site.
She began by exporting all DNS records—including MX records for business email and a CNAME for Google Workspace verification. She then disabled WHOIS privacy, unlocked the domain, and generated the EPP code. The client created a Namecheap account using the same email listed in the registrant field to ensure smooth approval.
Jamie initiated the transfer and notified the client to approve the request. Within 48 hours, the transfer was complete. The client logged in, confirmed DNS settings were intact, and tested email functionality. No downtime occurred, and the site remained fully operational.
The key to success? Documentation, communication, and avoiding any DNS alterations during the transfer window.
Frequently Asked Questions
Can a domain transfer cause my website to go down?
Not if done correctly. As long as nameservers remain unchanged and DNS records are preserved, the website continues resolving normally. Downtime typically occurs only when nameservers are accidentally modified or DNS zones are misconfigured post-transfer.
How long does a domain ownership transfer take?
Most transfers take 5–7 days. The process includes a mandatory waiting period for approval from both registrants. Some registrars offer expedited approval if both parties act quickly, potentially reducing it to 3–4 days.
What happens to my email during the transfer?
Email remains unaffected if MX records are untouched. Ensure the new owner does not alter DNS settings immediately after transfer. It’s wise to test sending and receiving emails within 24 hours of completion.
Final Steps and Long-Term Security
After successful transfer, the new owner should treat the domain like a critical asset. This includes enabling two-factor authentication on the registrar account, setting up auto-renewal, and keeping contact information updated. Consider using a dedicated domain management service for high-value domains.
Also, remember that ICANN mandates a 60-day lock after any ownership change—meaning another transfer cannot be initiated during this period. Plan accordingly if future transitions are anticipated.
Conclusion
Transferring domain ownership doesn’t have to be stressful or risky. With clear documentation, careful coordination, and adherence to technical best practices, the process can be completed seamlessly—without a single second of downtime. Whether you’re handing over a domain to a client, selling a premium URL, or consolidating your portfolio, following this guide ensures reliability and trust at every step.


 浙公网安备
33010002000092号
浙公网安备
33010002000092号 浙B2-20120091-4
Comments
No comments yet. Why don't you start the discussion?