
Facebook occasionally requires users to verify their identity, especially when there’s suspicion of fake accounts, suspicious activity, or if you’re managing business assets like Pages or Ads. While the process is straightforward, many users encounter delays due to incorrect document submission or misunderstandings about what’s required. Completing ID verification correctly the first time saves time, avoids account restrictions, and strengthens your online presence.
This guide walks you through each stage of Facebook’s ID verification process with precise instructions, expert-backed tips, and real-world insights to ensure a fast, secure, and successful outcome.
Why Facebook Requires ID Verification
Facebook enforces ID verification as part of its broader strategy to maintain platform integrity. With over 3 billion monthly active users, ensuring authenticity helps combat impersonation, misinformation, and fraudulent advertising.
You may be prompted to verify your identity in several scenarios:
- You’ve recently created a new account with limited activity.
- Your account shows unusual login patterns or location changes.
- You manage a Facebook Page or run paid ads and need to confirm ownership.
- Another user reported your profile for impersonation.
- Facebook’s automated systems flag your account for policy review.
“Identity verification is not about surveillance—it’s about accountability. Verified identities reduce abuse and build trust across digital communities.” — Dr. Lena Patel, Cybersecurity Researcher at the Digital Trust Institute
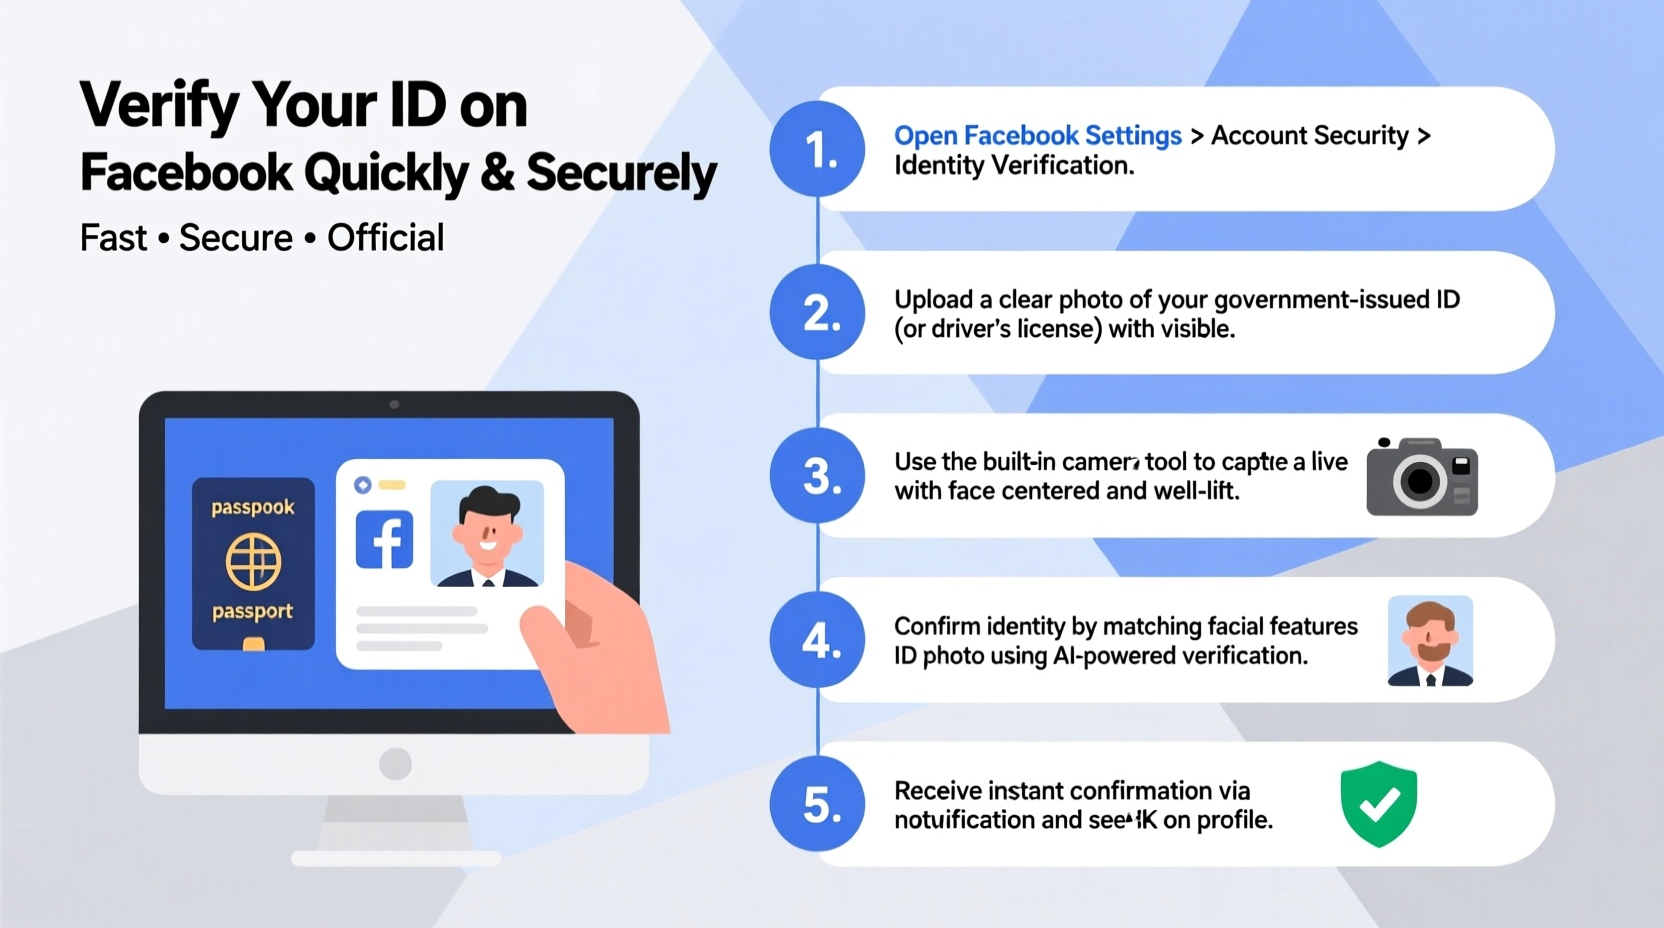
Step-by-Step Guide to Submitting Your ID on Facebook
The verification process is fully integrated into Facebook’s platform and typically takes place within your account settings or via a notification prompt. Follow these steps carefully to ensure a smooth experience.
- Check for a Verification Prompt
Log in to your Facebook account. If verification is required, you’ll likely see a banner at the top of your News Feed or a message in your Notifications center stating: “We need to confirm your identity.” Click on it to begin. - Select Your Country and Document Type
Facebook will ask you to choose your country of residence and the type of government-issued ID you plan to upload. Acceptable documents include:- Driver’s license
- Passport
- National ID card
- Resident alien card (e.g., U.S. Green Card)
- Capture Clear Images of Your ID
Using your smartphone or webcam, take high-resolution photos or scans of both the front and back of your ID. Make sure:- All text and images are legible.
- No glare, shadows, or blurriness obscure details.
- The entire document is visible within the frame.
- Security features (like holograms) are intact but not hidden.
- Confirm Your Name Matches Exactly
Facebook compares the name on your ID to the name on your profile. Even minor discrepancies—such as a nickname instead of a legal first name—can trigger rejection. If your profile name differs, consider updating it before submitting. - Submit and Wait for Review
After uploading your documents, click “Send” or “Submit.” Facebook does not provide instant approval. Most reviews take between 24 to 72 hours, though some cases may require up to 7 days.
Do’s and Don’ts When Uploading Your ID
To prevent rejection and unnecessary delays, follow this essential checklist based on common pitfalls observed in user submissions.
| Do’s | Don’ts |
|---|---|
| Use a color photo or scan of an unexpired ID | Upload black-and-white copies unless required |
| Ensure all corners of the document are visible | Crop out any edges or cut off information |
| Verify that your name and date of birth match your Facebook profile | Submit expired IDs—even by a few days |
| Keep sensitive data like ID numbers visible (they are encrypted) | Blur or redact personal information—this invalidates the document |
| Update your profile name to match your legal ID if needed | Use someone else’s ID or falsified documents |
Real Example: How One User Fixed a Rejected Submission
Sarah, a small business owner from Austin, Texas, encountered a problem when trying to launch her first Facebook ad campaign. Her account was flagged for verification, and she submitted her driver’s license promptly—but received a rejection notice two days later.
The reason? Her Facebook profile used “Sara” (without the ‘h’), while her license clearly read “Sarah J. Thompson.” She corrected her profile name, waited 24 hours for synchronization, and resubmitted the same ID. This time, her verification was approved within 18 hours, and she regained full access to her ad account.
Sarah’s case highlights a subtle but critical detail: even one letter difference can halt verification. Always double-check spelling and spacing.
What Happens After You Submit Your ID?
Once your documents are uploaded, Facebook encrypts and stores them securely. According to Meta’s privacy policy, these files are retained only as long as necessary and are inaccessible to other users or advertisers.
During review, automated systems and human moderators assess:
- Document authenticity
- Name and photo consistency
- Expiry status
- Geographic alignment with account activity
If approved, you’ll receive a confirmation email and notification. Your account remains fully functional. If rejected, Facebook will explain why and allow one re-submission. Multiple failed attempts may result in temporary limitations or permanent restrictions.
Frequently Asked Questions
Is it safe to upload my ID to Facebook?
Yes. Facebook uses end-to-end encryption for ID uploads, and documents are stored separately from public profile data. They are not shared with third parties or used for advertising. However, only submit IDs through official Facebook prompts—not links in emails or messages, which could be phishing scams.
How long does Facebook ID verification take?
Most verifications are completed within 24 to 72 hours. Complex cases—especially those involving international IDs or disputed names—may take up to 7 business days. Avoid submitting multiple requests, as this can slow down processing.
Can I verify without a passport or driver’s license?
In most cases, no. Facebook requires government-issued photo IDs. If you don’t have a passport or driver’s license, a national ID card or resident permit is usually acceptable. Contact Facebook Support directly if none apply to your situation.
Final Checklist Before Submitting
Before clicking “Submit,” go through this quick verification checklist to maximize your chances of approval:
- ✅ My ID is current and not expired
- ✅ The photo is clear, in color, and shows the full document
- ✅ My name on Facebook matches the ID exactly (including middle names/initials if used)
- ✅ No part of the ID is cut off or obscured
- ✅ I’m accessing the verification portal directly through Facebook.com (not a third-party link)
- ✅ I’ve reviewed Facebook’s ID requirements for my country
Stay Verified, Stay in Control
Verifying your identity on Facebook isn’t just a bureaucratic hurdle—it’s a proactive step toward securing your digital presence. Whether you’re protecting your personal profile or managing a growing business page, verified accounts enjoy greater credibility and fewer disruptions.
By following the steps outlined here, you minimize delays, protect your privacy, and maintain uninterrupted access to the tools you rely on. Take a few minutes today to ensure your documents are ready and your profile is accurate. A little preparation now can save significant time and stress later.


 浙公网安备
33010002000092号
浙公网安备
33010002000092号 浙B2-20120091-4
Comments
No comments yet. Why don't you start the discussion?