
Many guitarists reach a frustrating plateau when they first attempt barre chords. What makes these essential shapes so difficult? Unlike open chords that rely on natural finger placement and open strings, barre chords demand strength, precision, and coordination across the entire hand. It’s no wonder so many beginners feel discouraged. But here’s the truth: difficulty doesn’t mean impossibility. With the right understanding of the mechanics behind barre chords and a structured approach to improvement, anyone can conquer them.
Why Barre Chords Feel So Hard
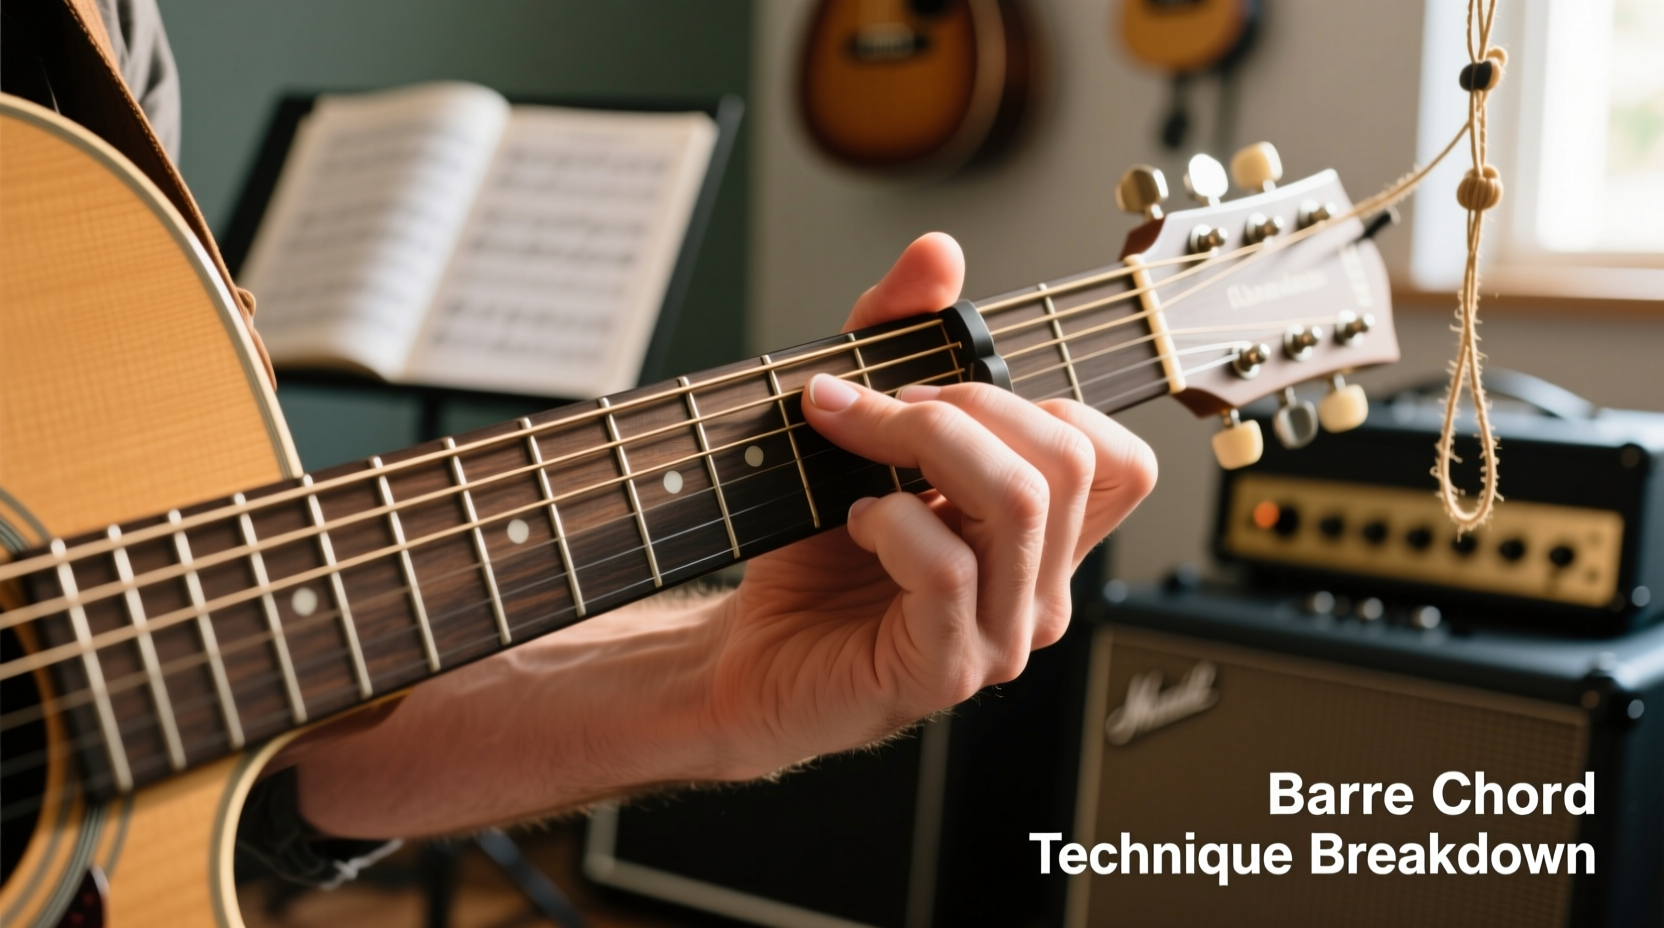
The challenge begins with physics. A barre chord requires one finger—typically the index—to press down multiple strings across a single fret, acting as a movable “capo.” This demands significant fingertip pressure, especially on the thinner strings near the top of the neck. Add to that the need for other fingers to form precise chord shapes just behind the next frets, and you’ve got a complex coordination task.
Several factors amplify the difficulty:
- Lack of finger strength: The index finger must exert even pressure across five or six strings, which takes time to build.
- Poor hand positioning: Many players curl their thumb over the neck or collapse their wrist, reducing leverage.
- Guitar setup issues: High action (string height) or heavy gauge strings make pressing harder.
- Inconsistent practice habits: Attempting barre chords only occasionally leads to slow progress.
“Barre chords are not a test of brute force—they’re a test of technique. Efficiency beats strength every time.” — David Hidalgo, Guitar Instructor & Berklee Alumnus
Anatomy of a Proper Barre Technique
Mastery starts with alignment. Your hand, wrist, and arm should work together like a well-tuned machine. Misalignment wastes energy and increases discomfort.
Hand Position Fundamentals
Place your thumb in the middle of the back of the neck, opposite your index finger. This creates a \"squeeze\" between thumb and finger, stabilizing the grip. Keep your wrist relatively straight—slightly arched is fine, but avoid excessive bending.
Your index finger should lay flat across the fretboard, but not flat in the sense of lying down; instead, it should be angled slightly so the outer edge (closer to the thumb) bears most of the pressure. This leverages the stronger part of the finger and reduces buzzing.
Finger Placement Precision
Each finger matters. For an F major barre chord at the first fret:
- Index finger bars all six strings at the 1st fret.
- Middle finger presses the 3rd string at the 2nd fret.
- Ring finger covers the 5th string at the 3rd fret.
- Pinky supports the 4th string at the 3rd fret.
The ring and pinky fingers act as anchors, allowing the index finger to relax slightly. Tension in one finger spreads to the whole hand—efficiency is key.
Step-by-Step Guide to Building Barre Chord Strength
Improvement doesn’t come from endless repetition alone. It comes from smart, progressive training. Follow this 4-week plan to build real proficiency.
- Week 1: Isolate the Barre Motion
Practice only the index finger barre on the 5th fret (A-shape barre). Mute the low E string with your thumb. Press down with your index finger and check each string individually. Focus on clarity, not speed. - Week 2: Add One Finger at a Time
After barring, add your ring finger to the 3rd fret of the D string. Strum only those two strings. Once clean, add the pinky to the G string. Then include the middle finger on the B string. - Week 3: Practice Transitions
Switch between an open E major and an F major barre chord. Start slowly—two changes per minute. Accuracy over speed. Use a metronome set to 60 BPM, changing on every other beat. - Week 4: Integrate Into Songs
Play along with simple tracks that use barre chords (e.g., “Knockin’ on Heaven’s Door” or “Horse with No Name”). Focus on smooth transitions and consistent tone.
Common Mistakes and How to Fix Them
Avoiding errors accelerates progress. Here’s a comparison of common pitfalls and their corrections:
| Mistake | Why It’s Bad | Solution |
|---|---|---|
| Using the fleshy part of the index finger | Causes muted or buzzing strings, especially on high E and B | Roll finger slightly toward the thumb side to use the firmer edge |
| Thumb too high on the neck | Reduces leverage and weakens grip | Position thumb lower, centered behind the index finger |
| Pressing too hard | Creates tension, slows transitions, causes pain | Use minimal pressure needed for clear sound—refine finger placement |
| Collapsing the wrist inward | Limits finger mobility and control | Keep wrist neutral; imagine holding a small ball in your palm |
Real Example: From Struggle to Success
Jamal, a self-taught guitarist, had played for eight months before attempting barre chords. He spent weeks trying to play an F major, muting strings and giving up after 30 seconds due to hand fatigue. After watching a tutorial on hand ergonomics, he adjusted his thumb position and began practicing the barre motion in isolation. He used a capo on the 3rd fret to reduce string tension and started with easier shapes like the B minor (using only four strings).
Within three weeks of daily 6-minute drills, Jamal could cleanly play F major and switch between E and F without pausing. Six weeks in, he performed a full song using three barre chords. His breakthrough wasn’t raw strength—it was technique refinement and consistent micro-practice.
Checklist: Are You Ready to Master Barre Chords?
- ✅ Check your guitar’s action—lower action reduces finger strain
- ✅ Use lighter gauge strings (e.g., .009–.042) if you’re still building strength
- ✅ Warm up your hands with stretches before playing
- ✅ Practice barre shapes higher on the neck (e.g., 5th or 7th fret) where tension is lower
- ✅ Record yourself weekly to monitor tone clarity and transition smoothness
- ✅ Avoid locking your elbow—keep your arm relaxed to reduce shoulder tension
FAQ
Why do my strings buzz when I play barre chords?
Buzzing usually means uneven pressure or incorrect finger angle. Ensure your index finger is close behind the fret and that you’re using the firmer edge. Also, check that other fingers aren’t lifting the barre when pressing down.
How long does it take to master barre chords?
Most players see noticeable improvement within 3–6 weeks of consistent practice. Full comfort typically takes 2–3 months. Progress varies based on practice quality, guitar setup, and prior experience.
Can I skip barre chords and just use a capo?
A capo helps transpose songs but doesn’t replace the ability to move freely across the neck. Barre chords unlock full access to the fretboard and are essential for playing in any key. Think of them as foundational—not optional.
Final Thoughts and Call to Action
Barre chords are hard because they ask more from your hands than any earlier technique. But that difficulty is a gateway—not a barrier. Every guitarist who has ever played a full version of “Wonderwall” or “Smoke on the Water” faced the same frustration and pushed through. The tools are simple: patience, proper form, and intelligent practice.
You don’t need superhero strength. You need consistency. Start today with five minutes of focused barre work. Adjust your thumb. Roll your index finger. Listen closely. Celebrate small wins. In a few weeks, you’ll look back and wonder why you ever thought they were impossible.


 浙公网安备
33010002000092号
浙公网安备
33010002000092号 浙B2-20120091-4
Comments
No comments yet. Why don't you start the discussion?