
Pothos (Epipremnum aureum) is one of the most forgiving houseplants, thriving in low light and surviving neglect. Its popularity among beginners isn’t just due to its resilience—it’s also incredibly easy to propagate. Water propagation is a favorite method because it allows you to watch roots develop in real time, offering both satisfaction and insight into plant health. However, many new growers encounter a common issue: rot. When stems turn mushy or discolored, the cutting often fails before it ever gets a chance to grow.
This guide walks through every step of water propagation for pothos, focusing on techniques that prevent rot from the start. With attention to detail and consistent care, you can produce healthy, robust cuttings ready for soil or continued growth in water—without losing a single vine to decay.
Why Pothos Is Ideal for Water Propagation
Pothos naturally grows along the forest floor in tropical regions, where its aerial roots absorb moisture from humid air and damp surfaces. This adaptation makes it exceptionally good at developing roots in water. Unlike some plants that require hormones or sterile conditions, pothos cuttings readily form roots when placed in clean water under moderate light.
The key to success lies not in complexity but in consistency. While the process is simple, small oversights—like using a dirty container or leaving leaves submerged—can lead to bacterial growth and rot. Understanding the plant’s biology helps explain why certain practices work better than others.
“Pothos is one of the few plants where propagation success rates exceed 90% when basic hygiene and light needs are met.” — Dr. Lena Torres, Botanist and Indoor Plant Specialist
Step-by-Step Guide to Propagating Pothos in Water
Follow this detailed sequence to ensure your cuttings stay healthy from day one to root maturity.
- Select a healthy parent plant: Choose a vine with vibrant green leaves and no signs of yellowing, pests, or disease. Strong parent material increases the likelihood of successful rooting.
- Use sterilized tools: Clean your scissors or pruning shears with rubbing alcohol to prevent introducing pathogens during cutting.
- Cut just below a node: Nodes are small brown bumps along the stem where roots will emerge. Your cutting must include at least one node—ideally two—for optimal root development.
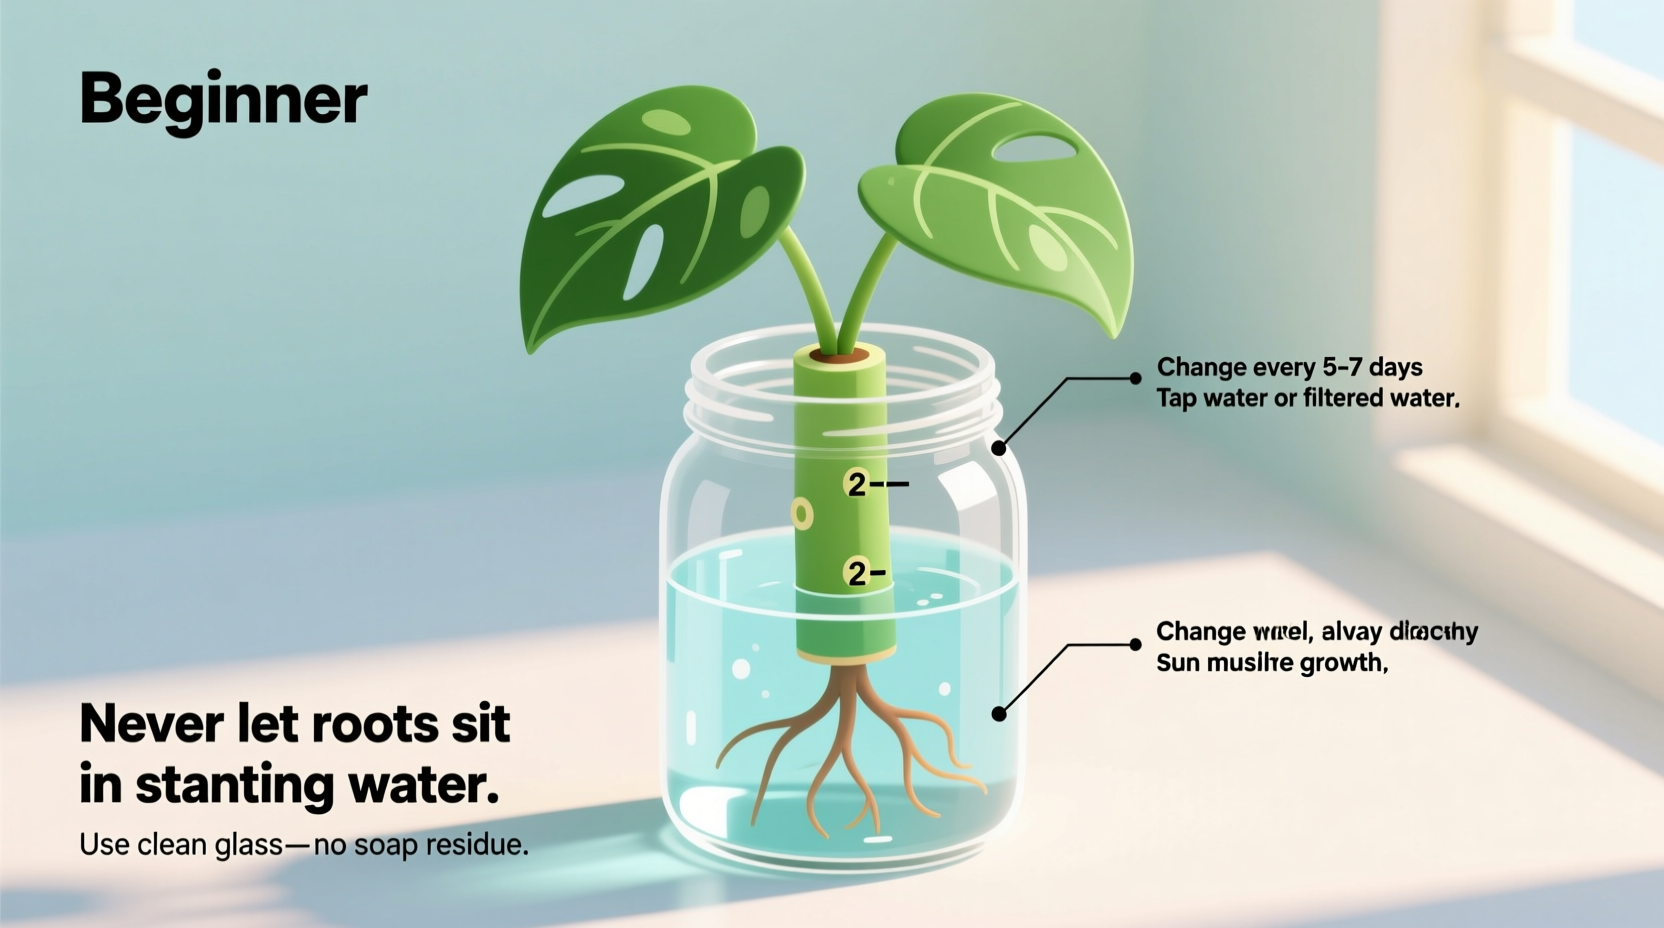
- Trim excess leaves: Remove any leaves that would sit below the waterline once placed in the container. Submerged foliage decomposes quickly and promotes bacterial growth.
- Place in clean water: Use room-temperature water in a clear glass or jar. Position the cutting so nodes are submerged, but all leaves remain above water.
- Set in bright, indirect light: Avoid direct sunlight, which can overheat the water and encourage algae. A north-facing window or a few feet back from a south-facing one works best.
- Change water weekly: Replace 100% of the water every 7 days to maintain oxygen levels and reduce microbial buildup.
- Wait patiently: Roots typically appear within 7–14 days. Allow them to grow 1–2 inches before considering transplanting or continuing in water.
Preventing Rot: The Critical Do’s and Don’ts
Rotten stems are usually caused by stagnant water, decaying tissue, or poor hygiene. Fortunately, they’re almost entirely preventable with proper technique.
| Do | Don’t |
|---|---|
| Always submerge at least one node in water | Leave nodes out of the water—they won’t root |
| Remove all leaves below the waterline | Let leaves soak—they’ll rot and contaminate water |
| Use a clean, transparent container | Reuse jars without washing—they may harbor bacteria |
| Change water weekly or sooner if cloudy | Top off old water—this doesn’t refresh oxygen or remove waste |
| Keep cuttings in stable temperatures (65–80°F) | Place near heaters, AC vents, or drafty windows |
| Inspect cuttings every few days for soft spots | Ignore early signs of browning or mushiness |
What to Do If You Spot Early Rot
If part of the stem begins to darken or feel soft, act fast. Remove the cutting from water and trim above the damaged section, ensuring at least one healthy node remains. Re-clean the container, refill with fresh water, and return the revised cutting. As long as viable tissue remains, recovery is possible.
Real Example: From Failed Attempts to Consistent Success
Sarah, a first-time plant owner in Portland, tried propagating pothos three times before succeeding. Her initial attempts failed due to leaving too many leaves in the water and waiting two weeks between changes. Each time, the stems turned brown and slimy within ten days.
After researching common mistakes, she adjusted her approach: she removed lower leaves completely, used a washed mason jar, changed the water every Friday, and placed the jar on an east-facing sill. Within nine days, white nubs appeared at the nodes. By day 18, she had multiple 1.5-inch roots. Today, she has six thriving propagated plants—one in water, five transplanted into soil.
Her experience underscores that failure isn’t due to the plant being difficult, but rather small procedural errors that compound over time.
How Long It Takes & When to Transplant
Root development varies based on temperature, light, and the health of the original cutting. Here’s a realistic timeline:
- Days 1–5: No visible changes. Stem may look unchanged.
- Days 6–10: Small white bumps (root primordia) appear at nodes.
- Days 11–21: Roots elongate to 1–2 inches. Secondary roots begin forming.
- Day 21+: Cutting is ready for transfer to soil or permanent water culture.
Transplanting to soil gives faster growth and fuller foliage over time. To transition smoothly:
- Prepare a pot with well-draining mix (e.g., peat, perlite, and pine bark).
- Gently rinse roots if algae formed in water.
- Plant so roots are covered, and the stem rests just above the soil line.
- Water lightly and keep in bright, indirect light for 7–10 days to acclimate.
Alternatively, you can grow pothos indefinitely in water. In this case, use liquid fertilizer (¼ strength every 4–6 weeks) and consider hydroponic support like clay pebbles to stabilize the plant.
Frequently Asked Questions
Can I propagate pothos in tap water?
Yes, most tap water is suitable. However, if your water is heavily chlorinated or contains high fluoride, let it sit out overnight before use to allow chemicals to dissipate. Alternatively, use filtered or rainwater.
Why are my pothos roots turning brown?
Brown or black roots usually indicate rot or low oxygen. Check for soft stems—if present, trim above damage. If roots are firm but discolored, it may be tannins from the plant leaching into water. Change water more frequently and ensure adequate light.
Do I need rooting hormone for pothos?
No. Pothos naturally produces auxins that stimulate root growth. Rooting hormone can speed things slightly but isn’t necessary and may increase risk of contamination if not applied cleanly.
Essential Checklist for Success
Print or save this checklist to follow each time you propagate:
- ✅ Select a healthy vine with visible nodes
- ✅ Sterilize cutting tool before use
- ✅ Cut just below a node
- ✅ Remove all leaves that would be underwater
- ✅ Place node(s) in clean water
- ✅ Use a transparent, clean container
- ✅ Position in bright, indirect light
- ✅ Change water weekly (or earlier if needed)
- ✅ Inspect for rot every 2–3 days
- ✅ Wait until roots are 1–2 inches long before transplanting
Final Thoughts: Patience and Prevention Are Key
Propagating pothos in water is one of the most rewarding experiences for indoor gardeners. It costs nothing beyond a glass and some water, yet yields new plants you can gift, sell, or expand your collection with. The difference between success and frustration often comes down to hygiene and consistency—not advanced skills.
Rot happens not because the plant is weak, but because conditions favor decay over growth. By removing submerged leaves, changing water regularly, and monitoring for early warning signs, you create an environment where roots thrive and bacteria don’t stand a chance.
Every gardener starts somewhere. Whether you’ve lost cuttings before or are trying for the first time, know that each attempt teaches you something valuable about plant care. With this guide, you now have the knowledge to propagate pothos confidently—and keep every cutting alive.


 浙公网安备
33010002000092号
浙公网安备
33010002000092号 浙B2-20120091-4
Comments
No comments yet. Why don't you start the discussion?