
Mastering Apex Legends on PS5 requires more than just quick reflexes and game sense—your controller setup plays a pivotal role in your performance. While many players focus solely on gear or loadouts, the reality is that even minor adjustments to sensitivity, dead zones, and button mapping can drastically improve accuracy, recoil control, and overall responsiveness. For console players, especially those competing at higher ranks, fine-tuning your settings isn’t optional—it’s essential.
The default controller configuration may work for casual play, but it often lacks the precision needed for consistent headshots and flick shots under pressure. By optimizing your settings based on proven mechanical principles and player-tested configurations, you can transform shaky aim into surgical precision. This guide breaks down every critical setting, explains how it affects gameplay, and provides a complete blueprint for building an accurate, responsive control scheme tailored to your playstyle.
Understanding Sensitivity: The Foundation of Accuracy
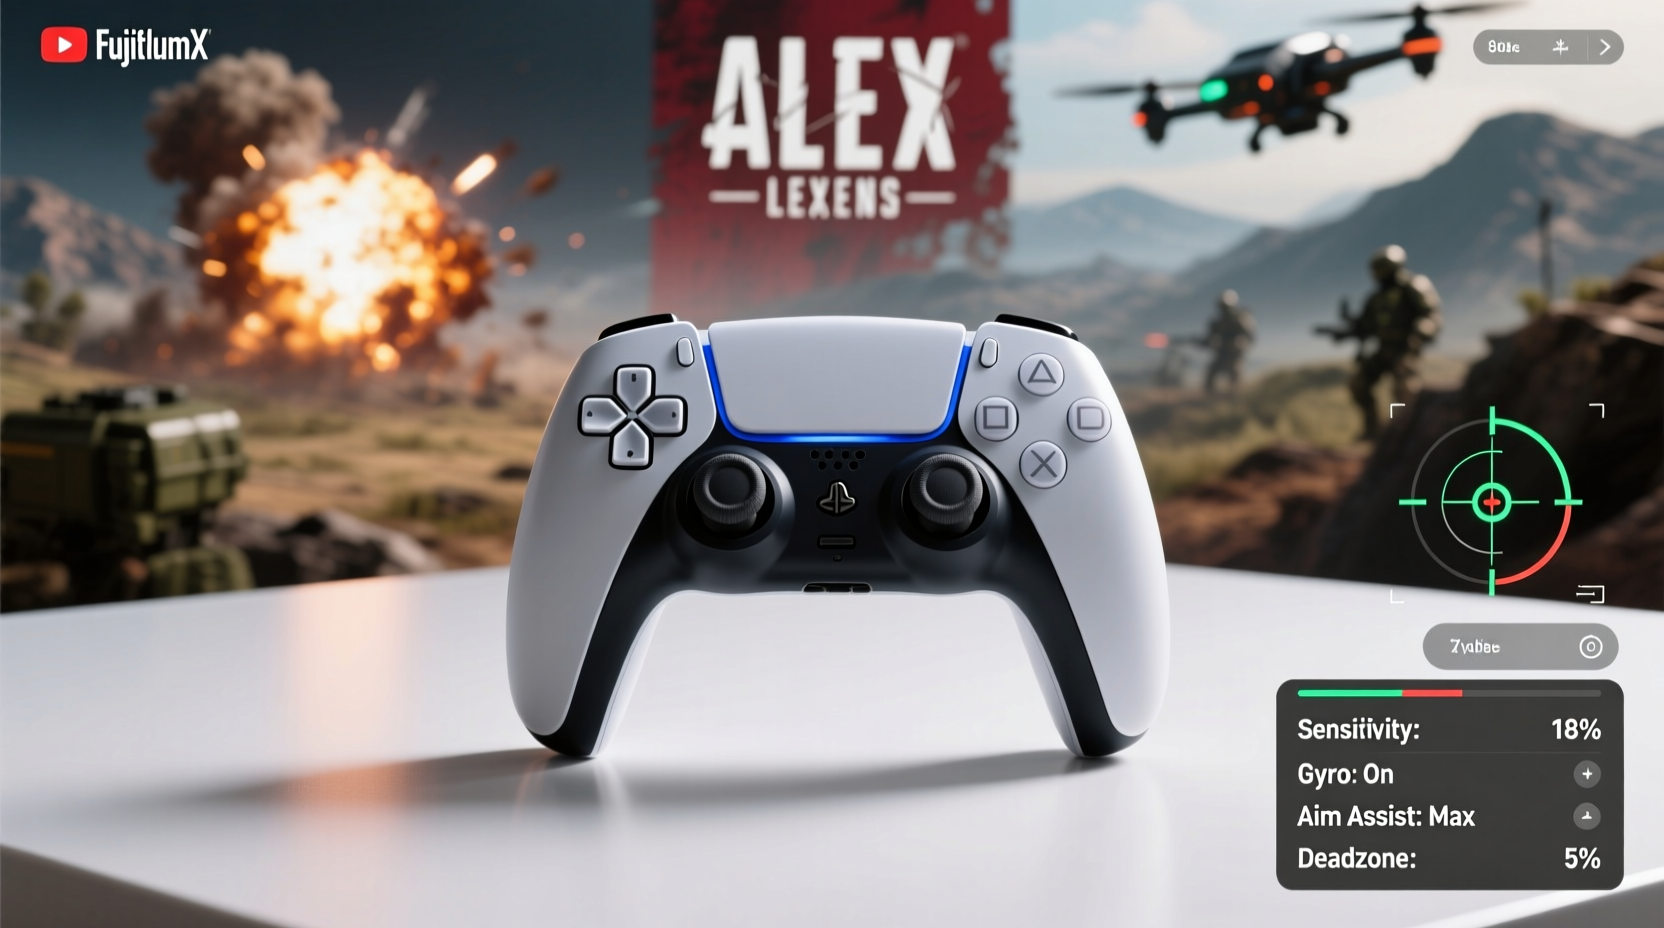
Sensitivity determines how fast your reticle moves in response to stick input. Too high, and you’ll overflick and lose micro-adjustment control; too low, and tracking fast-moving enemies becomes sluggish. The key is finding a balance between speed and precision—what professionals often call “Goldilocks sensitivity.”
On PS5, sensitivity is split across multiple categories: ADS (Aim Down Sights) sensitivity, horizontal and vertical look sensitivity, and scope-specific multipliers. Each layer interacts with the others, so adjusting one affects your entire aiming experience.
A common mistake is setting look sensitivity too high in an attempt to turn quickly. However, this makes small corrections difficult during close-range fights. Instead, prioritize lower base sensitivities with moderate ADS multipliers. This allows slow, controlled tracking up close while still enabling fast turns when needed.
Many top players use a horizontal look sensitivity between 7 and 10, paired with an ADS multiplier of 1.0x to 1.1x for non-scoped weapons. For sniper scopes, a slightly higher multiplier (1.3x–1.5x) helps with long-range tracking without sacrificing stability.
Optimal Controller Settings Breakdown
The following table outlines a battle-tested controller configuration used by competitive PS5 players focused on maximizing accuracy and minimizing input lag.
| Setting | Recommended Value | Purpose |
|---|---|---|
| Look Sensitivity (Horizontal) | 8.5 | Balances turning speed with precise aiming control |
| Look Sensitivity (Vertical) | 7.0 | Slightly lower than horizontal to prevent over-tracking vertically |
| ADS Sensitivity Multiplier | 1.0x | Maintains muscle memory consistency between hip-fire and scoped aiming |
| Holo/Reflex Sight Multiplier | 1.0x | Ensures seamless transition between different ARs |
| 2x Scope Multiplier | 1.1x | Minimal boost for better tracking without instability |
| 4x Scope Multiplier | 1.3x | Improves target acquisition at mid-to-long range |
| Sniper Scope Multiplier | 1.5x | Enables smoother follow-up shots after landing first hit |
| Controller Acceleration | Off | Eliminates unpredictable movement curves for consistent input |
| Input Dead Zone | 0% | Maximizes stick responsiveness and reduces drift |
| Vibration | Off | Prevents hand fatigue and improves fine motor control |
This configuration emphasizes consistency across all scopes, which builds reliable muscle memory. It also disables acceleration—a feature that increases sensitivity the longer you hold the stick—to ensure linear, predictable movement. Many players unknowingly rely on acceleration, which hampers their ability to make repeatable flicks.
“We’ve seen players drop their K/D ratio significantly after switching to linear sensitivity. Once they adapt, their accuracy improves because every input feels the same.” — Marcus Tran, Console Esports Coach
Button Layout and Responsiveness Optimization
Your thumb’s travel distance matters. The less you move, the faster you react. A well-designed button layout minimizes unnecessary motion and places high-frequency actions within easy reach.
Resurrection, melee, and crouch are among the most frequently used inputs. Placing them on the back paddles (using the DualSense Edge or a compatible third-party controller) frees up face buttons and reduces finger strain.
- Right Paddle: Crouch/Sprint Toggle – Enables instant sliding or peeking without lifting your thumb.
- Left Paddle: Melee – Critical for finishers and escaping grabs.
- R3 (Click Stick): Use/Interact – Reduces mispresses with jump.
- L1/R1: Aim/Fire – Keep as default for optimal ergonomics.
- Touchpad Click: Ping – Keeps communication fast and intuitive.
Additionally, enable “Tap to Crouch” and disable “Auto Sprint.” Tap-to-crouch gives you granular control over movement, allowing silent steps or instant slides. Auto sprint, while convenient, delays reaction time when you need to stop and shoot abruptly.
Step-by-Step: How to Apply These Settings
Implementing these changes systematically ensures you adapt efficiently without overwhelming your muscle memory. Follow this timeline over 3–5 days:
- Day 1: Reset & Baseline – Go to Settings > Controller > Restore Default Settings. Then, apply the sensitivity values from the table above. Spend 30 minutes in the firing range testing hip-fire tracking.
- Day 2: Refine ADS Behavior – Adjust ADS multiplier to 1.0x if not already set. Practice flicking between targets at medium range (30–50m). Focus on stopping precisely on target.
- Day 3: Test Scopes – Enter a match using only a 2x or 4x scoped weapon. Evaluate whether the multiplier feels smooth. Increase by 0.1x increments if tracking feels too slow.
- Day 4: Map Buttons – Assign crouch and melee to paddles or alternate inputs. Run through World’s Edge focusing on movement fluidity and interaction speed.
- Day 5: Live Validation – Play three full matches. Note how often you miss micro-adjustments or overflick. Fine-tune vertical sensitivity if you’re consistently overshooting vertically.
After this process, your controls should feel natural, responsive, and highly accurate. Avoid making large changes mid-session; instead, let your hands adapt gradually.
Real-World Example: From Bronze to Gold
Consider Jordan, a PS5 player stuck in Bronze for months despite good game sense. He frequently missed close-range fights and struggled to track moving targets. After analyzing his settings, he was using:
- Look Sensitivity: 14 (Horizontal), 14 (Vertical)
- ADS Multiplier: 1.5x
- Acceleration: On
- No paddle usage
His setup caused erratic aim—fast flicks overshot, and small corrections were nearly impossible. After switching to the recommended settings and practicing for five days, his average kills per match rose from 0.8 to 2.3. More importantly, his confidence in gunfights improved dramatically. Within two weeks, he reached Gold.
“I didn’t realize how much my settings were holding me back,” Jordan said. “Once I slowed things down and removed acceleration, my aim became way more consistent.”
Frequently Asked Questions
Should I use the same sensitivity for all scopes?
Not necessarily. While keeping multipliers close maintains consistency, it’s acceptable—and often beneficial—to increase magnified scopes (4x, 6x, sniper) by 0.2x–0.5x. This compensates for the tighter field of view without disrupting core aim mechanics.
Is it worth buying a DualSense Edge for better settings?
Yes, especially if you're serious about improving. The customizable back paddles, swappable sticks, and onboard profile storage give you professional-grade control. You can save multiple layouts for different legends or modes, and switch instantly.
How do I know if my sensitivity is too high?
If you constantly overflick, struggle to reacquire targets after recoil, or find yourself shaking the reticle during close fights, your sensitivity is likely too high. Lower it incrementally until micro-adjustments feel effortless.
Checklist: Finalizing Your Accurate Control Setup
Before entering ranked, confirm the following:
- ✅ Horizontal sensitivity set between 7.5 and 9.5
- ✅ Vertical sensitivity 1.0–2.0 points below horizontal
- ✅ ADS multiplier at or near 1.0x for ARs and SMGs
- ✅ Acceleration disabled
- ✅ Dead zone at 0% (or minimal if experiencing drift)
- ✅ Crouch and melee mapped to paddles or easily accessible buttons
- ✅ Vibration turned off
- ✅ Tested in live matches across multiple legends
Revisit this checklist weekly, especially if you feel your aim regressing. Small tweaks can restore peak performance.
Conclusion: Precision Starts With Your Settings
Great aim in Apex Legends isn’t just about talent—it’s built on deliberate, optimized mechanics. The right controller settings create a foundation for accuracy, consistency, and confidence in every firefight. Whether you’re grinding to Platinum or pushing for Radiant, refining your sensitivity, disabling erratic features like acceleration, and leveraging hardware advantages like back paddles can be the difference between surviving and dominating.


 浙公网安备
33010002000092号
浙公网安备
33010002000092号 浙B2-20120091-4
Comments
No comments yet. Why don't you start the discussion?