
Streaming has become a cornerstone of digital communication, whether you're hosting live gameplay, conducting remote interviews, or building a personal brand on platforms like Twitch, YouTube, or Instagram. One of the most overlooked yet critical elements of a successful stream is lighting. Poor lighting can make even the most engaging content look amateurish. The good news? You don’t need a Hollywood-grade studio to achieve crisp, flattering illumination. By thoughtfully combining natural and artificial light, you can create a professional-looking setup without breaking the bank.
The key lies in balance—leveraging the soft, diffused quality of daylight while supplementing it with affordable artificial sources to maintain consistency, especially when sunlight isn’t available. This approach not only enhances visual clarity but also reduces eye strain for your viewers and helps convey confidence and professionalism.
Why Lighting Matters in Streaming
Lighting directly affects how your audience perceives you. Harsh shadows, backlighting, or dim conditions obscure facial expressions and reduce engagement. Viewers are more likely to stay engaged when they can clearly see the streamer’s face and environment. Proper lighting improves contrast, color accuracy, and depth, all of which contribute to a polished broadcast.
Natural light, particularly during mid-morning or early afternoon, provides a balanced color temperature (around 5500K) and soft diffusion when filtered through curtains or windows. However, relying solely on sunlight is unreliable—weather changes, time of day, and room orientation can all disrupt consistency. Artificial lights offer control, allowing you to fine-tune brightness, direction, and color temperature regardless of external conditions.
Building a Balanced Lighting Strategy
A hybrid lighting approach—combining natural and artificial sources—delivers both aesthetic appeal and reliability. Here’s how to structure it effectively:
- Assess Your Natural Light Availability: Observe your space throughout the day. Note when direct sunlight enters and when the room becomes too dark. South-facing windows provide the most consistent daylight in the Northern Hemisphere.
- Use Sheer Curtains or Diffusers: Direct sunlight creates harsh contrasts and glare. A sheer curtain or translucent blind scatters light evenly across your face without losing brightness.
- Supplement with Budget-Friendly Artificial Lights: When natural light fades, use affordable LED panels or ring lights to maintain consistent exposure.
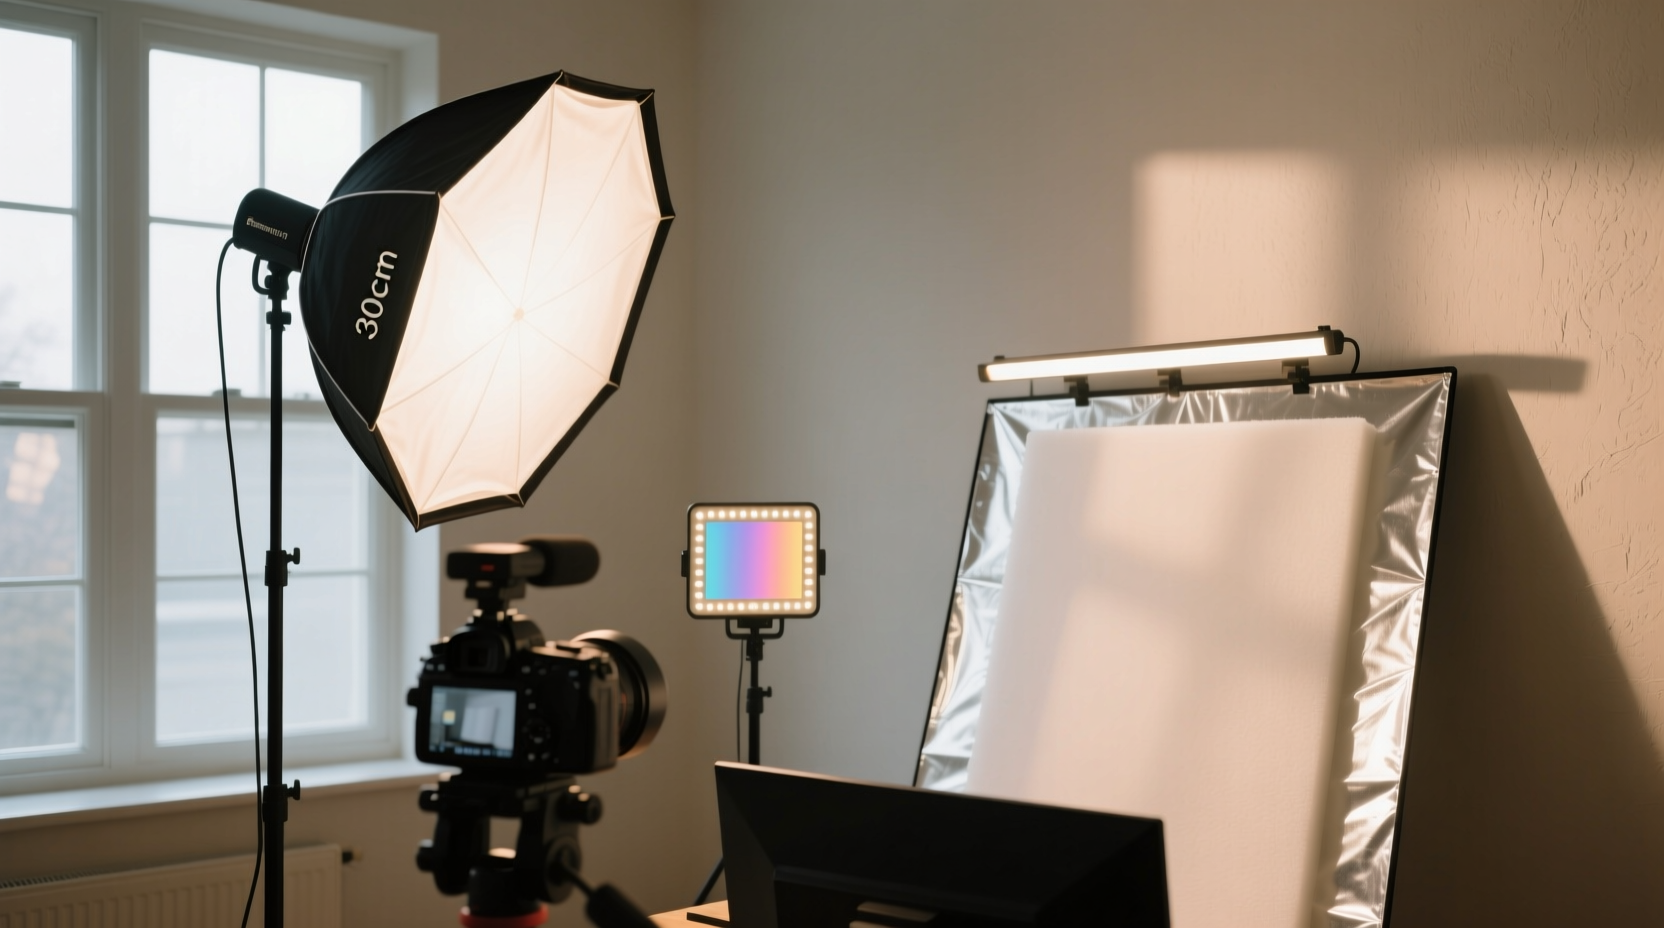
- Aim for Three-Point Lighting: Even on a budget, replicate this classic setup using one key light (main source), one fill light (softens shadows), and one backlight (separates you from the background).
- Match Color Temperatures: Ensure your artificial lights are around 5500K to blend seamlessly with daylight and avoid unnatural color casts.
Choosing the Right Artificial Lights on a Budget
You don’t need expensive fixtures to get great results. Many entry-level LED options perform well when used correctly. Look for lights with adjustable brightness and color temperature settings. These allow flexibility as ambient conditions change.
Popular budget choices include:
- LED Ring Lights ($20–$50): Circular design provides even front lighting, ideal for close-up shots. Often come with phone mounts and tripods.
- Softbox Panels ($30–$60): Rectangular LED panels with diffusion filters that mimic studio lighting. More directional than ring lights, better for shaping light.
- Clip-On LED Lamps ($15–$25): Flexible gooseneck designs that can be attached to desks or shelves. Useful as fill or accent lights.
“Hybrid lighting setups give creators the best of both worlds—natural warmth during the day and reliable consistency at night.” — Jordan Lee, Broadcast Lighting Technician
Step-by-Step Setup Guide
Follow this practical sequence to build an effective, low-cost lighting system that leverages both natural and artificial sources:
- Position Your Desk Near a Window: Place your streaming station perpendicular to the window so daylight illuminates your face from the side, reducing glare on screens.
- Install a Sheer Curtain: Hang a white or off-white curtain to diffuse direct sunlight. Avoid heavy drapes that block too much light.
- Add a Key Light Opposite the Window: Use a softbox or ring light on the opposite side to balance shadows. This becomes your primary artificial source.
- Place a Fill Light in Front: A small clip-on LED placed below or beside your monitor softens shadows under the chin and nose.
- Include a Backlight: Position a small lamp behind you, pointing toward the wall or your shoulders, to create depth and prevent blending into the background.
- Test and Adjust: Record a short test clip at different times of day. Check for harsh shadows, overexposure, or color imbalance. Tweak angles and brightness accordingly.
Comparison: Natural vs. Artificial Lighting
| Aspect | Natural Light | Artificial Light |
|---|---|---|
| Cost | Free | $15–$60 per fixture |
| Consistency | Varies by time/weather | Fully controllable |
| Color Temperature | ~5000–6500K (daylight) | Adjustable (2700K–6500K) |
| Diffusion Quality | Excellent when diffused | Depends on modifiers (diffusers, softboxes) |
| Maintenance | None | Bulb replacements, power usage |
| Best For | Daytime streaming, natural aesthetic | Night streaming, consistent branding |
Common Mistakes to Avoid
Even with the right equipment, poor placement or technique can ruin your lighting. Watch out for these pitfalls:
- Backlighting from Windows: Sitting with your back to a bright window turns you into a silhouette. Always face the light source.
- Mixing Mismatched Color Temperatures: Combining warm indoor bulbs (3000K) with cool daylight (5500K) creates unnatural skin tones. Stick to one range.
- Overusing Ring Lights: While popular, ring lights can flatten facial features if used alone. Pair them with side or fill lights for dimension.
- Ignoring the Background: A well-lit face against a dark background looks unbalanced. Use a backlight or ambient lamp to illuminate the rear zone.
- Skipping White Balance Calibration: Don’t rely on auto white balance. Manually set it in your camera or software to match your lighting setup.
Mini Case Study: From Dim Room to Professional Stream
Maya, a part-time streamer based in Chicago, struggled with inconsistent video quality. Her apartment received strong morning sun but became nearly dark by 3 PM. Initially, she relied only on her laptop screen and a single desk lamp, resulting in greenish tinted footage and deep shadows.
She implemented a hybrid solution: she moved her chair to face a south-facing window with a sheer curtain, added a $40 adjustable LED softbox on the opposite side, and mounted a $20 clip-on light below her monitor as a fill. She also painted her backdrop wall light gray to reflect more light.
Within a week, viewer retention increased by 35%, and several followers commented on her “much clearer” appearance. Maya now streams consistently from 10 AM to 8 PM by adjusting artificial brightness as daylight changes—proving that smart, incremental upgrades yield real results.
Essential Checklist for Your Budget Lighting Setup
Use this checklist to ensure your hybrid lighting system is optimized:
- ☑️ Desk positioned to receive indirect natural light
- ☑️ Sheer curtain or diffusion material on window
- ☑️ Primary artificial light (ring light or softbox) opposite the window
- ☑️ Fill light to reduce facial shadows
- ☑️ Backlight to separate subject from background
- ☑️ All lights set to ~5500K color temperature
- ☑️ Overhead room lights turned off during stream
- ☑️ Camera white balance manually calibrated
- ☑️ Test recordings reviewed at multiple times of day
Frequently Asked Questions
Can I stream effectively using only natural light?
Yes, but only if you stream during consistent daylight hours and have proper diffusion. Without artificial backup, evening or cloudy-day streams will suffer from low light and noise. For long-term reliability, supplementation is recommended.
What’s the cheapest way to improve my lighting?
Start with repositioning your desk to face a window with a sheer curtain. Then add a single $20–$30 LED panel with adjustable brightness and color temperature. This two-step upgrade dramatically improves image quality for under $50.
Do I need a ring light, or are softboxes better?
Ring lights are great for beauty-focused content due to their signature circular catchlight in the eyes. Softboxes offer more directional control and are better for creating depth. For general streaming, a softbox as a key light with a small fill light often produces more natural results.
Final Thoughts: Quality Doesn’t Require High Cost
Professional-grade lighting doesn’t demand a professional budget. By understanding how to harmonize natural daylight with affordable artificial sources, you can create a dynamic, reliable setup that adapts to your schedule and environment. The goal isn’t perfection—it’s consistency, clarity, and authenticity. Whether you’re teaching, entertaining, or connecting with an audience, good lighting ensures you’re seen the way you want to be seen.


 浙公网安备
33010002000092号
浙公网安备
33010002000092号 浙B2-20120091-4
Comments
No comments yet. Why don't you start the discussion?