
In today’s remote-first world, how you appear on camera matters. Whether you're presenting in a team meeting, interviewing for a job, or hosting a virtual workshop, poor lighting can undermine your credibility—no matter how polished your message is. Harsh shadows, dim faces, or backlit silhouettes distract viewers and make communication harder. The good news? You don’t need a Hollywood budget to achieve broadcast-quality lighting at home. With thoughtful placement, affordable tools, and a few key principles, you can create a professional-looking image that enhances clarity, confidence, and connection.
Why Lighting Matters More Than You Think
Lighting is often overlooked in favor of high-end cameras or microphones, but it plays an outsized role in visual perception. A well-lit face helps convey emotion, focus attention, and reduce digital compression artifacts during streaming. Poor lighting forces video conferencing platforms like Zoom, Google Meet, or Microsoft Teams to compensate by boosting brightness or contrast, which introduces noise, grain, or unnatural skin tones.
Professional lighting ensures even exposure across your face, minimizes harsh contrasts, and eliminates distracting shadows behind or beside you. It also reduces eye strain for viewers, making long meetings more comfortable. Most importantly, good lighting signals competence and preparedness—subtle cues that build trust in virtual environments.
“Lighting isn’t just about visibility; it’s about presence. The right setup makes you feel seen—and believed.” — Lena Torres, Broadcast Lighting Designer
The Three Pillars of Effective Video Call Lighting
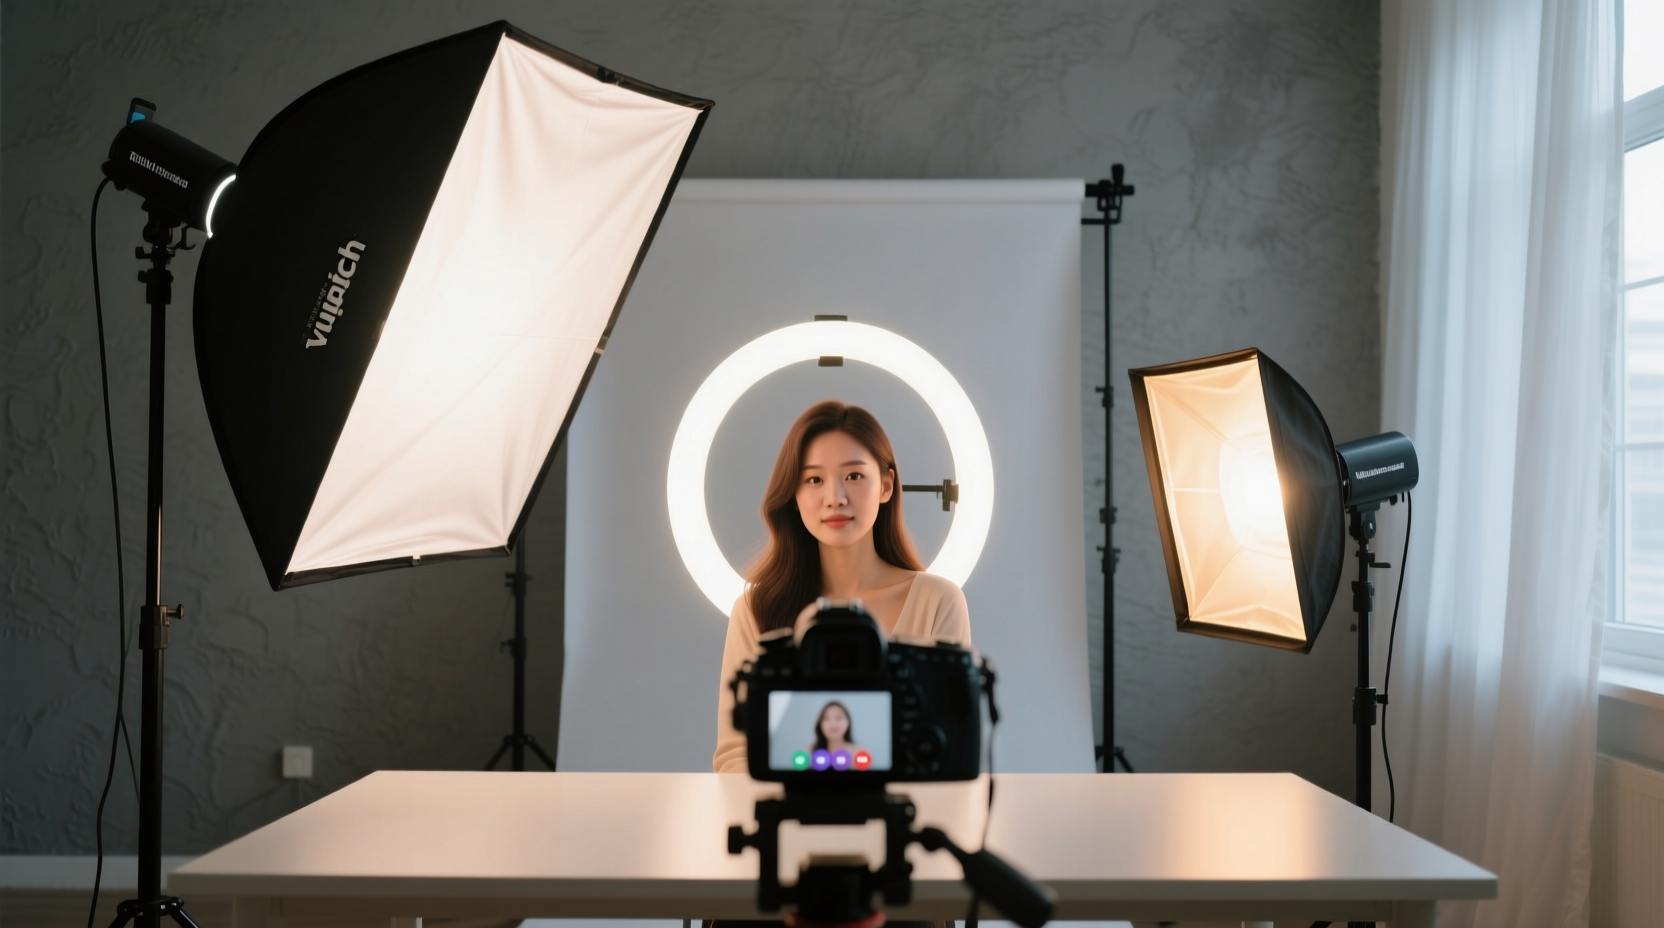
Photographers and cinematographers use a three-point lighting system to sculpt dimension and clarity. While full setups are ideal for content creators, most remote workers benefit from simplified versions focused on these core principles:
1. Key Light: Your Primary Source
This is the main light illuminating your face. It should be positioned slightly above eye level and angled down at about 30–45 degrees, ideally placed in front of you and off to one side (usually camera-left). This creates gentle modeling on your features without flattening your appearance.
A softbox, ring light, or adjustable LED panel works well. Avoid bare bulbs or overhead ceiling lights—they cast unflattering shadows under the eyes and nose.
2. Fill Light: Softening Shadows
If your key light is strong, it will create shadows on the opposite side of your face. A fill light—less intense than the key—balances this contrast. In practice, many people use natural light or a reflector (like a white foam board) as a passive fill. For consistent results, a second small LED panel set at 50% intensity on the shadowed side evens out tones beautifully.
3. Back Light (Optional): Adding Depth
Also called a “hair light” or “rim light,” this subtle source separates you from the background. Placed behind and above your head, it highlights the outline of your shoulders and hair, preventing you from blending into dark walls. Not essential for everyday calls, but highly effective for professional presentations or content creation.
Practical Setup Options for Every Budget
You don’t need expensive gear to improve your lighting. Here are four realistic configurations, ranging from no-cost solutions to pro-grade systems.
| Budget Tier | Setup Components | Best For | Estimated Cost |
|---|---|---|---|
| No-Budget | Natural daylight + white wall + DIY reflector (white poster board) | Daily check-ins, casual calls | $0 |
| Entry-Level | Ring light or clip-on LED ($20–$50) near monitor | Regular meetings, interviews | $30–$60 |
| Mid-Tier | Adjustable softbox key light + small fill light | Presentations, coaching, teaching | $100–$200 |
| Pro-Grade | Three-point kit with diffusers, stands, color temperature control | Streaming, public speaking, media work | $250+ |
No-Cost Solution: Harness Natural Light
Sit facing a large window during daylight hours. Morning and midday light provide the most balanced illumination. Avoid sitting *with* the window behind you—this backlights your figure and turns you into a silhouette. Close blinds partially if sunlight is too direct, causing squinting or hotspots.
Low-Cost Upgrade: Ring Lights & Desk LEDs
Ring lights are popular because they produce even, circular catchlights in the eyes and minimize shadows. Choose one with adjustable color temperature (measured in Kelvin). Around 4500K mimics neutral daylight and flatters most skin tones. Avoid cheap models with flickering LEDs or blue-heavy outputs.
Mid-Range Investment: Dual-Light Setup
Pair a softbox-style key light (positioned at 45° to your front-left) with a lower-intensity fill light on the right. Use flexible arms or tripods for precise aiming. Look for lights with built-in diffusion panels and dimmer controls. Brands like Neewer, Elgato, and Godox offer reliable options under $200.
Advanced: Full Studio Control
For those streaming live classes or recording promotional videos, invest in a complete kit with CRI (Color Rendering Index) ratings above 95. High CRI means colors appear true-to-life on camera. Add barn doors or grids to shape the light beam and prevent spill onto walls. Use a light meter app or test recordings to fine-tune balance.
Step-by-Step Guide to Optimizing Your Lighting Today
Follow this sequence to evaluate and enhance your current setup—even if you’re starting from scratch.
- Assess Your Current Environment: Turn on your camera and observe how your face appears. Are your eyes sunken? Is one side darker than the other? Is there glare on glasses?
- Face Your Main Light Source: Position yourself so the brightest ambient light (window or lamp) is in front of you, not behind.
- Elevate Your Light Slightly Above Eye Level: This mimics natural overhead daylight and prevents under-chin shadows. Never place a light below your face—it creates eerie, horror-movie effects.
- Diffuse Harsh Light: If using a bare bulb or bright window, hang a sheer white curtain or use a translucent umbrella to soften the output.
- Add a Fill Using Reflection: Place a white poster board, open laptop lid, or light-colored notebook on the shadowed side of your face to bounce light back.
- Test Across Platforms: Record a short clip on Zoom, then review it on another device. Check for overexposure, noise, or unnatural skin tone shifts.
- Adjust Color Temperature: If your skin looks too yellow (warm) or blue (cool), adjust the light’s Kelvin setting. Aim for 4000K–5000K for neutrality.
- Eliminate Background Distractions: Ensure walls aren’t too dark or cluttered. A softly lit, neutral backdrop improves facial visibility through contrast management.
Avoid These Common Lighting Mistakes
- Using only overhead room lighting: Ceiling fixtures create deep eye sockets and nasal shadows—often called “raccoon eyes.” Supplement them with forward-facing light.
- Placing lights too close: This causes overexposure, glare, and uneven gradients. Maintain at least 3–5 feet between you and the light source.
- Ignoring color consistency: Mixing warm indoor bulbs with cool daylight results in conflicting tones. Use lights of the same Kelvin rating throughout the scene.
- Over-relying on ring lights alone: While convenient, they flatten facial contours. Combine them with a secondary source for depth.
- Blocking light with monitors or plants: Keep the path between your light and face clear. Even small obstructions cast noticeable shadows.
Real-World Example: How Sarah Improved Her Client Calls
Sarah, a freelance graphic designer based in Portland, struggled with being taken seriously during client video calls. Despite her expertise, clients often asked if her internet was unstable—when in reality, the issue was poor visibility. She sat in a dim corner with a floor lamp behind her, creating a dark, indistinct profile.
After reading about basic lighting principles, she repositioned her desk to face a north-facing window. She added a $40 LED panel on a small stand to her left, angled toward her face. She placed a white notebook on her right to act as a fill reflector. The change was immediate: her expressions became visible, her skin tone looked healthy, and clients commented on her “professional setup.” Within two weeks, she closed two new contracts, crediting clearer communication—and better visibility—as key factors.
Essential Lighting Checklist Before Every Call
Run through this quick checklist before joining any important video meeting:
- ✅ Am I facing the primary light source?
- ✅ Is my face evenly lit with no dark shadows?
- ✅ Are my eyes clearly visible (not hidden in socket shadows)?
- ✅ Does my skin tone look natural, not orange or blue?
- ✅ Is there any glare on glasses or screens?
- ✅ Is the background clean and moderately lit?
- ✅ Have I tested the camera feed within the actual app I’ll be using?
Frequently Asked Questions
Can I use my phone flashlight as a fill light?
Technically yes, but it’s far from ideal. Phone flashlights are extremely harsh, overly blue, and difficult to position. They lack dimming controls and often cause overexposure. Invest in a small, adjustable LED instead—it costs about the same as a coffee per month.
What if I work at night and don’t have access to natural light?
No problem. Artificial lighting gives you full control. Use a daylight-balanced LED (around 5000K) as your key light. Pair it with a reflector or secondary soft light to eliminate shadows. Consistency is easier at night since ambient conditions don’t change.
Do I need different lighting for different skin tones?
All skin tones benefit from even, diffused lighting. However, deeper skin tones require slightly more illumination to retain detail without crushing shadows. Avoid under-lighting, which can mute rich pigments. High CRI lights ensure accurate representation across all complexions.
Final Thoughts: Lighting as a Professional Tool
Your appearance on screen is part of your personal brand. Just as you’d dress appropriately for an office meeting, you owe it to yourself and your audience to present clearly and confidently. Great lighting doesn’t require technical mastery—just awareness, intention, and a few smart choices. Start with what you have, apply one improvement at a time, and test the results. Over time, you’ll develop a setup that feels seamless and supports your goals.
Remember: the goal isn’t perfection. It’s presence. When your face is well-lit, your words carry more weight, your expressions land with clarity, and your professionalism shines through—literally.


 浙公网安备
33010002000092号
浙公网安备
33010002000092号 浙B2-20120091-4
Comments
No comments yet. Why don't you start the discussion?