
A radiant, lit-from-within complexion is one of the most sought-after beauty goals—and highlighter plays a pivotal role in achieving it. But too often, the pursuit of glow ends in a slick, oily mess that looks more like sweat than shimmer. The key isn’t avoiding highlighter altogether; it’s learning how to use it with precision, the right formula, and technique that enhances your skin’s natural luminosity without crossing into greasy territory.
When applied correctly, highlighter mimics the way light naturally hits the high points of your face, creating dimension and freshness. Whether you're prepping for a daytime event or evening out with friends, mastering this step can elevate your entire makeup look from flat to flawless. This guide breaks down everything from choosing the right product to application strategies that keep shine in check while maximizing radiance.
Understanding Highlighter: Finish vs. Formula
Not all highlighters are created equal. The difference between a dewy finish and an oily disaster often comes down to formulation and particle size. Understanding these elements helps you make informed choices based on your skin type and desired effect.
There are three main types of highlighter finishes:
- Dewy: A soft, moist-looking sheen that resembles healthy, hydrated skin.
- Metallic: High-shine, bold reflections—ideal for dramatic looks but risky for oily skin.
- Pearlescent: Subtle luster with fine particles that reflect light gently, perfect for natural results.
The formula also matters. Here’s a breakdown of common highlighter bases:
| Formula | Best For | Application Tip | Caution |
|---|---|---|---|
| Cream | Dry to normal skin | Blend with fingers or damp sponge | Can emphasize texture if over-applied |
| Stick | On-the-go touch-ups | Swipe and blend immediately | May feel heavy if layered |
| Liquid | Mixing into foundation or moisturizer | Sheer layering prevents buildup | Hard to control if dispensed too much |
| Powder | Oily or combination skin | Use fluffy brush for soft focus | Can appear ashy on deeper tones if mica-heavy |
For a non-greasy glow, those with oily or combination skin should lean toward powder or water-based liquid formulas. Dry skin types benefit from creamy textures that add moisture while reflecting light.
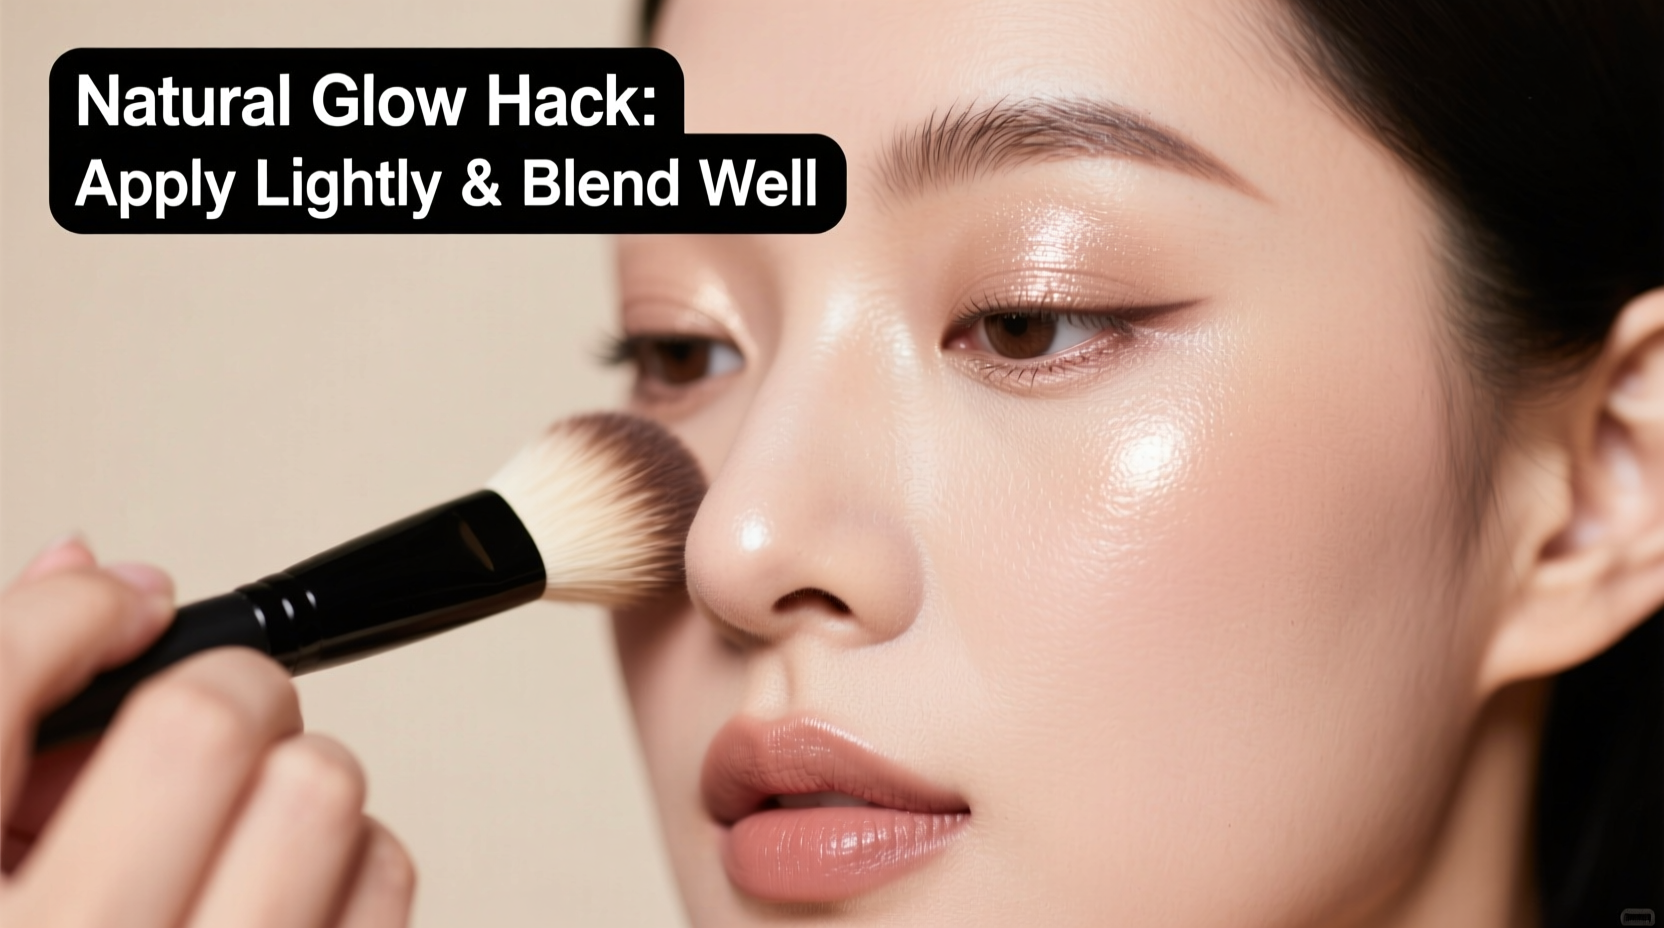
Step-by-Step Guide to Applying Highlighter Naturally
The secret to a believable glow lies not just in the product, but in where and how you apply it. Follow this timeline-tested method for balanced radiance:
- Prep your base: Begin with well-moisturized skin. If using cream products, allow your moisturizer to absorb fully (wait at least 3–5 minutes). Skipping this step can cause pilling or uneven texture when applying highlighter.
- Apply foundation and concealer first: Let your base settle before adding shimmer. This ensures the highlighter sits on top of your makeup rather than mixing into wet layers beneath, which can lead to patchiness.
- Identify your natural light-catch zones: These are the areas where sunlight would naturally hit your face. Common spots include:
- The tops of cheekbones (not the apples)
- Brow bones (just under the arch)
- Inner corners of the eyes
- Down the bridge of the nose (thin line)
- Cupid’s bow (above the lips)
- Chin tip (if lighting emphasizes it)
- Choose the right tool:
- Fingers: Ideal for cream formulas—body heat warms the product for seamless blending.
- Damp beauty sponge: Provides sheer, airbrushed diffusion.
- Small tapered brush: Best for precision on brow bones or inner corners.
- Fluffy fan brush: Perfect for soft powder highlighter sweeps across cheekbones.
- Apply sparingly and blend outward: Deposit product directly onto the high point, then blend upward and outward—not downward, which can drag pigment into fine lines. Use a stippling motion for powders; gentle patting for creams.
- Set strategically: If you’re using setting powder, avoid applying it over highlighted areas. Instead, set around them to preserve the glow while keeping the rest of your makeup locked in place.
- Evaluate in natural light: Step near a window after application. Artificial lighting can exaggerate shine. If you see pooling or stark streaks, lightly buff with a clean sponge or brush to soften.
“Less is always more with highlighter. I tell my clients to imagine they’ve just come in from a brisk walk—the kind of healthy flush and subtle gleam that needs no explanation.” — Lena Torres, Celebrity Makeup Artist
Do’s and Don’ts of Non-Greasy Glow
To maintain balance between luminosity and realism, follow these essential guidelines:
| Do | Don't |
|---|---|
| Apply highlighter after your base makeup is mostly set | Layer cream highlighter under liquid foundation |
| Use translucent setting spray to melt powders together for a skin-like finish | Skip blending because “it’s just a little shimmer” |
| Mix a drop of liquid highlighter into your foundation for an all-over glow | Apply highlighter on textured or bumpy areas like acne scars |
| Focus on one or two key areas max for daytime | Highlight every facial plane (cheeks, nose, forehead, chin) unless going for editorial drama |
| Blot excess shine with a tissue, then re-blend if needed | Use shimmery primers underneath already shiny highlighters |
Real Example: From Greasy to Glowing
Take Sarah, a 32-year-old marketing executive who loved wearing highlighter but constantly received comments like, “Are you sweating?” or “Your face is catching the light… a lot.” She was using a pearlescent cream stick applied liberally to her cheeks, nose, and forehead, then topping it with a glittery powder for extra pop.
After consulting a makeup artist, she changed her routine: switched to a matte cream base, used a minimal amount of champagne-toned liquid highlighter only on her cheekbones and inner corners, and blended with a cool jade roller to press—not push—the product into her skin. The result? Colleagues noticed she looked “well-rested and fresh,” not shiny. Her confidence soared because her glow finally matched her intention: subtle elegance, not spotlight appeal.
Choosing the Right Shade and Undertone
Color selection plays a major role in whether your highlight reads as natural or artificial. While silver and icy shades were once popular, many now favor warmer, skin-tone-synced options that mimic real-life light reflection.
- Light to fair skin: Opt for pearl, pale gold, or rose quartz. Avoid stark white, which can look ashy.
- Medium skin: Champagne, peach-gold, or bronze tones blend seamlessly.
- Deep skin: Rich copper, molten bronze, or deep garnet provide visible radiance without grayish cast.
Pro tip: Hold potential highlighters next to your collarbone in natural light. If the shade looks like a natural extension of your skin’s sheen, it’s likely a good match.
Checklist: Achieve a Natural Highlight in 7 Steps
Before your next makeup session, run through this checklist to ensure a polished, grease-free glow:
- ✅ Moisturize and wait 5 minutes for absorption
- ✅ Apply and set your base makeup (foundation, concealer, powder where needed)
- ✅ Select a highlighter formula suited to your skin type
- ✅ Choose a shade that complements your undertone
- ✅ Target only 1–3 natural high points (e.g., cheekbones, inner eyes, Cupid’s bow)
- ✅ Blend thoroughly using fingers, sponge, or appropriate brush
- ✅ Check appearance in daylight and adjust if necessary
Frequently Asked Questions
Can I wear highlighter if I have oily skin?
Absolutely—but choose wisely. Powder or water-based liquid highlighters work best. Avoid oil-infused creams or thick metallic sticks. Apply only to specific zones and avoid the T-zone unless you want deliberate shine. Setting sprays with a matte finish can help control overall oiliness while preserving targeted glow.
Why does my highlighter look patchy?
Patchiness usually occurs when the product isn’t properly blended or when applied over dry patches or incompatible layers. Ensure your skin is smooth and hydrated beforehand. Exfoliate gently 1–2 times per week. Also, never apply cream highlighter over silicone-heavy primers—they repel each other, causing separation.
Is it okay to use highlighter every day?
Yes, especially in subtle forms. Many daily wearers mix a drop of liquid illuminator into their moisturizer or foundation for an undetectable radiance. Cream or sheer powder highlighters in neutral tones are ideal for everyday use. Reserve intense shimmer for evenings or special occasions.
Final Thoughts: Glow With Intention
A natural-looking highlight isn’t about covering your face in shimmer—it’s about enhancing what’s already there. Light behaves predictably on the human face, and your makeup should follow suit. By selecting the right formula, respecting your skin type, and applying with restraint and precision, you can achieve a glow that looks effortless, healthy, and entirely your own.
Remember, the goal isn’t to draw attention to the highlighter itself, but to make people notice your skin. When someone says, “You look radiant today,” and has no idea why—that’s when you know you’ve mastered the art.


 浙公网安备
33010002000092号
浙公网安备
33010002000092号 浙B2-20120091-4
Comments
No comments yet. Why don't you start the discussion?