
A greasy laptop keyboard is more than just unpleasant—it’s a breeding ground for bacteria and can impair typing performance over time. The oils from your fingers, food residue, and environmental dust accumulate in and around the keys, especially on frequently used devices. While the urge to scrub it clean with household cleaners might be strong, doing so incorrectly can damage sensitive components or leave behind residue that worsens the problem. The key is using the right tools, techniques, and patience to restore cleanliness without risking harm to your device.
Cleaning your laptop keyboard properly extends its lifespan, improves hygiene, and enhances user experience. Whether you're a student, remote worker, or casual user, knowing how to safely remove grease and grime ensures your machine remains functional and comfortable to use. This guide walks through the safest, most effective method step by step, supported by expert insights and real-world testing.
Why Grease Builds Up on Laptop Keyboards
The primary cause of grease buildup is repeated contact between skin and keys. Human skin naturally produces sebum, an oily substance that transfers onto surfaces during touch. Typing habits—especially eating while working, touching your face, or skipping handwashing—accelerate this transfer. Over weeks and months, this oil combines with dead skin cells, lint, and airborne particles to form a sticky film around and under the keys.
Additionally, modern laptop designs often feature tightly spaced keys with shallow travel, making them harder to clean than mechanical desktop keyboards. Spills, humidity, and poor storage conditions further compound the issue. Ignoring the problem not only affects appearance but may lead to key sticking, reduced responsiveness, or even electrical shorts in extreme cases.
Essential Supplies for Safe Keyboard Cleaning
Using inappropriate materials—like paper towels, wet wipes, or harsh chemicals—can scratch surfaces or push moisture into internal circuits. Instead, gather tools designed for electronics care:
- Isopropyl alcohol (70% concentration): Effective at dissolving grease without leaving residue. Higher concentrations (90%+) evaporate too quickly and may pose static risks.
- Microfiber cloth: Non-abrasive and lint-free, ideal for wiping surfaces without scratching.
- Cotton swabs (Q-tips): Perfect for cleaning around individual keys and tight spaces.
- Compressed air canister: Removes loose debris and dust from beneath keys before liquid cleaning.
- Soft-bristled brush (e.g., clean toothbrush): Helps dislodge stubborn grime without damaging plastic.
- Plastic pry tool or guitar pick: Optional, for gently lifting keys if deep cleaning is needed (not recommended for beginners).
Avoid using water alone, vinegar, window cleaners, or disinfectant wipes containing bleach or ammonia—they can corrode metal contacts or degrade plastic finishes.
Step-by-Step Guide: How to Clean a Greasy Laptop Keyboard Safely
Follow this detailed process to remove grease effectively while protecting your laptop’s integrity.
- Power down and unplug the laptop. Shut it down completely and disconnect from any power source. If it has a removable battery, take it out. This prevents short circuits during cleaning.
- Tilt the laptop and shake gently. Hold the device at a 75-degree angle over a trash can and tap the back lightly to dislodge loose crumbs and dust.
- Use compressed air to blow out debris. Hold the can upright and spray in short bursts between and around the keys. Move diagonally across the keyboard to avoid redepositing particles. Do not invert the can, as propellant fluid can leak out and damage components.
- Dry-brush the surface. Use a soft-bristled brush to sweep horizontally across the keys, loosening stuck-on grime. Focus on areas between commonly used keys like “E,” “R,” “T,” and spacebar.
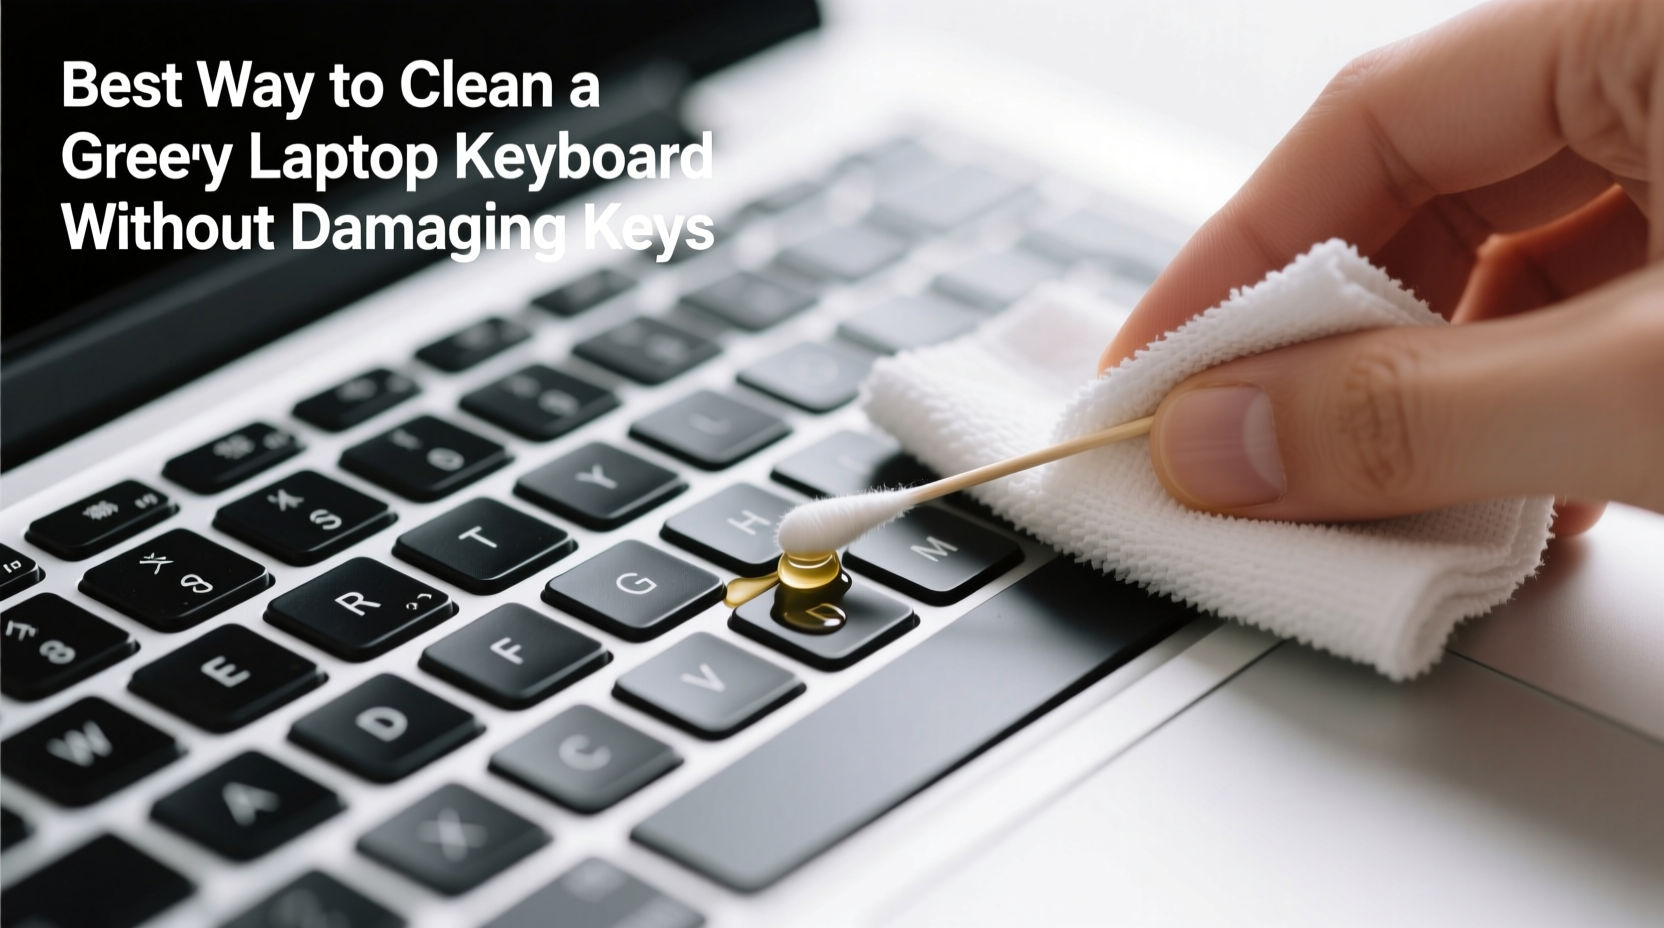
- Dampen a microfiber cloth with isopropyl alcohol. Moisten the cloth slightly—never soak it. Wring out excess liquid until it’s barely damp. Wipe the entire keyboard surface in one direction to lift grease.
- Clean between keys with cotton swabs. Dip a swab in alcohol, squeeze lightly against the bottle rim, and carefully clean around each key. Replace swabs frequently as they pick up dirt.
- Tackle stubborn grease spots. For visible oily patches, wrap a swab in a small piece of microfiber and apply gentle pressure while rotating it in place. Avoid pressing down hard enough to depress multiple keys simultaneously.
- Allow full drying time. Let the laptop sit powered off for at least 30 minutes to ensure all moisture evaporates. Never turn it on while damp.
- Test functionality. Power on the laptop and type a few sentences to confirm all keys respond normally.
Do’s and Don’ts When Cleaning Your Keyboard
| Do’s | Don’ts |
|---|---|
| Use 70% isopropyl alcohol on a microfiber cloth | Use household cleaners like Windex or bleach wipes |
| Let the laptop dry completely before powering on | Rinse keys with water or submerge any part |
| Clean in a well-lit area to spot grime easily | Use excessive pressure when wiping or brushing |
| Store the laptop in a dust-free environment after cleaning | Remove keys unless absolutely necessary and experienced |
| Wipe down palm rests and screen bezel at the same time | Use paper towels or tissues that leave lint behind |
Expert Insight: What Professionals Recommend
According to Dr. Lin Zhao, senior hardware technician at TechCare Labs, “The biggest mistake people make is assuming their laptop keyboard can handle the same cleaning agents as countertops. Electronics require precision and moderation.”
“Even small amounts of liquid trapped under keys can corrode circuitry over time. Always apply cleaner to the cloth—not directly to the laptop—and never rush the drying phase.” — Dr. Lin Zhao, Senior Hardware Technician
He also emphasizes preventive maintenance: “A five-minute wipe-down every few weeks takes less time than troubleshooting a malfunctioning key later.”
Mini Case Study: Recovering a Heavily Soiled Work Laptop
Mark, a freelance writer based in Portland, noticed his MacBook Pro’s “S” and “D” keys were increasingly unresponsive. After six months of daily use—often while snacking—he realized the entire keyboard felt slick and grimy. He tried wiping it with a damp paper towel, which only smeared the grease.
Following the method outlined here, he used compressed air, a microfiber cloth dampened with 70% alcohol, and cotton swabs. Within 40 minutes, the keys regained tactile feedback, and the sticky sensation disappeared. Most importantly, no keys failed post-cleaning. Mark now cleans his laptop every five weeks and reports improved typing comfort and reliability.
Frequently Asked Questions
Can I remove the keys to clean underneath?
While possible on some models, removing laptop keys carries risk. Many laptops use scissor-switch mechanisms that can snap if pried improperly. Unless you have replacement keys or technical experience, avoid removal. Most grease can be cleaned effectively without detaching keys.
Is it safe to use alcohol on my laptop keyboard?
Yes, 70% isopropyl alcohol is widely recommended by manufacturers and repair technicians. It evaporates quickly, kills germs, and dissolves oils without harming ABS plastic or coatings. Just apply it indirectly via a cloth or swab—never spray or pour it directly.
How often should I clean a greasy keyboard?
For heavy users (5+ hours daily), clean every 4–6 weeks. Light users can wait 8–10 weeks. If you eat near your laptop or live in a dusty environment, increase frequency. Visible shine or stickiness are clear signs it’s time to clean.
Prevent Future Grease Buildup
Once your keyboard is clean, maintain it with simple daily habits:
- Wash hands before extended typing sessions.
- Avoid eating directly over the laptop.
- Keep a microfiber cloth nearby for quick wipe-downs.
- Use a silicone keyboard cover if portability allows (though these can trap heat and aren’t suitable for gaming or high-performance tasks).
- Store the laptop in a closed case when traveling.
Regular maintenance prevents deep-set grime and reduces the need for intensive cleaning sessions. Think of it like dental hygiene—small efforts daily prevent major issues later.
Conclusion: A Clean Keyboard Is a Functional One
Your laptop keyboard endures constant contact and wear, making it one of the most handled—and overlooked—parts of your device. Grease isn’t just unsightly; it compromises both hygiene and performance. By following a careful, science-backed cleaning process using isopropyl alcohol, microfiber cloths, and compressed air, you can restore your keyboard to like-new condition without risking damage.
The best practices are simple: work slowly, use the right tools, and prioritize safety over speed. With minimal investment in time and supplies, you extend your laptop’s usability and enjoy a more pleasant, sanitary workspace.


 浙公网安备
33010002000092号
浙公网安备
33010002000092号 浙B2-20120091-4
Comments
No comments yet. Why don't you start the discussion?