
A well-organized pantry transforms meal preparation from a chaotic scramble into a smooth, intuitive process. When ingredients are visible, accessible, and logically grouped, cooking becomes faster, more enjoyable, and less wasteful. Yet, many pantries descend into clutter—half-empty boxes, expired sauces, and forgotten spices buried behind newer purchases. The solution isn’t just tidying; it’s strategic organization tailored to how you cook and eat. By rethinking storage, labeling, and layout, you can create a pantry that supports your daily routine rather than hinders it.
Start with a Strategic Pantry Audit
The foundation of an efficient pantry begins with a complete inventory. Remove every item and assess what you own, what’s expired, and what duplicates exist. This audit reveals patterns in your consumption and helps eliminate waste. Group items by category: baking supplies, canned goods, grains, snacks, condiments, and so on. As you evaluate each product, ask:
- When was this opened or purchased?
- Is it nearing expiration?
- Do I use this regularly?
- Do I already have a similar item?
This process not only clears space but also highlights gaps in your usual stock. For example, realizing you frequently run out of olive oil may prompt you to designate a dedicated spot for cooking fats. Conversely, finding three nearly empty bags of quinoa suggests overbuying—a habit to correct moving forward.
Zone-Based Organization for Functional Flow
Instead of organizing solely by food type, consider how you use ingredients during meal prep. A zone-based system groups items by function, aligning with the steps of cooking. Common zones include:
- Baking Station: Flour, sugar, baking powder, vanilla, chocolate chips
- Grains & Pasta: Rice, quinoa, pasta, couscous
- Canned & Jarred Goods: Tomatoes, beans, broths, pickles
- Breakfast Zone: Cereal, oatmeal, granola, coffee, tea
- Snack Hub: Nuts, crackers, dried fruit, protein bars
- Cooking Essentials: Oils, vinegars, soy sauce, spices
Zones reduce decision fatigue. When assembling dinner, you go directly to the “grains” shelf without scanning unrelated items. This method works especially well in deep pantries or walk-ins where physical separation is possible. Use labeled bins or baskets to reinforce boundaries between zones.
“Organization isn’t about perfection—it’s about creating systems that match real-life behavior.” — Sarah Chen, Home Efficiency Consultant
Maximize Visibility and Accessibility
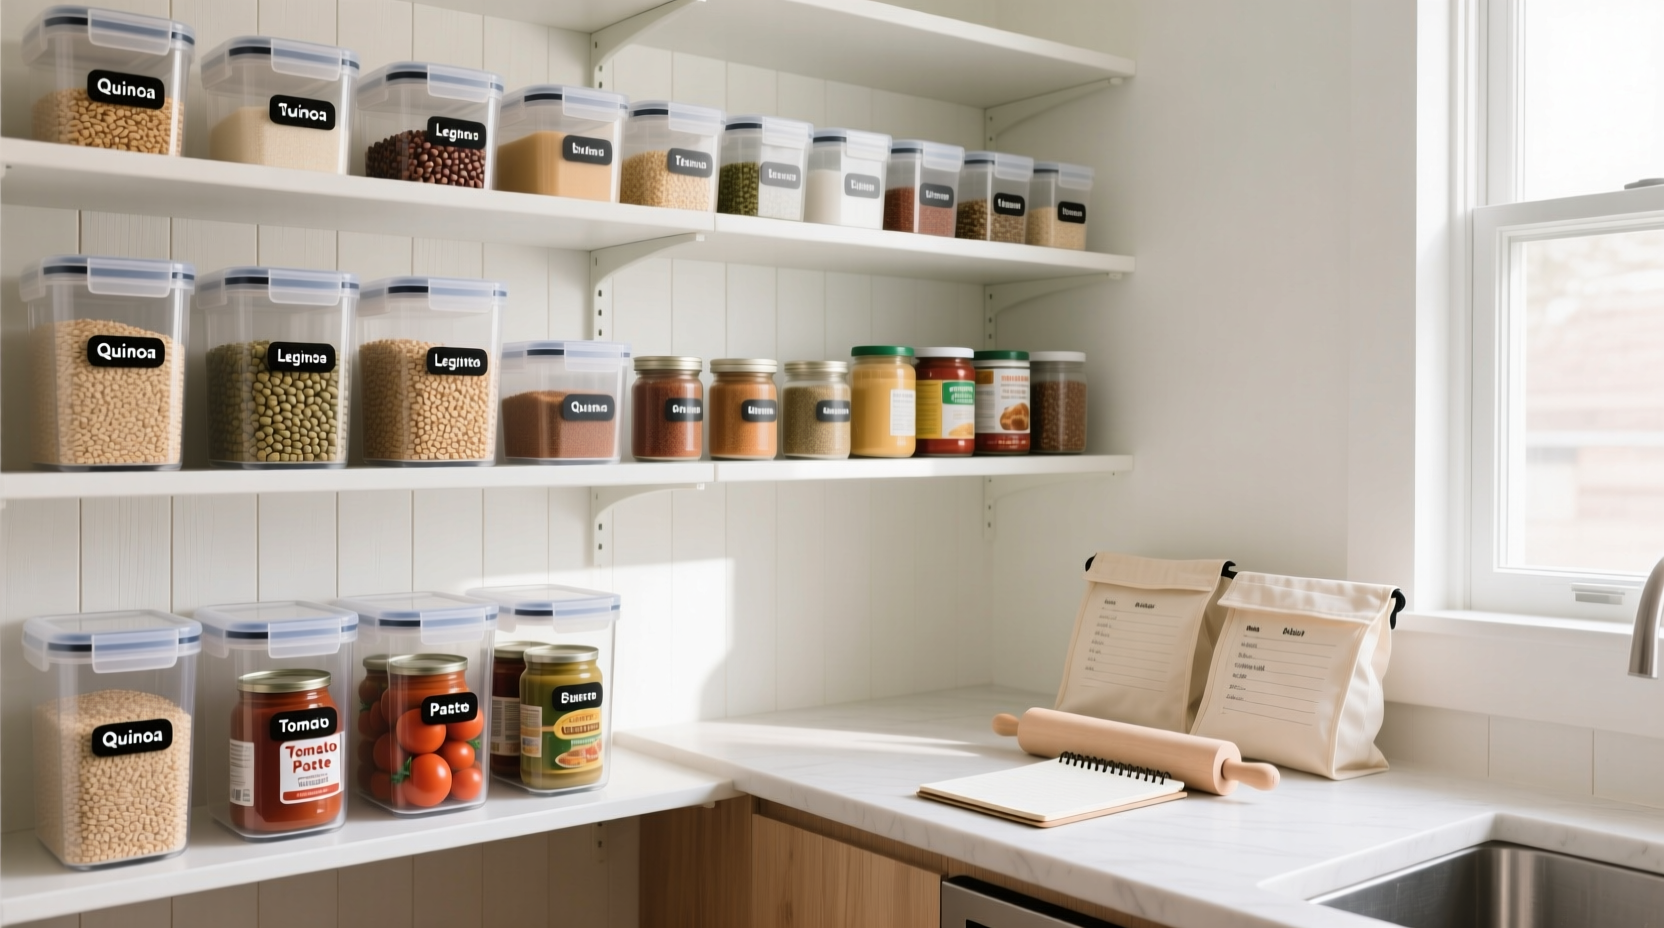
No system works if you can’t see what you have. Transparent containers are essential for dry goods like flour, rice, lentils, and cereal. Glass or BPA-free plastic jars with airtight lids preserve freshness while allowing instant visual checks. Uniform containers also create a clean aesthetic, but functionality matters more than appearance.
For smaller items—tea bags, seasoning packets, spice sachets—use tiered shelves or turntables (lazy Susans). These tools bring rear items forward, eliminating the need to move multiple objects just to reach one. Stackable bins work well for cans, allowing you to see labels at a glance.
| Item Type | Best Storage Method | Visibility Tip |
|---|---|---|
| Dry Grains & Pasta | Airtight clear containers | Label with contents and purchase date |
| Canned Goods | Stackable wire racks or tiered shelves | Face labels outward; group by type |
| Spices | Turntable or drawer inserts | Alphabetize or group by cuisine |
| Snacks | Bins with dividers | Use clear-front baskets |
| Baking Supplies | Labeled bins or pull-out drawers | Group by frequency of use |
Shelving height should reflect usage frequency. Frequently used items—like cooking oil or everyday spices—belong at eye level. Rarely used appliances or seasonal ingredients can occupy higher or lower shelves.
Step-by-Step Guide to Pantry Reorganization
Follow this sequence to build a functional, lasting system:
- Empty the pantry completely. Place items on counters or tables to assess everything.
- Discard expired or stale products. Recycle packaging where possible.
- Clean shelves thoroughly. Wipe down surfaces with mild soap and water.
- Sort items into categories. Use temporary zones on the counter.
- Purchase storage solutions as needed. Focus on clear containers, bins, and organizers.
- Assign zones based on usage. Map out which category goes where.
- Transfer dry goods to labeled containers. Include product name and date.
- Install organizers like turntables or risers. Maximize depth and vertical space.
- Place items in their zones. Follow FIFO principles.
- Take a photo of the final layout. Use it as a reference for future resets.
This process takes 2–3 hours initially but pays dividends in time saved weekly. Reassess every 3–4 months to adapt to changing eating habits or seasonal needs.
Real-Life Example: From Chaos to Clarity
Consider Maria, a working parent of two, who spent 15 minutes nightly searching for ingredients. Her pantry overflowed with open boxes, mismatched containers, and no clear system. After a weekend overhaul using the zone method, she created dedicated areas: one shelf for school-day snacks, another for weeknight dinner staples like pasta and canned tomatoes, and a high shelf for occasional-use items like party decorations.
She invested in six large glass jars for rice, oats, sugar, and flour, and used small bins for spice packets and bouillon cubes. Within a week, her meal prep time dropped by nearly half. She could now see exactly what she had, reducing duplicate grocery purchases. Most importantly, her kids began helping themselves to snacks independently, decreasing household stress.
Maria’s success wasn’t due to expensive organizers but consistent categorization and placement based on real usage patterns.
Essential Checklist for Pantry Success
Use this checklist to ensure your pantry setup supports long-term efficiency:
- ✅ Removed all expired or stale items
- ✅ Cleaned shelves and walls
- ✅ Sorted items into logical categories
- ✅ Invested in clear, airtight containers for dry goods
- ✅ Labeled all containers with contents and dates
- ✅ Installed turntables or risers for deep shelves
- ✅ Grouped items by usage (zones), not just type
- ✅ Placed frequently used items at eye level
- ✅ Applied FIFO (first in, first out) rotation
- ✅ Took a \"before and after\" photo for reference
Revisit this list quarterly to maintain order, especially after bulk shopping trips or seasonal changes in diet.
Frequently Asked Questions
How do I organize a small pantry with limited shelf space?
Maximize vertical space with stackable bins and over-the-door organizers. Use wall-mounted racks for spices or small jars. Prioritize multi-functional items and minimize duplicates. Consider storing bulk items in a basement or closet if available, rotating them in as needed.
Should I keep food in its original packaging?
No—original packaging often obscures contents and degrades over time. Transfer dry goods like pasta, rice, and cereal into clear, airtight containers. Keep barcodes or lot numbers inside the container if needed for recalls. Exceptions include items with built-in pour spouts or resealable features, like certain broths or nut butters.
What’s the best way to store spices for longevity and access?
Store spices in a cool, dark place away from heat sources like the stove. Use uniform jars with tight lids and label clearly. Organize alphabetically for quick lookup or by cuisine (e.g., Italian, Indian, Mexican). Replace ground spices every 6–12 months and whole spices every 2–3 years for optimal flavor.
Conclusion: Build a Pantry That Works for You
An organized pantry is not a static display—it’s a dynamic tool designed to support your lifestyle. The best system reflects how you cook, shop, and eat. Whether you prepare meals daily or rely on quick fixes, clarity and accessibility reduce friction in your routine. By implementing zones, prioritizing visibility, and maintaining consistency, you create a space that saves time, reduces waste, and makes cooking feel effortless.
Start small if needed: reorganize one shelf today, then expand. Use affordable, reusable containers and focus on function over aesthetics. Once your system is in place, you’ll wonder how you ever managed without it.


 浙公网安备
33010002000092号
浙公网安备
33010002000092号 浙B2-20120091-4
Comments
No comments yet. Why don't you start the discussion?