
Blisters on the feet are a common yet painful condition caused by friction, heat, or moisture—often from ill-fitting shoes or prolonged physical activity. While they may seem minor, improper handling can lead to infection, delayed healing, or recurring discomfort. The key is not just removing or treating a blister, but doing so in a way that promotes fast recovery and prevents complications. This guide delivers medically sound, practical methods to manage foot blisters safely, reduce pain, and protect your mobility.
Understanding Foot Blisters: Causes and Types
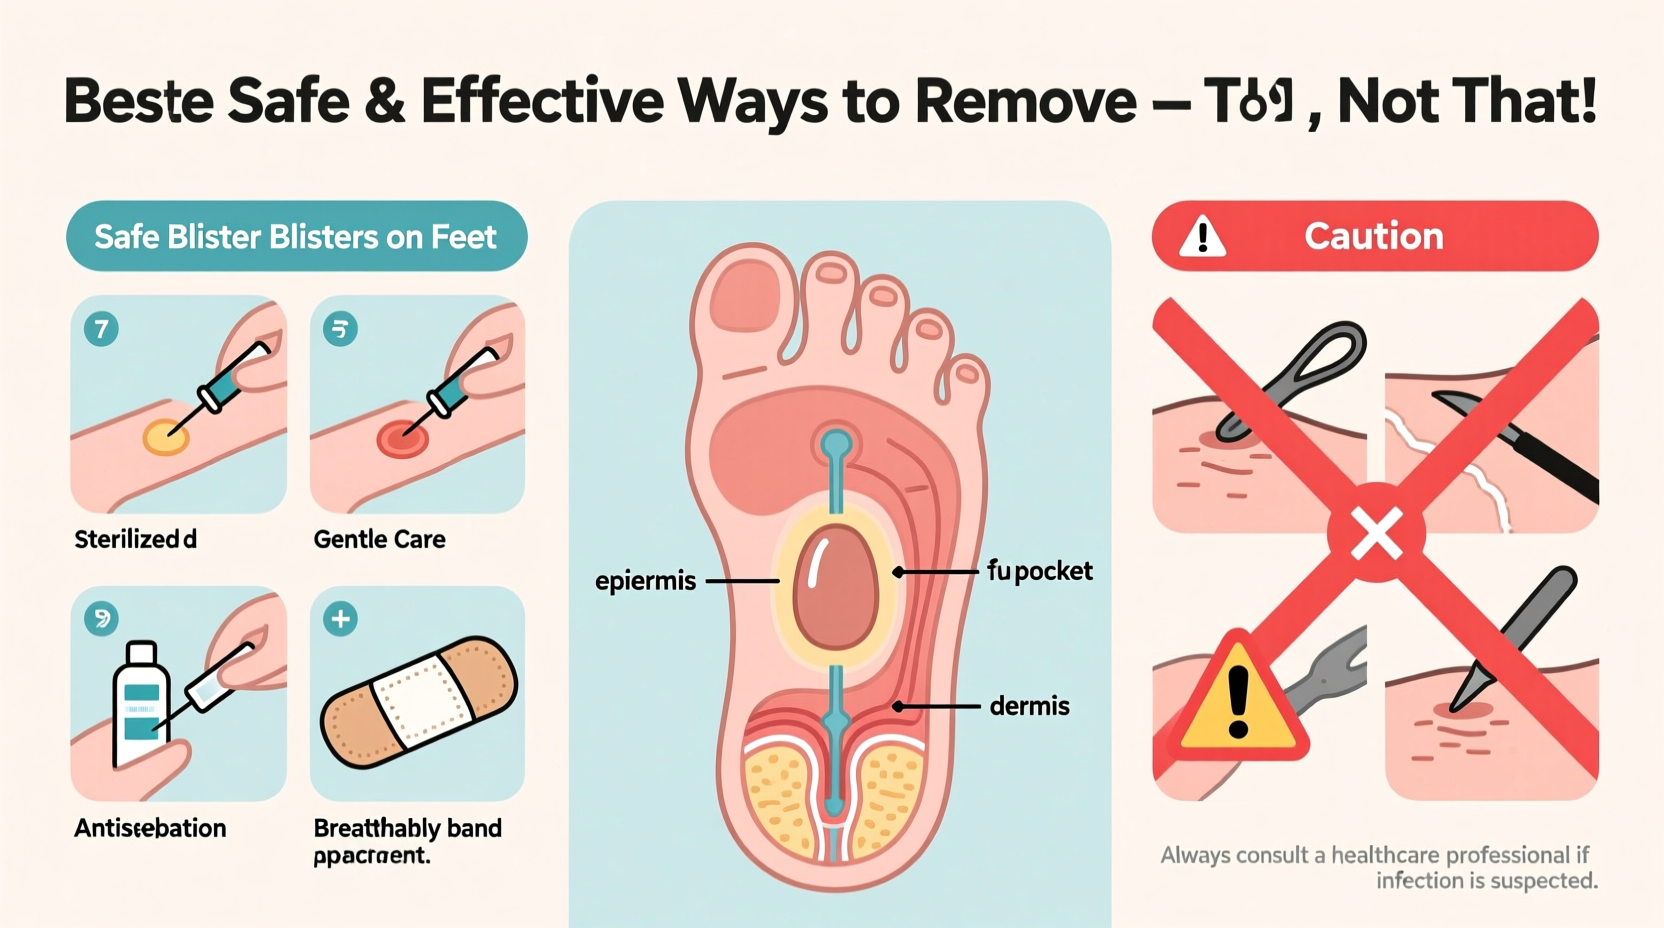
A blister forms when the outer layer of skin separates from the layers beneath due to repeated rubbing, burns, or allergic reactions. Fluid fills the gap, creating a protective cushion that allows underlying tissue to heal. Most foot blisters are friction-related, especially among runners, hikers, or people breaking in new shoes.
There are several types of blisters:
- Filled blisters: Contain clear fluid (serum) and are typically intact.
- Blood blisters: Occur when small blood vessels break under pressure; appear red or purple.
- Popped blisters: Have ruptured naturally or accidentally, exposing raw skin.
Not all blisters require intervention. In fact, leaving an intact blister undisturbed is often the safest approach. The body’s natural barrier reduces infection risk and accelerates healing.
“An intact blister is nature’s bandage. Unless it’s extremely large or painful, it's usually best to leave it alone.” — Dr. Alan Foster, Podiatrist and Wound Care Specialist
Step-by-Step Guide to Safely Treat a Blister
If a blister is causing significant discomfort or is at high risk of tearing, careful drainage may be necessary. Follow this sterile, controlled process:
- Wash your hands and clean the area: Use soap and warm water to clean both your hands and the blistered foot. Dry thoroughly.
- Disinfect the blister: Apply rubbing alcohol or iodine solution to sterilize the surface.
- Use a sterile needle: Flame-sterilize a fine needle and allow it to cool. Gently pierce the edge of the blister in one or two spots.
- Drain gently: Press lightly around the blister to express fluid. Do not remove the overlying skin—it protects the wound.
- Apply antiseptic: Dab on an antibiotic ointment like bacitracin or neomycin.
- Cover with a non-stick dressing: Use a hydrocolloid bandage or gauze pad secured with medical tape. Change daily.
Do’s and Don’ts When Managing Foot Blisters
| Do’s | Don’ts |
|---|---|
| Keep the blister covered with a sterile bandage | Pop a blister unnecessarily |
| Wear moisture-wicking socks during activity | Peel off loose skin after a blister breaks |
| Elevate the foot if swollen | Continue wearing the shoes that caused the blister |
| Monitor for signs of infection (redness, pus, warmth) | Soak the blister in unclean water |
| Use moleskin or blister pads for protection | Apply adhesive bandages directly on open wounds |
Real-Life Scenario: Hiker’s Long-Distance Recovery
Sarah, an experienced hiker, developed a large friction blister on her heel during a 15-mile trek. Instead of popping it immediately, she stopped to assess. The blister was intact but painful under pressure. She cleaned the area with antiseptic wipes, applied a hydrocolloid dressing, and used athletic tape to secure it. She changed into trail sandals to relieve pressure and completed the hike with minimal discomfort. Over the next three days, she changed the dressing daily, kept the area dry, and avoided tight footwear. By day five, the blister had flattened naturally and healed without infection.
This case highlights the importance of patience, proper materials, and minimizing further trauma. Sarah’s decision to preserve the blister roof prevented contamination and sped up recovery.
Effective Home Remedies and Supportive Care
While medical-grade treatments are ideal, several home-based practices support healing:
- Aloe vera gel: Soothes inflammation and moisturizes healing skin. Use pure gel, not scented lotions.
- Tea tree oil (diluted): Has natural antiseptic properties. Mix 1–2 drops with a carrier oil before spot application.
- Warm Epsom salt soak (only for drained blisters): After the blister has opened, soaking in warm water with Epsom salts can reduce swelling and cleanse the area. Limit to 15 minutes once daily.
- Vitamin E oil: Applied after healing begins, it may improve skin regeneration and reduce scarring.
Prevention Checklist: Stop Blisters Before They Start
Preventing blisters is more effective than treating them. Use this checklist before engaging in physical activity:
- ✅ Wear well-fitted, broken-in shoes—never rely on “breaking them in” during long walks.
- ✅ Choose moisture-wicking socks made of wool or synthetic blends (avoid cotton).
- ✅ Use double-layer socks or liner socks to reduce friction.
- ✅ Apply lubricants like petroleum jelly or anti-chafe balms to hot spots.
- ✅ Tape vulnerable areas (heels, toes) with athletic or zinc oxide tape before hikes.
- ✅ Keep feet dry—carry extra socks and change them mid-activity if needed.
- ✅ Trim toenails regularly to prevent pressure points inside shoes.
When to Seek Medical Attention
Most blisters resolve within 3 to 7 days with proper care. However, certain symptoms indicate a need for professional evaluation:
- Pus, increasing redness, or foul odor (signs of infection)
- Spreading red streaks from the blister site
- Fever or chills accompanying the blister
- Recurrent blisters without clear cause
- Blisters related to burns, chemicals, or underlying conditions like diabetes
People with diabetes or poor circulation should never self-treat foot blisters. Even minor injuries can escalate quickly due to reduced sensation and impaired healing.
FAQ: Common Questions About Foot Blisters
Can I continue exercising with a blister?
Yes, but only if the blister is protected. Use blister pads, moleskin, or specialized tapes to cushion the area. If pain worsens or the blister ruptures, stop activity and treat it promptly.
Is it better to cover a blister or let it breathe?
Covering is generally better. A covered blister stays clean, moist, and protected. Uncovered blisters can dry out, crack, and become infected. Use breathable dressings and change them daily.
How long does it take for a blister to heal?
An intact blister usually flattens within 3–5 days as the fluid is reabsorbed. Full skin regeneration takes 7–10 days. Drained or torn blisters may take longer, especially if exposed to continued friction.
Final Thoughts: Smart Care Leads to Faster Recovery
The best way to remove blisters on feet isn't always about removal—it's about smart management. Whether you're dealing with a small friction blister or a larger, painful one, the principles remain the same: protect the area, avoid infection, and support natural healing. With the right knowledge, tools, and preventive habits, you can minimize downtime and keep moving comfortably.


 浙公网安备
33010002000092号
浙公网安备
33010002000092号 浙B2-20120091-4
Comments
No comments yet. Why don't you start the discussion?