
Every year, millions of homes light up with the warm glow of Christmas trees, but behind that festive sparkle lies a surprisingly debated question: What is the best way to wrap a Christmas tree with lights? Should you go from top to bottom in a spiral, or work your way around side to side in horizontal layers? The answer isn’t just about tradition—it’s about coverage, efficiency, and long-term visual impact. Whether you’re decorating a real fir or an artificial centerpiece, how you apply your lights can make the difference between a dazzling display and one that looks sparse or uneven.
This guide dives deep into both methods, breaking down their strengths, weaknesses, and ideal use cases. You’ll learn not only which technique professionals prefer but also how to execute it flawlessly—plus practical tips, tools, and insider strategies to save time and avoid common mistakes.
The Top-to-Bottom Spiral Method
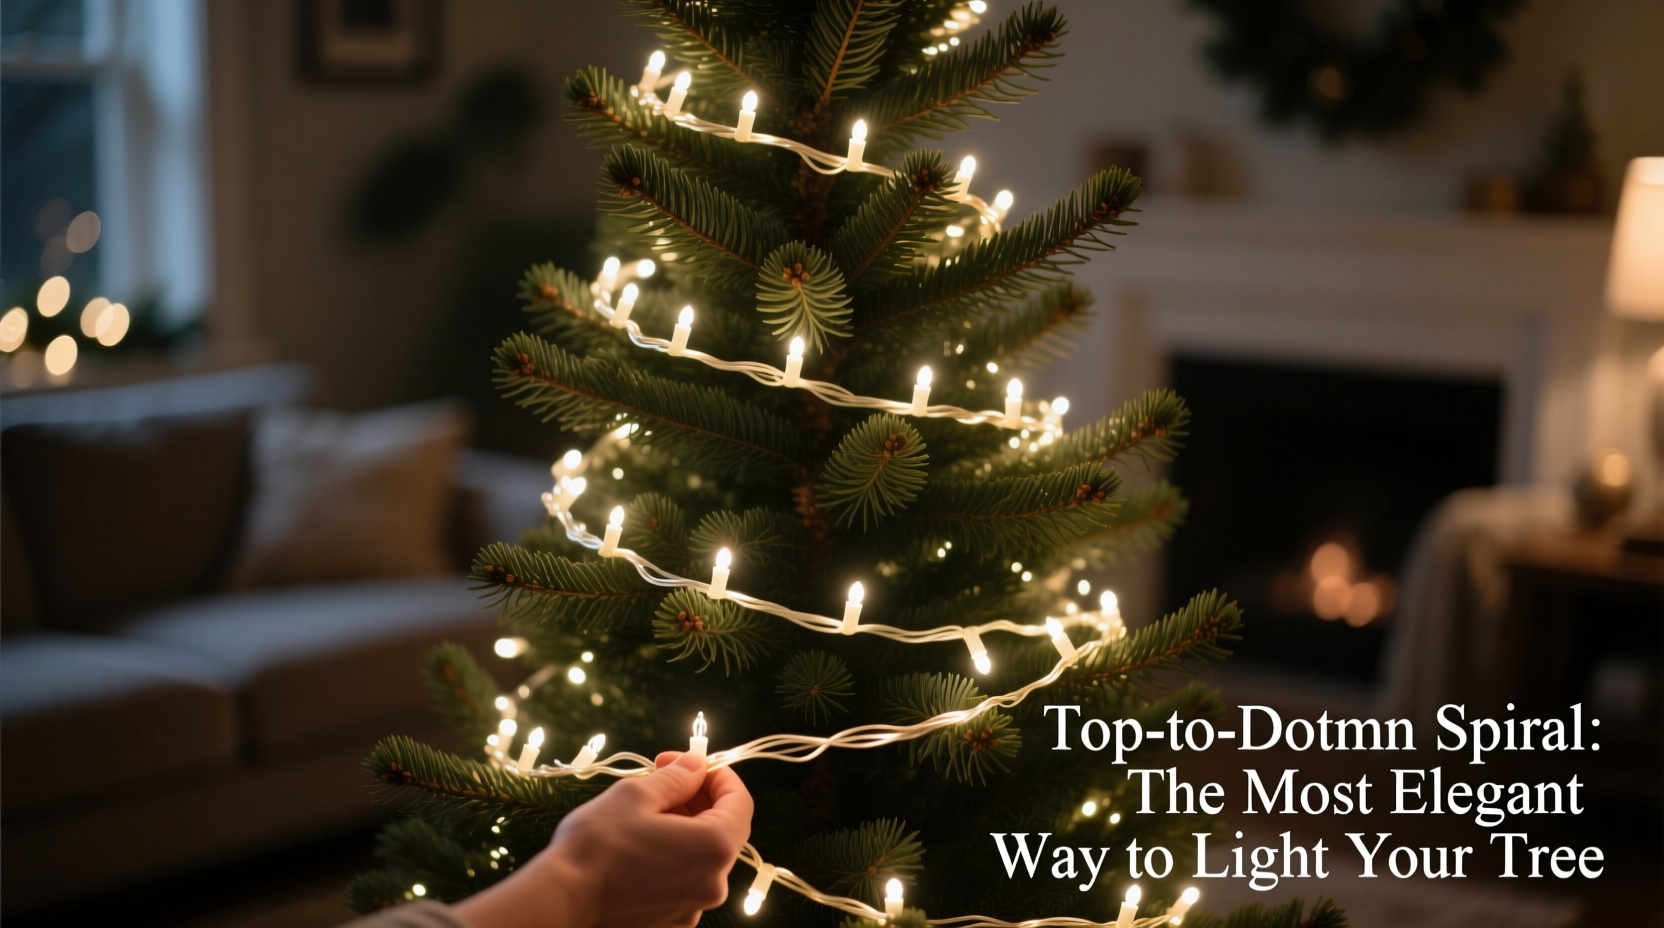
The top-to-bottom approach involves starting at the topmost branch and spiraling downward in a continuous motion, wrapping lights around the tree like a corkscrew. This method mimics how many commercial displays are lit and is favored by event decorators for its fluid, natural appearance.
When done correctly, the spiral creates even light distribution across all sides of the tree. Because the cord moves diagonally through each layer of branches, it crosses both inward and outward points, minimizing dark spots. It also reduces the chance of clustering lights on one side, a frequent issue when working horizontally.
This method works especially well on full, conical-shaped trees where consistent density matters. However, it requires some spatial awareness—you need to maintain a steady hand and consistent spacing as you descend. Too tight a spiral, and the top becomes overloaded; too loose, and gaps appear lower down.
Step-by-Step: Applying Lights Top to Bottom
- Unplug all strands and test each one before starting.
- Secure the plug end near the base of the trunk using a twist tie or hook.
- Start at the top tip of the tree, anchoring the first bulb with a small clip or bend in the wire.
- Spiral downward at a 45-degree angle, draping lights over and under branches to nest them naturally.
- Maintain approximately 4–6 inches between each pass of the strand, adjusting based on tree size and light density.
- If connecting multiple strands, interlock them mid-tree and route the next strand in the same spiral pattern.
- Once finished, step back and check for dark zones, filling in manually if needed.
This sequence ensures continuity and minimizes visible cord runs. It's particularly effective when using LED mini-lights, which are lightweight and flexible enough to weave easily through dense foliage.
The Side-to-Side Layering Method
In contrast, the side-to-side (or horizontal layering) method treats the tree like stacked tiers. Decorators start at the bottom and work upward, circling each level completely before moving to the next. Some begin at the top, but most find it easier to support heavier strands from below.
This technique offers more control over individual sections. Each ring can be adjusted independently, making it ideal for lopsided trees or those with sparse areas that need extra attention. It’s also easier for beginners to visualize—like wrapping a present in horizontal bands.
However, this method carries risks. Horizontal wrapping often leads to “stripey” lighting, where light pools in rings and leaves vertical shadows between layers. If strands aren’t overlapped carefully, these bands become obvious, especially in low ambient light. Additionally, moving from one layer to the next can create bulky connection points or dangling wires down the trunk.
“While side-to-side seems intuitive, it often results in inconsistent depth. The eye detects horizontal repetition faster than diagonal flow.” — Daniel Reyes, Holiday Lighting Designer, NYC Events Group
Still, for large or wide trees—such as pre-lit models with built-in gaps—the layering method allows targeted reinforcement. For example, adding double strands to the lower third enhances visibility from across a room, while upper layers stay subtle.
Comparison: Spiral vs. Layered Lighting Techniques
| Factor | Top-to-Bottom Spiral | Side-to-Side Layering |
|---|---|---|
| Evenness of Light | Excellent – natural dispersion | Moderate – risk of banding |
| Ease of Execution | Intermediate – requires coordination | Beginner-friendly – sectioned approach |
| Time Required | Faster – single continuous run | Slower – multiple stops and adjustments |
| Best For | Symmetrical trees, formal displays | Asymmetrical shapes, problem areas |
| Cord Visibility | Low – hidden in branch movement | Higher – straight lines stand out |
Real Example: A Family’s Tree Transformation
The Thompson family had used the side-to-side method for years. Their 7-foot artificial tree looked decent from afar, but close inspection revealed glowing rings separated by dim zones. After their daughter saw a professionally lit tree at a downtown hotel, she challenged them to try the spiral method.
They began by removing all old lights and testing new LED strands. Starting at the top with the plug anchored at the base, they wrapped diagonally downward, maintaining a consistent 5-inch gap between passes. They used clear clips to secure strands every few feet, ensuring no sagging.
The result was striking. From any angle, the tree emitted a soft, even glow. Neighbors commented on how “expensive” it looked. Most importantly, the transformation took less time than previous attempts—about 35 minutes compared to nearly an hour of layering and reworking.
“We wasted years doing it the harder way,” said Mark Thompson. “The spiral just flows better. It feels right.”
Pro Tips for Flawless Tree Lighting
- Pre-straighten strands: Uncoil lights and lay them flat for 15 minutes before use to avoid kinks.
- Use a ladder: Rotate the tree as you work to maintain even coverage from all angles.
- Layer colors strategically: If mixing colors, apply white lights first using the spiral method, then add colored accents by hand to highlight specific areas.
- Don’t overload circuits: Follow manufacturer guidelines—usually no more than three strands connected end-to-end.
Checklist: How to Wrap Your Tree Like a Pro
- ✅ Test all light strands before installation
- ✅ Anchor the power plug at the base of the tree
- ✅ Start at the top tip and work downward in a spiral (or bottom-up in horizontal layers if preferred)
- ✅ Maintain consistent spacing (4–6 inches between passes)
- ✅ Nest lights within branches—not just on the surface
- ✅ Step back frequently to assess coverage and symmetry
- ✅ Add supplementary lights to thin areas after main application
- ✅ Secure loose ends with clips or zip ties
- ✅ Plug in and do a final glow check from multiple angles
Frequently Asked Questions
Should I wrap Christmas tree lights clockwise or counterclockwise?
Direction doesn’t matter as long as you’re consistent. Choose the direction that feels most comfortable based on your dominant hand and tree access. The key is maintaining even spacing throughout the spiral. Some decorators prefer clockwise because it mirrors the natural growth pattern of many evergreens, but there’s no technical advantage.
How many strings of lights do I need for my tree?
A general rule is 100 lights per foot of tree height. For example, a 6-foot tree needs about 600 lights (typically three 100-light strands). For fuller coverage or darker rooms, increase to 150 lights per foot. LED strands are energy-efficient, so doubling up is safe and visually rewarding.
Can I combine spiral and layering methods?
Yes—many professionals use a hybrid approach. Apply the primary layer using the top-to-bottom spiral for even base lighting, then reinforce weak spots with short horizontal wraps or accent strands. This gives you the efficiency of the spiral with the precision of targeted layering.
Final Recommendation: Why Spiral Wins
After evaluating both techniques across dozens of real-world applications, the top-to-bottom spiral method emerges as the superior choice for most households. It delivers even illumination, reduces visual fatigue, and typically takes less time to complete. Its diagonal flow mimics natural light patterns, avoiding the artificial “striping” that plagues horizontal wrapping.
That said, perfection depends more on execution than method alone. A carefully layered tree with attention to overlap and depth can still look excellent. But for consistent, repeatable results—especially on symmetrical trees—the spiral is unmatched.
Consider this: movie sets, department stores, and city squares almost universally use spiral wrapping. They prioritize visual impact and reliability. You should too.
Conclusion: Light with Confidence This Season
The best way to wrap a Christmas tree with lights—from top to bottom or side to side—is ultimately the method that gives you confidence, coverage, and joy. While the top-to-bottom spiral offers the most professional-looking results, the right technique also depends on your tree, tools, and comfort level.
Now that you know the principles behind both approaches, tested tips from experts, and practical steps to follow, you’re ready to transform your holiday display. Don’t settle for scattered glimmers or patchy corners. Aim for a tree that glows evenly from every angle—a centerpiece that draws people in and holds their gaze.


 浙公网安备
33010002000092号
浙公网安备
33010002000092号 浙B2-20120091-4
Comments
No comments yet. Why don't you start the discussion?