
Crackers are a pantry staple—perfect for cheese boards, soups, or quick snacks. But when they sit too long, they lose their crispness and become soft, chewy, or even slightly musty. Rather than tossing them out or serving lackluster snacks, there are subtle, reliable techniques to bring stale crackers back to life. The goal isn’t just restoration—it’s doing so seamlessly, so no guest, coworker, or family member suspects you ever doubted their freshness.
With a few minutes and basic kitchen tools, you can revive stale crackers so effectively that even seasoned snackers won’t detect a difference. Whether you’re hosting last-minute guests, packing school lunches, or simply avoiding food waste, these methods deliver real results without fanfare.
The Science Behind Stale Crackers
Staling isn’t just about drying out—it’s a structural change in the starch molecules within the cracker. Over time, moisture migrates from the interior to the surface, where it evaporates, leaving behind a rigid, brittle texture. Simultaneously, starch retrogradation occurs: the gelatinized starch recrystallizes, making the cracker tough and less palatable.
This process accelerates in humid environments (where condensation leads to sogginess) or dry ones (where moisture loss is rapid). Temperature fluctuations worsen it. Understanding this helps explain why simply leaving a cracker out won’t fix it—and why targeted heat and moisture control are essential.
“Reviving stale crackers isn’t magic—it’s controlled rehydration and reheating. You’re essentially resetting the starch structure.” — Dr. Lena Ruiz, Food Scientist at the Institute of Baked Goods Research
Best Methods to Restore Crispness (Without Drawing Attention)
The key to successful revival lies in speed, simplicity, and discretion. The method should be quiet, fast, and leave no trace of effort. Here are the most effective approaches:
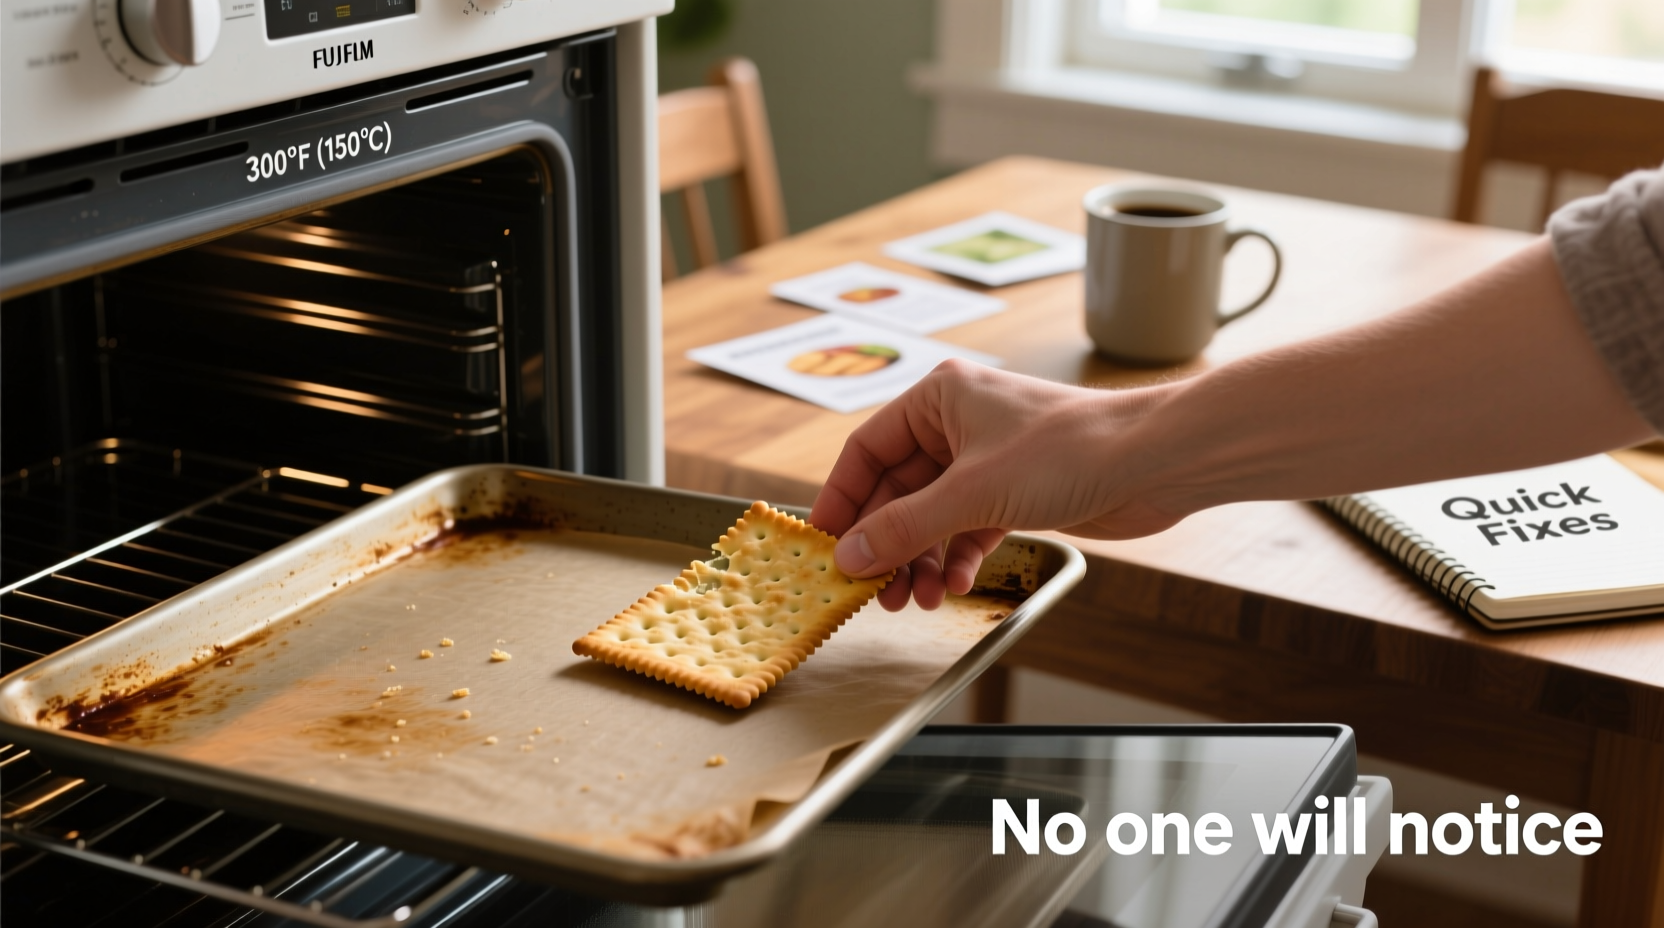
1. The Oven Re-Crisp Method
The oven offers the most consistent results. It gently removes excess moisture while restoring uniform crispness.
- Preheat your oven to 300°F (150°C).
- Spread the crackers in a single layer on a baking sheet.
- Heat for 5–7 minutes, checking every two minutes after the fifth.
- Remove once crisp but not browned further.
- Cool completely before serving.
2. Microwave with a Damp Paper Towel
For urgent situations—say, guests arriving in ten minutes—this method works quickly, though with more risk.
Place the stale crackers on a microwave-safe plate. Cover them with a slightly damp paper towel. Microwave in 10-second bursts. After each interval, check texture. Most crackers revive in 20–30 seconds total.
The damp towel introduces minimal moisture, which the microwave then evaporates rapidly, carrying away internal moisture and leaving crispness behind. Overheating causes burning or uneven texture, so caution is essential.
3. Air Fryer Touch-Up
Air fryers excel at restoring crisp foods. Their rapid convection heat mimics deep frying without oil.
Set the air fryer to 300°F (150°C). Place crackers in a single layer—do not overcrowd. Heat for 2–3 minutes. Shake the basket halfway through. Cool briefly before serving.
This method is ideal for buttery crackers like club or tea biscuits, which benefit from slight fat redistribution during heating.
4. The Jar & Rice Desiccant Trick (Long-Term Prevention)
While not a revival method, this prevents staleness in opened packages. Place crackers in an airtight glass jar with a small handful of uncooked rice or silica gel packets. The rice absorbs ambient moisture, keeping crackers dry and crisp for weeks longer.
This isn’t a fix for already-stale crackers—but it ensures future batches stay fresh, reducing the need for last-minute rescues.
Do’s and Don’ts of Cracker Revival
| Do | Don’t |
|---|---|
| Use low heat for longer periods to avoid burning. | Apply high heat immediately—this scorches edges while leaving centers soft. |
| Store revived crackers in airtight containers immediately after cooling. | Leave them exposed to air—they’ll re-stale within hours. |
| Check frequently during reheating; thin crackers go from stale to burnt fast. | Walk away mid-process. Timing is critical. |
| Revive only what you plan to use within 24 hours. | Reheat large batches days in advance—crispness fades again. |
| Label jars clearly to avoid confusion with other pantry items. | Mix different cracker types in one revival batch—flavors and thicknesses vary. |
Real-Life Scenario: The Unexpected Guests
Sarah was preparing a charcuterie board when she realized her favorite water crackers had been open for over three weeks. They were limp and lacked snap. Her sister was due in 15 minutes with friends in tow.
She didn’t panic. She preheated her toaster oven to 300°F, arranged the crackers on a tray, and heated them for six minutes. While they cooled, she finished assembling the board. When guests arrived, no one suspected a thing. In fact, one complimented the “perfectly crisp” crackers.
The trick? Sarah didn’t mention the rescue operation. She served them naturally, alongside cheeses and jams. The revival was invisible—not just physically, but socially. No explanations, no embarrassment, just great snacks.
Step-by-Step Guide: Refreshing Crackers in Under 10 Minutes
Follow this timeline when time is tight:
- 0–2 min: Gather stale crackers and select the revival method (oven, microwave, or air fryer).
- 2–3 min: Prepare equipment (preheat oven or set microwave settings).
- 3–5 min: Arrange crackers in a single layer on a tray or plate.
- 5–8 min: Heat using chosen method:
- Oven: 5–7 min at 300°F
- Microwave: 10–30 sec with damp towel
- Air fryer: 2–3 min at 300°F
- 8–10 min: Cool completely (critical for crispness), transfer to serving dish, and serve confidently.
When Not to Revive: Safety First
Not all stale crackers can—or should—be saved. Discard crackers that show any of the following:
- Visible mold (fuzzy spots, discoloration)
- Rancid smell (buttery crackers with sour or paint-like odor)
- Excessive crumbling beyond normal fragility
- Storage near strong odors (they absorb smells like spices or cleaning agents)
Revival techniques work on texture issues due to moisture imbalance—not spoilage. Consuming rancid fats or mold can cause illness. When in doubt, throw it out.
Frequently Asked Questions
Can I freeze crackers to keep them fresh?
Yes, freezing is excellent for long-term storage. Place unopened or sealed packages in the freezer for up to six months. Thaw at room temperature in an airtight container to prevent condensation. Freezing halts staling and preserves flavor. Avoid refreezing thawed crackers.
Why do some crackers taste bitter after reheating?
Bitterness usually indicates oxidation of fats, especially in whole grain or cheese-flavored varieties. If bitterness occurs, the crackers were likely past their prime before reheating. This can't be reversed. Stick to crackers within 1–2 months of opening for best results.
Can I use these methods for tortilla chips or pretzels?
Absolutely. These techniques work across similar baked snacks. Tortilla chips respond well to oven or air fryer treatment. Pretzels, especially hard varieties, regain snap similarly. Adjust time based on thickness—thinner snacks require less heat.
Expert Tips for Seamless Snack Service
To ensure your cracker revival remains undetected, consider presentation and timing:
- Serve immediately after cooling—delay increases risk of re-absorbing humidity.
- Mix revived crackers with fresh ones if available. This blends textures imperceptibly.
- Avoid placing crackers near steam sources like kettles or stovetops during serving.
- Use decorative, airtight tins for serving—they look intentional and preserve crispness.
“The best food hacks are the ones nobody knows happened. A perfectly crisp cracker served with confidence tells its own story.” — Marcus Bell, Culinary Instructor and Pantry Management Specialist
Checklist: How to Refresh Stale Crackers Like a Pro
- ✔ Assess cracker condition – no mold, off-smells, or grease stains
- ✔ Choose method: oven (most reliable), microwave (fastest), air fryer (best for buttery types)
- ✔ Preheat appliance to 300°F or set microwave with damp towel
- ✔ Arrange in single layer – no overlapping
- ✔ Heat in short intervals – check frequently
- ✔ Cool completely before serving
- ✔ Store extras in airtight container with desiccant (rice or silica packet)
- ✔ Serve with confidence – never announce the rescue mission
Conclusion: Waste Less, Impress More
Reviving stale crackers isn’t just about saving a few dollars—it’s about maintaining standards without stress. With simple tools and a bit of know-how, you can turn a pantry disappointment into a flawless snack experience. The techniques are fast, scientifically sound, and completely inconspicuous.
Next time you open a bag of sad, limp crackers, don’t reach for the trash. Reach for the oven, the microwave, or the air fryer instead. In under ten minutes, you’ll have crisp, satisfying crackers ready to serve—no one will ever know they needed help.


 浙公网安备
33010002000092号
浙公网安备
33010002000092号 浙B2-20120091-4
Comments
No comments yet. Why don't you start the discussion?