
Blush is one of the most transformative makeup products—when applied well, it can mimic a post-walk glow, enhance cheekbone structure, and bring warmth to the face. But achieving that effortless, just-pinched look depends heavily on your application tool. The debate between using a blush brush versus a sponge isn't just about preference; it's about finish, control, and how seamlessly the color integrates with your skin.
While both tools are staples in professional kits and bathroom drawers alike, they deliver very different results. Understanding their strengths—and knowing when to use each—can elevate your makeup from flat to flushed with life.
The Blush Brush: Precision and Buildable Color
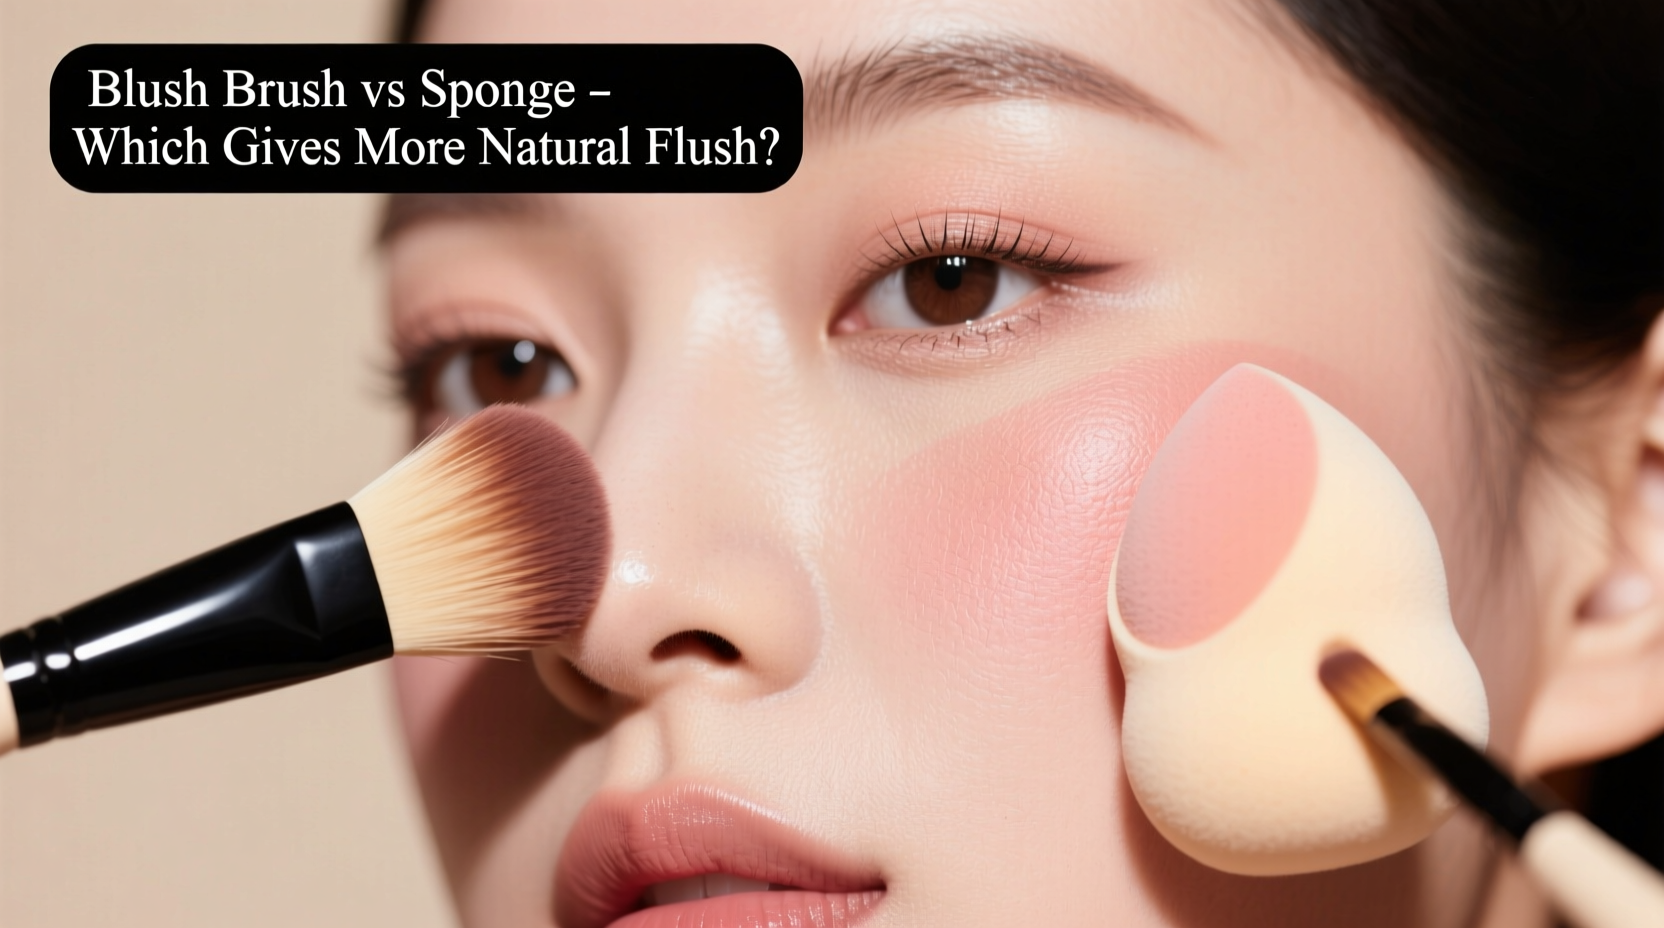
A blush brush, typically dome-shaped with soft, densely packed bristles, is designed for targeted placement and controlled pigment release. It’s ideal for powder and cream-to-powder formulas, allowing you to deposit color exactly where you want it—along the apples of the cheeks, up toward the temples, or lightly across the bridge of the nose for a sun-kissed effect.
One of the key advantages of a brush is its ability to build color gradually. With light strokes, you can layer product without over-applying, making it easier to correct mistakes before they set. Brushes also maintain crisp edges, which is beneficial for defined makeup styles or structured contouring.
Brushes come in various sizes and bristle types—synthetic for creams, natural for powders—but the shape matters most. A tapered or angled dome allows for precision at the tip while still offering enough surface area to blend outward.
When a Brush Shines
- Dry or combination skin types that don’t require extra hydration.
- Full-coverage foundation or matte finishes needing a pop of color without disturbing base layers.
- Situations requiring precise placement, such as stage makeup or photography.
- Powder or baked blushes that need lifting and distributing evenly.
The Makeup Sponge: Skin-Like Finish and Seamless Blending
The beauty sponge—most famously represented by the teardrop-shaped applicator—has become synonymous with airbrushed makeup. When used for blush, especially cream or liquid formulas, it presses product into the skin rather than laying it on top. This pressing action mimics natural blood flow beneath the surface, creating a flush that looks like it’s coming from within.
Because sponges blend by stippling (dabbing) motion, they soften edges instantly and eliminate streaks. They’re particularly effective for dewy or no-makeup makeup looks, where the goal is indistinguishability between skin and product.
“Sponges create intimacy between product and skin. They break down barriers—literally and visually—so color doesn’t sit on top but becomes part of the complexion.” — Lena Torres, Celebrity Makeup Artist
However, sponges can absorb product if not dampened properly. A dry sponge soaks up cream blush, leading to waste and patchiness. The solution? Dampen it slightly before use—wring out thoroughly so it’s moist, not wet.
When a Sponge Wins
- Cream, gel, or liquid blush formulations.
- Dewy or glowing skin finishes.
- Thin or medium-coverage foundations where disruption isn’t a concern.
- Mature skin, where a softer, less textured application minimizes emphasis on fine lines.
Side-by-Side Comparison: Brush vs Sponge
| Feature | Blush Brush | Makeup Sponge |
|---|---|---|
| Best For | Powder blushes, precise placement | Cream/liquid blushes, blended flush |
| Finish | Soft-focus, diffused | Skin-like, embedded |
| Control Level | High – directional application | Medium – blending-focused |
| Learning Curve | Low to moderate | Moderate – requires proper dampness and technique |
| Skin Type Suitability | All, especially oily/combination | Dry, mature, sensitive |
| Hygiene Maintenance | Easily cleaned; dries quickly | Requires thorough weekly washing |
| Natural Flush Effect | Good – if blended well | Excellent – mimics subsurface color |
Step-by-Step Application Techniques
Using a Blush Brush for a Natural Flush
- Choose a shade close to your natural lip color for realism.
- Swirl the brush lightly into the blush—don’t press hard.
- Tap off excess to avoid fallout and over-pigmentation.
- Smile slightly to locate the apple of your cheek.
- Apply the brush here first, then sweep upward and back toward the hairline in a diagonal motion.
- Use the tip to soften any edges along the jaw or temple.
- Layer gradually until desired intensity is reached.
Using a Sponge for a Skin-Integrated Flush
- Dampen a clean sponge and squeeze out all excess water.
- Dot cream or liquid blush directly onto the apples of your cheeks.
- Use the rounded bottom of the sponge to stipple (bounce, don’t drag) the product outward and upward.
- Focus on pressing color into the skin rather than spreading it.
- Use the pointed end to blend near the nose and hairline.
- Repeat with minimal product if more intensity is needed.
- Wash sponge after 3–5 uses to prevent bacterial buildup.
Real-World Example: Bridal Makeup Decision
Consider Sarah, a bride preparing for her outdoor summer wedding. Her makeup artist wanted a fresh, lit-from-within glow that would last through humidity and emotional moments. She had dry skin and was wearing lightweight, luminous foundation.
The artist chose a peachy-pink cream blush applied with a damp sponge. The stippling technique ensured the color looked like a natural reaction to sunlight and excitement, not makeup. Later in the day, when touch-ups were needed, a translucent setting powder was applied, followed by a whisper of the same blush shade using a small fluffy brush—just enough to reactivate the flush without adding heaviness.
This dual-tool approach showcased the strengths of both methods: the sponge for initial integration, the brush for refinement and longevity. Guests commented on how “healthy” she looked, never suspecting it was enhanced.
Expert Tips for Choosing Your Tool
No single tool is universally superior. The right choice depends on your formula, skin type, desired finish, and skill level. Here’s a checklist to guide your decision:
📋 **Blush Application Tool Checklist**- ✅ What formula am I using? Cream/gel → sponge; powder → brush.
- ✅ What’s my skin type? Dry/mature → sponge; oily → brush.
- ✅ What finish do I want? Dewy/luminous → sponge; matte/defined → brush.
- ✅ How much control do I need? High precision → brush; soft diffusion → sponge.
- ✅ Am I comfortable cleaning my tools regularly? Sponges require more hygiene maintenance.
“The most natural blush doesn’t look applied—it looks inevitable.” — Amir Patel, Editorial Makeup Director
Frequently Asked Questions
Can I use a sponge with powder blush?
Yes, but sparingly. A slightly damp sponge can press powder blush into the skin for a more integrated look, though it may reduce the powder’s longevity. Use a clean, dry sponge for lighter diffusion without setting spray activation.
Why does my sponge make my blush disappear?
If your sponge is too wet or overly absorbent, it will soak up the product instead of blending it. Always wring it thoroughly and consider using a denser sponge (like latex-free foam) that absorbs less than traditional porous ones.
Which tool is better for mature skin?
A sponge generally works better because it blends without dragging or emphasizing texture. Cream formulas pressed in with a stippling motion sit smoothly over fine lines, whereas powder brushed on can settle into creases if not set carefully.
Final Thoughts: It’s Not Either/Or—It’s Both/And
The question isn’t necessarily which tool gives a more natural flush, but rather which one serves your current needs best. In direct comparison, the sponge often wins for sheer realism—its ability to press color into the epidermis creates an illusion of authenticity that brushes, even expertly used, can struggle to match.
Yet brushes offer unmatched versatility and control, especially with powder products. They’re faster to use, easier to clean, and more travel-friendly. For many, the ideal routine involves both: starting with a sponge for depth and integration, finishing with a brush for definition and extension.
The secret to a truly natural flush lies not just in the tool, but in restraint, placement, and understanding your skin’s behavior throughout the day. Whether you reach for a plush brush or a bouncy sponge, remember that subtlety is the hallmark of realism. A whisper of color, well-placed and expertly blended, speaks louder than a bold stripe ever could.


 浙公网安备
33010002000092号
浙公网安备
33010002000092号 浙B2-20120091-4
Comments
No comments yet. Why don't you start the discussion?