
Fried chicken is a beloved comfort food across cultures—golden, crunchy on the outside, tender and juicy within. But nothing is more disappointing than biting into what should be a crisp cutlet only to find most of the breading pooled at the bottom of the pan or stuck to the skillet. This common kitchen frustration doesn’t mean you’re a bad cook; it usually points to small but critical missteps in preparation. Understanding why breading detaches—and how to prevent it—is key to mastering consistently great results.
Whether you're making classic Southern fried chicken, schnitzel, or oven-baked tenders, the principles of proper adhesion are universal. From moisture control to coating technique, several factors determine whether your crust stays put. Let’s explore the science behind breading failure and deliver practical, no-fail solutions you can apply immediately.
Why Breading Falls Off: The Core Issues
Breading separates from chicken when the bond between the meat and the coating breaks down during cooking. This typically happens due to excess moisture, improper layering, incorrect oil temperature, or premature flipping. Each stage of the breading process plays a role, and skipping or rushing even one step can compromise the final result.
The traditional breading sequence—flour, egg wash, breadcrumbs—is designed to create layers that stick together and adhere to the chicken. But if any part of this system fails, the entire structure collapses under heat and agitation.
Top 5 Reasons Breading Fails (and How to Fix Them)
1. Excess Moisture on the Chicken
Raw chicken often comes packed with residual water, and even cooked meat releases moisture as it heats. When water is trapped between the chicken and the breading, it creates steam, which pushes the coating away.
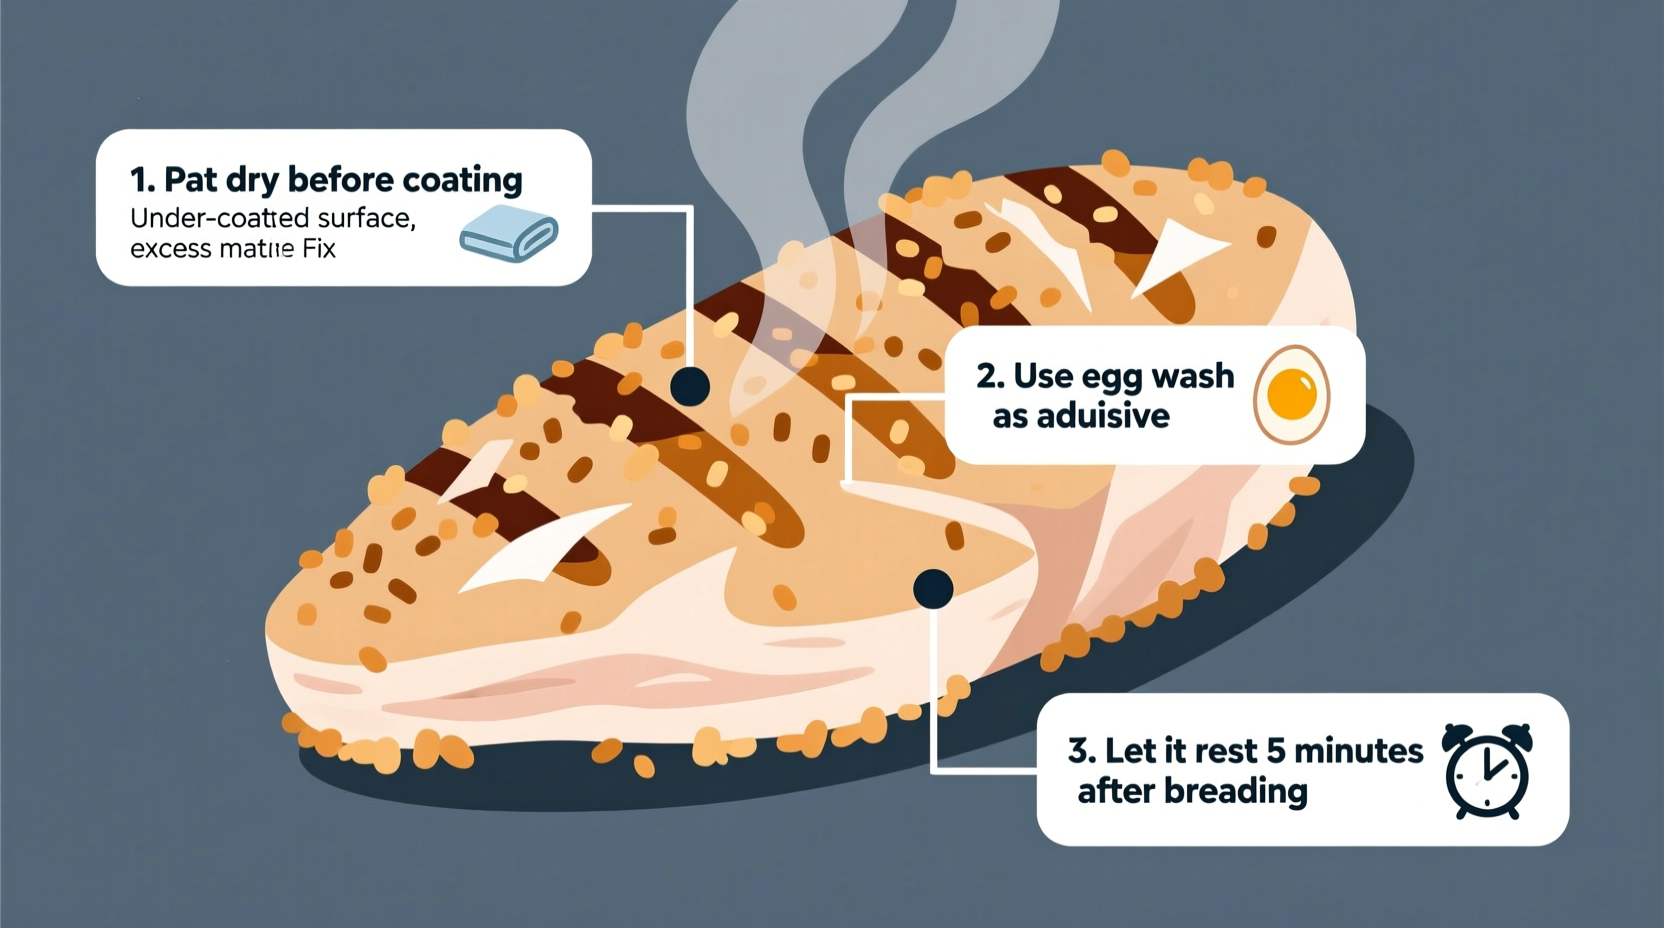
Solution: Dry the chicken thoroughly before breading. Place pieces on a wire rack over a tray and refrigerate uncovered for 30–60 minutes. This air-dries the surface, creating a better bonding surface for flour and egg.
2. Skipping the Dredging Step or Using Wet Flour
Flour acts as a glue that helps the egg wash stick to the chicken. If you skip this step or use clumpy, wet flour, the foundation of your breading is weak.
Solution: Use a shallow dish with seasoned all-purpose flour. After drying the chicken, dredge each piece evenly, shaking off excess. For extra grip, some chefs recommend a double dip: flour → egg → flour → egg → breadcrumbs.
3. Inconsistent Egg Wash Application
If the egg wash is too thin, runs off quickly, or isn’t applied evenly, parts of the chicken won’t hold the crumbs. Over-soaking can also cause clumping and uneven coverage.
Solution: Beat eggs with a tablespoon of water or milk to improve spreadability. Dip the floured chicken briefly, letting excess drip off before moving to breadcrumbs.
4. Poor Breadcrumb Adhesion or Premature Handling
Pressing breadcrumbs too hard or not firmly enough both lead to issues. Additionally, touching breaded chicken too much before cooking dislodges the coating.
Solution: Gently press the breadcrumbs onto the chicken using your fingertips. Then, let the coated pieces rest on a wire rack for 10–15 minutes before frying. This allows the coating to set and improves adhesion.
5. Oil Temperature Too Low or Too High
Cold oil causes chicken to absorb grease and cook slowly, leading to soggy breading that slips off. Oil that’s too hot burns the outside before the inside cooks, causing cracking and flaking.
Solution: Maintain oil temperature between 325°F and 350°F (163°C–177°C). Use a deep-fry thermometer and adjust heat as needed. Fry in small batches to avoid drastic temperature drops.
“Proper breading isn’t about fancy ingredients—it’s about patience and process. Letting the coating rest before frying makes a dramatic difference.” — Chef Marcus Reed, Culinary Instructor at Midwest Cooking Academy
Step-by-Step Guide to Perfectly Breaded Chicken
- Dry the chicken: Pat each piece with paper towels. For best results, air-dry in the fridge for 30–60 minutes.
- Set up your station: Three shallow dishes—flour, egg wash (eggs + splash of milk), seasoned breadcrumbs or panko.
- Dredge: Coat chicken in flour, shake off excess.
- Dip in egg: Submerge briefly, allowing excess to drip off.
- Coat with crumbs: Press gently to ensure full coverage without compacting.
- Rest: Place on a wire rack for 10–15 minutes before cooking.
- Fry or bake: Use oil at 350°F or bake at 400°F on a greased rack over a baking sheet for airflow.
- Flip once: Turn only once during cooking to minimize disturbance.
Do’s and Don’ts: Breading Success Checklist
| Do’s | Don’ts |
|---|---|
| Pat chicken dry before breading | Use wet or icy-cold chicken straight from packaging |
| Use a wire rack for resting and frying/baking | Place breaded chicken directly on a plate (creates sogginess) |
| Season each layer (flour, egg, crumbs) | Over-season only one component and expect balanced flavor |
| Monitor oil temperature with a thermometer | Guess the oil heat by dropping in a crumb |
| Let chicken rest after cooking before cutting | Cut into chicken immediately—steam loosens crust |
Real-World Example: A Home Cook’s Breakthrough
Sarah, a home cook from Nashville, struggled for years with her family’s fried chicken recipe. “Every Sunday, half the breading would end up in the oil,” she said. “I thought it was just how it was supposed to be.” After learning about the importance of drying the chicken and letting the breading rest, she adjusted her method. She started placing seasoned cutlets on a rack in the fridge for an hour before frying and used a thermometer to monitor oil temp. “The difference was night and day,” she shared. “Now the crust sticks perfectly, and my kids fight over the crispy bits.”
Alternative Cooking Methods and Their Impact on Breading
While deep-frying produces the crispiest results, many people opt for baking or air frying for health or convenience. These methods require slight adjustments:
- Baking: Preheat the baking sheet with oil to help jumpstart crisping. Use a wire rack on top of the sheet pan so heat circulates evenly.
- Air Frying: Lightly spray the breaded chicken with oil to encourage browning. Avoid overcrowding the basket.
- Pan-Frying: Use enough oil to reach halfway up the chicken, and turn only once. Cover briefly at first to ensure interior doneness, then uncover to crisp.
FAQ
Can I bread chicken ahead of time?
Yes. You can bread chicken up to 24 hours in advance. Store it uncovered on a wire rack in the refrigerator. Chilling helps the coating set and improves crispness when cooked.
Why does my breading taste raw?
This usually means the flour wasn’t fully cooked. Ensure oil is hot enough before adding chicken. If baking, increase oven temperature slightly or extend cook time while monitoring internal temperature (165°F in thickest part).
Is there a gluten-free substitute that holds well?
Yes. Use gluten-free flour blends for dredging and certified gluten-free breadcrumbs or crushed cornflakes. Add 1 teaspoon of xanthan gum per cup of flour mix to improve binding.
Final Tips for Foolproof Breading Adhesion
Success starts before the oil even heats up. Control moisture, follow the correct order, allow resting time, and maintain consistent cooking temperatures. Small habits make a big difference: using separate hands for wet and dry steps, avoiding touching the coating unnecessarily, and resisting the urge to peek or flip too soon.
Remember, perfect breading isn’t magic—it’s method. With attention to detail and consistency, you’ll serve golden, crunchy chicken that stays intact bite after bite.


 浙公网安备
33010002000092号
浙公网安备
33010002000092号 浙B2-20120091-4
Comments
No comments yet. Why don't you start the discussion?