
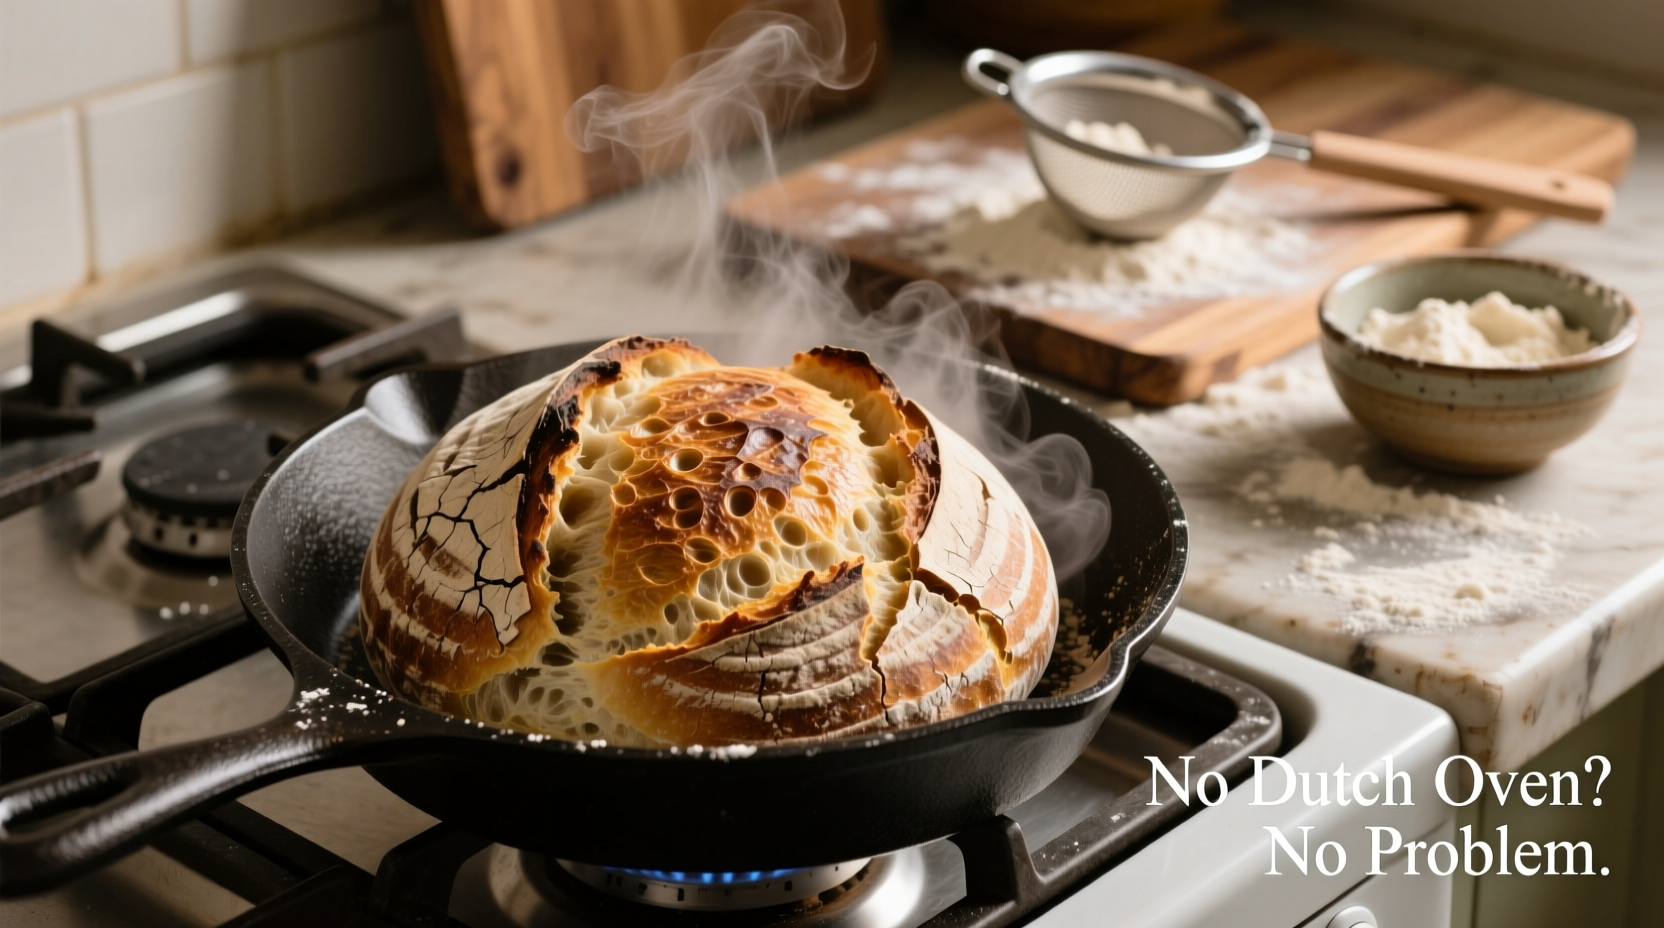
Baking sourdough bread at home has surged in popularity, with many aspiring bakers aiming for that perfect combination of a crisp, blistered crust and an open, airy crumb. A Dutch oven is often recommended as the ideal vessel for baking sourdough because it traps steam and provides even heat distribution—two critical factors for successful artisan loaves. But what if you don’t own one? Can you still achieve professional results?
The answer is yes—though success depends on how well you replicate the core functions of a Dutch oven: consistent high heat, moisture retention during the initial phase of baking, and structural support to encourage proper oven spring. This article explores several proven alternatives, evaluates their effectiveness, and offers practical guidance for producing excellent sourdough without specialized equipment.
Why the Dutch Oven Works So Well
To understand why alternatives are necessary—and how to choose the best one—it helps to know what makes a Dutch oven so effective for sourdough baking.
A heavy cast-iron Dutch oven creates a sealed environment when covered. During the first 20–25 minutes of baking, this enclosure traps steam released from the dough. Steam delays crust formation, allowing the loaf to expand fully (a phenomenon known as “oven spring”). It also gelatinizes surface starches, contributing to a glossy, crackly crust. After this initial phase, removing the lid allows the crust to dry and darken.
Additionally, the thermal mass of cast iron ensures steady, radiant heat transfer, reducing hot spots and promoting even browning.
Alternative Method 1: Baking Steel or Baking Stone with Steam Pan
One of the most reliable substitutes for a Dutch oven involves using a baking steel or ceramic baking stone paired with a separate steam pan.
Preheat the steel or stone in the oven for at least 45 minutes at 475°F (245°C). Place a metal tray or roasting pan on the bottom rack. When loading the dough, quickly pour about 1 cup of boiling water into the tray and close the door immediately to trap the steam. The hot surface gives immediate lift to the dough, while the steam mimics the enclosed environment of a Dutch oven.
This method requires timing and caution—pouring water into a cold pan won’t generate enough steam, and using too much water can cool the oven excessively. Some bakers prefer tossing ice cubes into the pan for sustained steam release.
“Steam management is the cornerstone of great sourdough crust development. With a baking steel and smart steam technique, you can match—or even exceed—the performance of a Dutch oven.” — James Thompson, Artisan Baker & Instructor at Midwest Bread School
Alternative Method 2: Covered Casserole Dish or Oven-Safe Pot
Not all lidded pots are Dutch ovens, but many standard oven-safe casserole dishes can serve the same function—if they meet certain criteria.
The ideal substitute should be made of heavy-duty material (like enameled cast iron, thick ceramic, or stainless steel), have a tight-fitting lid, and be able to withstand temperatures up to 500°F (260°C). Common options include large Pyrex-style glass dishes with lids (check manufacturer guidelines), CorningWare, or deep stainless steel pots.
Use them exactly like a Dutch oven: preheat empty, carefully transfer the scored dough inside, cover, and bake for 20–25 minutes before uncovering to finish.
| Pot Type | Oven Safe to 500°F? | Heat Retention | Recommended? |
|---|---|---|---|
| Enameled Cast Iron (non-Dutch) | Yes | Excellent | ✅ Yes |
| Stainless Steel Stockpot | Lid may warp | Moderate | ⚠️ With caution |
| Tempered Glass (e.g., Pyrex) | Check label | Poor | ❌ Not recommended unless verified |
| Ceramic Casserole (e.g., CorningWare) | Yes (older models) | Good | ✅ Yes, if vintage or rated |
Alternative Method 3: Combo Cooker Technique (Skillet + Roasting Pan)
A clever workaround used by many home bakers is the \"combo cooker\" method popularized by Ken Forkish in *The Elements of Pizza*. This approach uses two common kitchen items: a large cast-iron skillet and a high-sided roasting pan with a tight-fitting lid.
Place the skillet upside-down on the lower oven rack and preheat both it and the roasting pan (right-side-up) for at least 45 minutes. When ready, place your proofed and scored dough onto the hot inverted skillet (seam-side down), then quickly lower the roasting pan over it like a dome. The skillet acts as the baking surface; the roasting pan becomes the steam chamber.
After 20 minutes, remove the roasting pan and continue baking uncovered. This setup delivers excellent heat transfer and steam retention, rivaling traditional Dutch ovens.
Step-by-Step: Using the Skillet + Roasting Pan Combo
- Place a 12-inch cast-iron skillet upside-down on the lower rack of your oven.
- Put a large roasting pan (with tight lid) on the upper rack.
- Preheat oven to 475°F (245°C) for 45 minutes.
- Score your risen dough and carefully transfer it seam-side down onto the hot skillet.
- Quickly place the roasting pan over the dough, sealing it like a lid.
- Bake covered for 20 minutes.
- Remove roasting pan and continue baking for 25–30 minutes until deeply golden.
- Cool completely before slicing.
Alternative Method 4: DIY Steam Injection (Spray Bottle & Towel Method)
If no lidded vessel is available, you can attempt to simulate steam using household tools. While less effective than enclosed environments, this method works in a pinch.
Preheat your baking stone or sheet tray. Just after loading the dough, spray the oven walls and loaf generously with a plant mister filled with water. Immediately toss a damp cotton towel (not synthetic) over the loaf and oven rack for the first 15 minutes. The towel traps moisture and prevents rapid crust formation.
Remove the towel carefully after 15 minutes and continue baking uncovered. Be cautious—wet towels near heating elements pose a fire risk if synthetic fibers are present.
“I’ve baked hundreds of loaves without a Dutch oven. The towel trick isn’t perfect, but with practice, you can get surprisingly good spring and shine.” — Sarah Lin, Home Baker & Sourdough Educator
Real-World Test: Three Methods Compared
To assess which alternative performs best, we conducted a side-by-side bake using identical sourdough recipes and shaping techniques. Each loaf was baked in a different setup:
- Method A: Lodge 5.5 Qt Dutch Oven (control group)
- Method B: Baking steel + steam pan with boiling water
- Method C: Upside-down skillet + roasting pan combo
- Method D: Sheet pan with spray bottle and towel
Results after three trials:
- Method A produced the most consistent oven spring and deepest color, with a glossy, crackling crust.
- Method B came very close, especially when ice cubes were used instead of water. Crust texture was slightly drier initially but improved upon cooling.
- Method C exceeded expectations—better heat distribution than the Dutch oven in some cases, yielding taller loaves and sharper scoring expansion.
- Method D showed limited rise and patchy browning. The crust formed too early, restricting expansion. Only recommended for emergency use.
The takeaway? Equipment matters, but technique matters more. Method C, though unconventional, proved superior to even the standard Dutch oven under our test conditions.
Essential Checklist for Dutch Oven-Free Sourdough Success
Follow these steps regardless of the method you choose:
- ✅ Preheat your baking surface or vessel for at least 45 minutes
- ✅ Use parchment paper for safe transfer to hot surfaces
- ✅ Score your dough deeply (¼ to ½ inch) right before baking
- ✅ Trap steam during the first 15–25 minutes of baking
- ✅ Bake until internal temperature reaches 205–210°F (96–99°C)
- ✅ Cool completely (at least 2 hours) before slicing
- ✅ Clean vessels carefully—avoid thermal shock with cold water on hot metal
Frequently Asked Questions
Can I use a slow cooker for baking sourdough?
No. Slow cookers operate at low temperatures and lack the ability to create the rapid rise and crust development needed for sourdough. They’re not suitable substitutes for high-heat baking environments.
Is it safe to put glass bakeware in a 500°F oven?
It depends on the brand and age. Older Pyrex and Anchor Hocking products have experienced shattering due to thermal stress. Always check manufacturer specifications. Tempered glass labeled as oven-safe to at least 450°F may work, but sudden temperature changes increase breakage risk. Avoid placing cold glass in a hot oven.
What’s the best budget-friendly alternative to a Dutch oven?
A combo of a cast-iron skillet and a large roasting pan with a tight lid offers the best balance of performance and affordability. Many kitchens already own these items, making it a cost-effective upgrade path.
Final Tips for Consistent Results
No matter which method you adopt, consistency comes from repetition and attention to detail. Keep notes on bake times, oven settings, and outcomes. Track variables like ambient temperature, hydration levels, and fermentation duration.
Also consider investing in a few inexpensive tools: an infrared thermometer to check surface heat, a digital probe thermometer for internal readings, and a spray bottle dedicated to baking.
Conclusion: You Don’t Need a Dutch Oven to Make Great Sourdough
The belief that a Dutch oven is essential for baking sourdough is widespread—but not accurate. While it simplifies the process, numerous alternatives deliver comparable, and sometimes better, results when used correctly. From combo cookers to steam pans and heavy casserole dishes, resourceful bakers can achieve professional-grade loaves with what they already have in their kitchens.
What matters most isn’t the tool, but understanding the principles behind steam, heat retention, and proper scoring. Once you master those, the equipment becomes secondary.


 浙公网安备
33010002000092号
浙公网安备
33010002000092号 浙B2-20120091-4
Comments
No comments yet. Why don't you start the discussion?