
Every holiday season, millions of homes face the same frustrating problem: a string of Christmas lights that won’t turn on. For non-technical users, figuring out whether it’s a single dead bulb, a blown fuse, or a wiring issue can feel like solving a mystery without clues. Two common tools are often suggested—multimeters and dedicated Christmas light testers—but which one truly gets you back to festive lighting faster, especially if you're not an electrician?
The answer isn't just about technical accuracy—it's about speed, simplicity, and confidence in use. This article compares both tools from the perspective of someone who just wants their lights working again, not earning an electrical engineering degree.
Why Dead Bulb Strings Are So Common—and Tricky
Most traditional incandescent Christmas light strings are wired in series. That means if one bulb burns out or becomes loose, the entire circuit breaks, and the whole strand goes dark. Modern LED strings often include shunt wires that bypass failed bulbs, but even they can fail due to voltage drops, damaged sockets, or power supply issues.
For homeowners, the challenge lies in identifying the fault quickly. You don’t want to spend hours troubleshooting when you could be decorating. And while some people reach for a multimeter—the Swiss Army knife of electronics testing—others swear by simple plug-in light testers designed specifically for holiday lights.
Let’s break down how each tool works in practice and which delivers faster results for those without technical training.
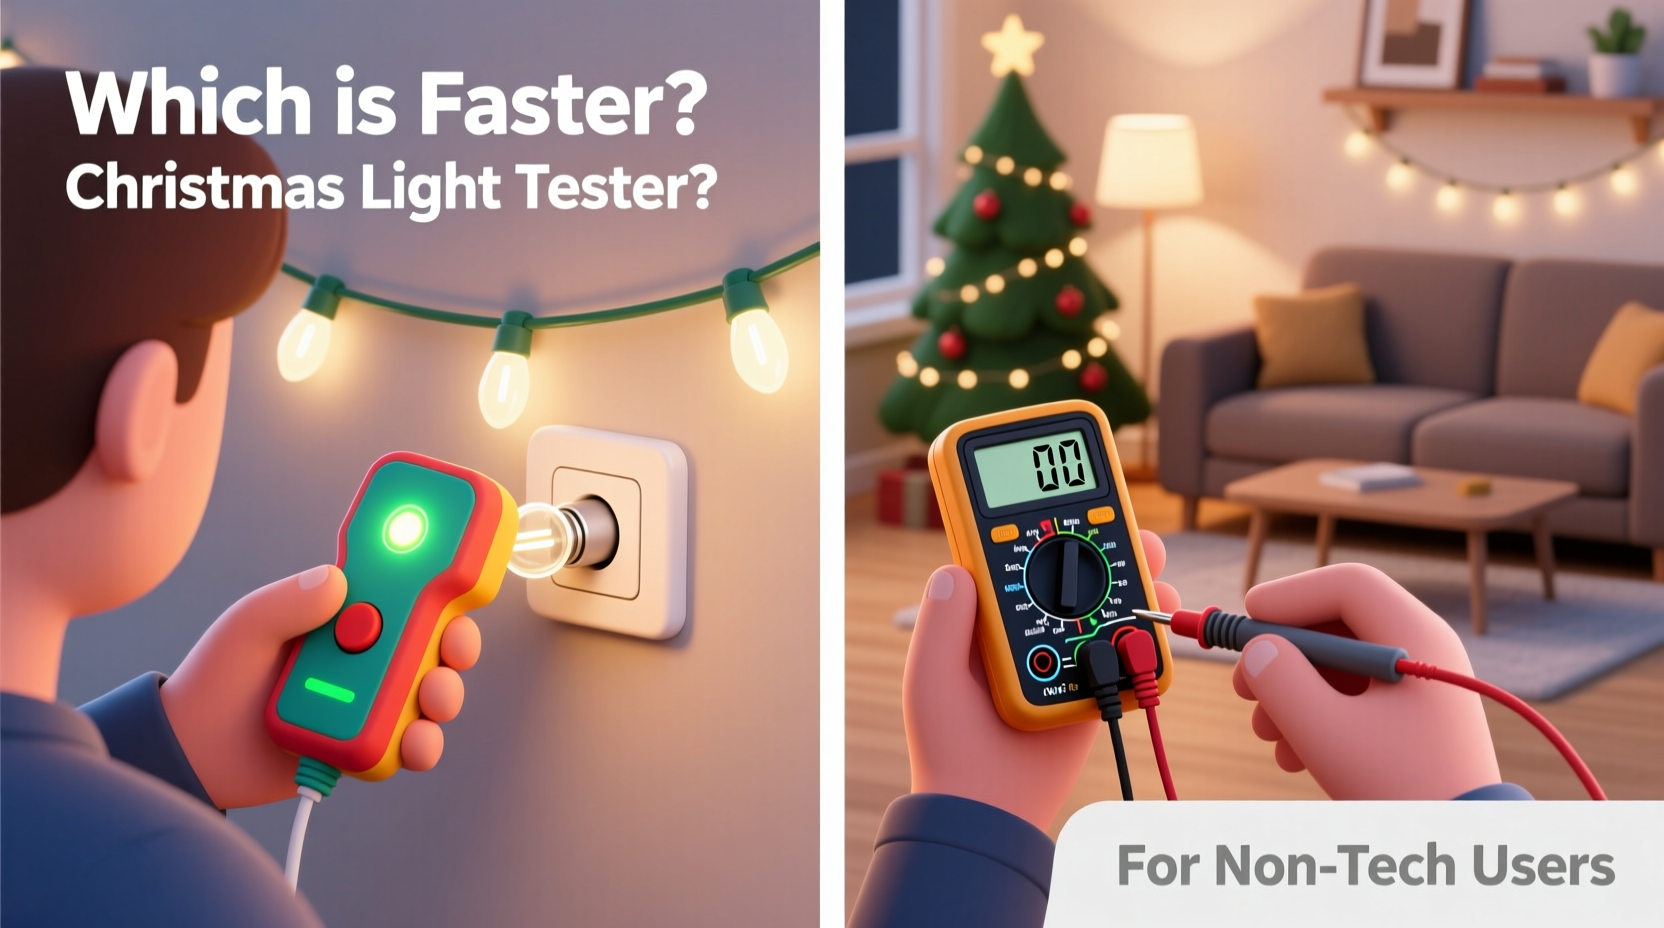
How a Christmas Light Tester Works
A Christmas light tester is a small, purpose-built device that detects current flow through individual bulbs without requiring direct contact with metal contacts. Most models work via electromagnetic induction: you hold the tester near a lit or live bulb socket, and it lights up or beeps if current is flowing.
Here’s how it’s typically used:
- Plug in the light string (ensure it’s powered).
- Start at one end of the strand.
- Hold the tester close to each bulb.
- If the tester indicates current, move to the next bulb.
- When the signal stops, the faulty bulb is either missing, burned out, or poorly seated in that section.
Some advanced models can detect open circuits even when the string is unplugged, using internal battery-powered diagnostics. These are especially useful for pre-season checks.
Advantages for Non-Tech Users
- No disassembly required: No need to remove bulbs or touch wires.
- Intuitive feedback: Lights or sounds make it easy to interpret results.
- Fast scanning: Can check multiple bulbs per second as you slide along the strand.
- Safety: Minimal risk of shock since there’s no direct contact with conductive parts.
Using a Multimeter to Diagnose Light Strings
A multimeter measures voltage, resistance, and continuity. It’s a versatile tool found in most home workshops. When applied to Christmas lights, it can verify whether power reaches certain points in the circuit or identify breaks in continuity.
To use a multimeter effectively on a light string, follow this general process:
- Unplug the string.
- Set the multimeter to continuity or resistance mode (Ω).
- Touch one probe to the neutral side of the plug and the other to the hot side—if there’s no beep or infinite resistance, there’s a break somewhere.
- To isolate the bad bulb, you may need to remove each bulb and test its resistance individually.
- Alternatively, test between adjacent sockets to find where continuity fails.
This method is technically sound and precise, but it requires understanding basic electrical concepts like series circuits, grounding, and probe placement.
“While multimeters offer precision, they demand a level of familiarity with electronics that many casual users simply don’t have.” — Mark Reynolds, Consumer Electronics Technician
Challenges for Non-Technical Users
- Steep learning curve: Requires knowledge of settings, symbols, and safety practices.
- Time-consuming: Testing each bulb individually takes minutes per strand.
- Risk of error: Misreading values or incorrect probe contact leads to false conclusions.
- Frustration factor: Many give up after two or three attempts, assuming the whole string is beyond repair.
Side-by-Side Comparison: Speed, Ease, and Effectiveness
| Feature | Christmas Light Tester | Multimeter |
|---|---|---|
| Learning Time | Under 1 minute | 15–30 minutes (for beginners) |
| Setup Required | None – just power on | Mode selection, probe connection |
| Testing Speed (per 50-bulb string) | 2–4 minutes | 8–15+ minutes |
| Physical Contact Needed? | No (non-contact) | Yes (probes must touch metal) |
| Skill Level Required | Beginner | Intermediate |
| Cost (average) | $10–$20 | $15–$50+ |
| Multipurpose Use? | No (holiday-specific) | Yes (electronics, batteries, outlets, etc.) |
| Safety Risk | Very low | Moderate (if misused) |
From this comparison, it’s clear that for diagnosing dead bulb strings quickly and safely, the Christmas light tester wins decisively for non-tech users. It eliminates guesswork and reduces diagnosis time by more than half compared to a multimeter approach.
Real-World Example: Sarah’s Pre-Holiday Panic
Sarah, a schoolteacher in Ohio, sets up her family’s heirloom light display every Thanksgiving weekend. Last year, she pulled out her favorite red-and-white C7 string—only to find it completely dark. With a young daughter watching, and dinner guests arriving in two hours, she needed a fast fix.
She tried plugging it into another outlet—no change. She jiggled each bulb by hand, hoping one was loose. Still nothing. Then she remembered a small red device her brother had given her: a Lighthouse Christmas Light Tester.
She plugged in the strand, turned on the tester, and slowly ran it along the first few bulbs. The tester beeped normally until it reached bulb #17. There, the tone stopped. She removed the bulb and saw the filament was broken. After replacing it with a spare from her holiday kit, the entire string lit up.
Total time: under three minutes.
Later, she tried using her husband’s multimeter to see if it would’ve worked too. It took her ten minutes just to figure out which setting to use. By then, she’d already solved the problem with the simpler tool.
Step-by-Step Guide: How to Use a Christmas Light Tester (Under 5 Minutes)
Follow this quick sequence to diagnose any dead string efficiently:
- Ensure Power Source: Plug the light string into a working outlet. Test the outlet with another device if unsure.
- Turn On the String: Switch it on. Some testers only work when current is flowing.
- Power On the Tester: Most have a simple button or auto-detect function.
- Start at One End: Begin near the plug end of the string.
- Scan Each Bulb: Hold the tester within 1 inch of each bulb. Listen for beeps or watch for indicator lights.
- Identify the Break: When the signal stops, focus on that segment. The faulty bulb is usually the last unlit one before silence.
- Inspect and Replace: Remove suspect bulbs and examine filaments. Swap in a known-good replacement.
- Re-test: Plug in the string again. If still dark, repeat the scan—sometimes more than one bulb fails.
This method works on both incandescent and many LED strings, though very low-voltage LEDs may require a sensitive model.
FAQ: Common Questions About Testing Holiday Lights
Can a multimeter damage my light string?
No, a multimeter in continuity or resistance mode uses very low voltage and won’t harm the bulbs. However, leaving it in voltage mode while connected incorrectly could pose risks, though rare with modern digital models.
Do Christmas light testers work on all types of bulbs?
Most work on standard incandescent and LED mini lights (like C6, C7, C9). They may struggle with very short strands or those with built-in rectifiers. Always check compatibility before purchasing.
What if my tester shows current everywhere but the lights still won’t turn on?
This usually indicates a fuse issue. Check the fuses located in the plug. Many light strings have two tiny fuses (hot and neutral). Use the tester to confirm power enters the plug, then visually inspect the fuses for discoloration or breakage.
Checklist: Get Your Lights Fixed Fast This Season
- ✅ Gather all suspect light strings and a power source
- ✅ Plug in each string to verify it’s truly dead
- ✅ Grab your Christmas light tester (or buy one—under $15)
- ✅ Start scanning from the plug end toward the far tip
- ✅ Mark or remove bulbs where the signal drops out
- ✅ Replace faulty bulbs with spares (keep extras on hand)
- ✅ Double-check fuses in the plug if no current is detected at all
- ✅ Store working strings properly after inspection to avoid tangles next year
Final Verdict: Simplicity Wins for Holiday Repairs
While multimeters are powerful diagnostic tools, they’re overkill for the average person trying to get holiday lights working. The complexity, setup time, and interpretation required slow down what should be a simple task.
In contrast, a Christmas light tester offers immediate, intuitive feedback. It’s purpose-built for the job, safe to use around children, and effective even in low-light conditions. For non-technical users—who make up the vast majority of holiday decorators—it’s the faster, smarter choice.
You don’t need to understand Ohm’s Law to enjoy twinkling lights. You just need the right tool for the moment.


 浙公网安备
33010002000092号
浙公网安备
33010002000092号 浙B2-20120091-4
Comments
No comments yet. Why don't you start the discussion?