
Flex Seal is one of the most popular liquid rubber sealants on the market, known for its ability to stop leaks, protect surfaces, and withstand harsh weather conditions. Whether you're sealing a roof crack, repairing a gutter, or waterproofing a basement wall, understanding how long Flex Seal takes to dry—and how to apply it correctly—is essential for lasting results. Missteps in application or unrealistic expectations about drying time can lead to weak seals, peeling, or wasted effort.
This comprehensive guide breaks down everything you need to know about Flex Seal drying times under various conditions, along with practical tips and proven techniques to ensure your project achieves a flawless, durable finish.
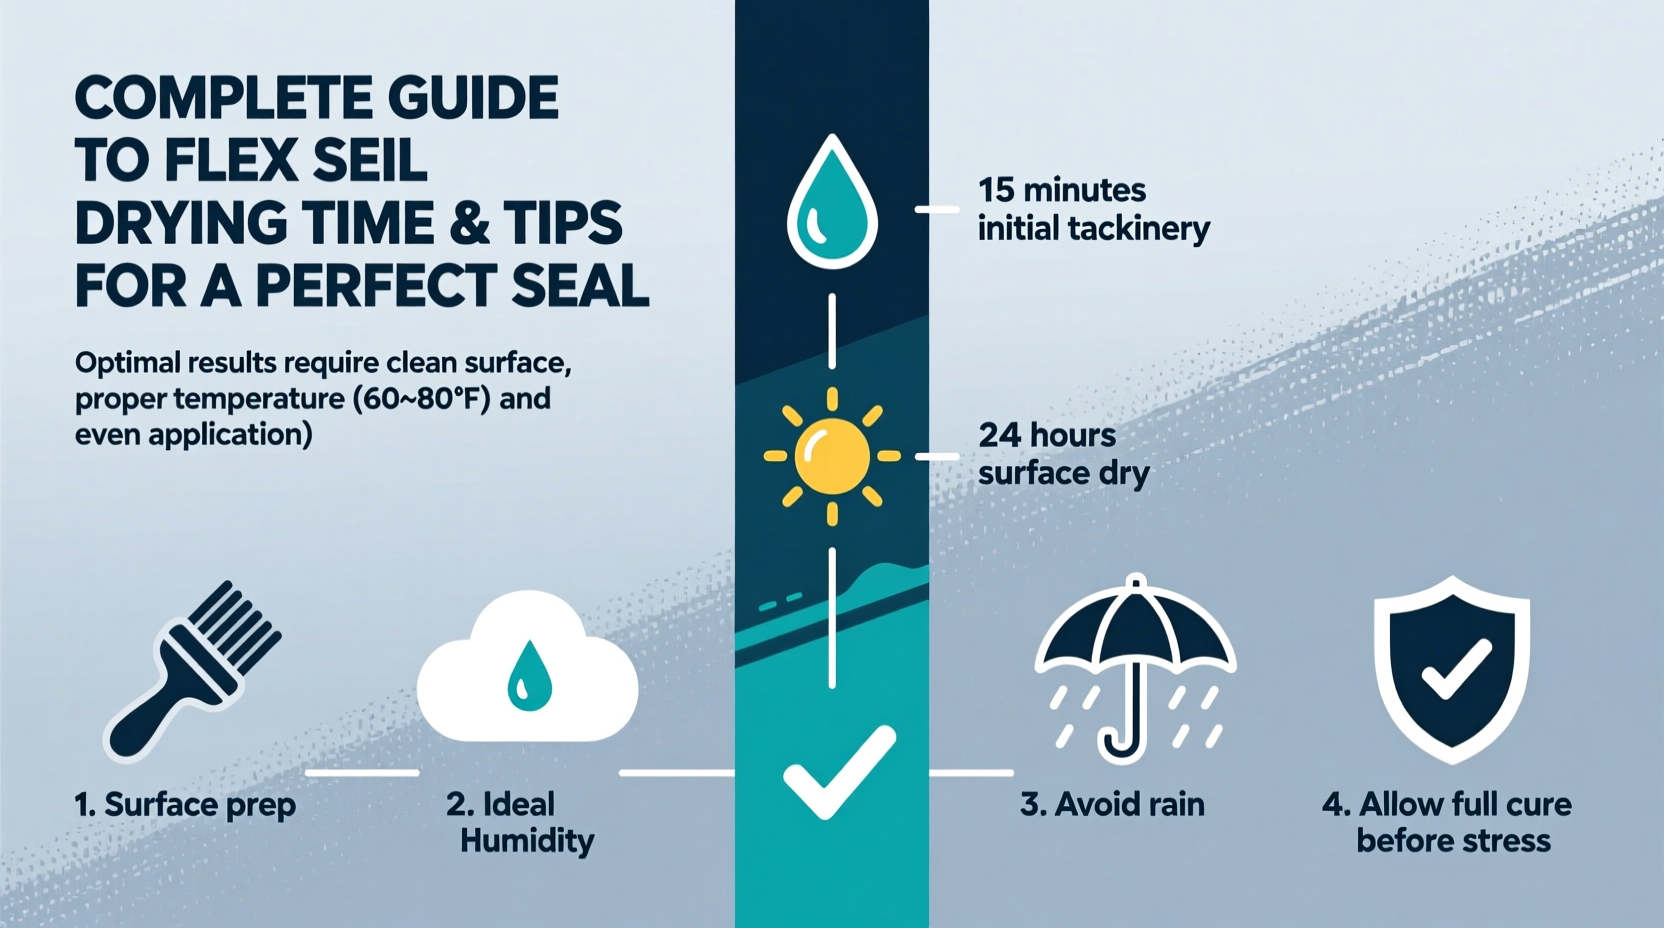
Drying vs. Curing: What’s the Difference?
Before diving into exact timelines, it's crucial to understand that \"drying\" and \"curing\" are not the same. Drying refers to the initial phase when the surface becomes touch-dry and no longer sticky. Curing, however, means the product has fully hardened and reached maximum strength and flexibility.
For Flex Seal, the drying process begins immediately after application, but full curing can take significantly longer depending on environmental factors and coating thickness.
- Drying Time: Typically 2–4 hours to the touch under ideal conditions.
- Curing Time: Up to 24–72 hours for complete cure, especially with multiple layers.
“Many people assume their seal is ready after a few hours, but true durability comes only after full curing. Rushing leads to failure.” — Jason Reed, Industrial Coatings Specialist
Factors That Affect Flex Seal Drying Time
Several environmental and application variables influence how quickly Flex Seal dries and cures. Being aware of these allows you to plan accordingly and avoid premature exposure to water or stress.
| Factor | Effect on Drying Time | Recommendation |
|---|---|---|
| Temperature | Colder temps slow drying; ideal range is 60°F–90°F (15°C–32°C) | Avoid application below 50°F (10°C) |
| Humidity | High humidity delays drying | Apply in low-humidity conditions when possible |
| Coating Thickness | Thicker layers take longer to dry through | Apply thin, even coats; build up gradually |
| Ventilation | Poor airflow slows evaporation of solvents | Ensure good air movement, especially indoors |
| Surface Material | Porous materials absorb moisture, altering drying speed | Prep non-porous surfaces for better adhesion |
Step-by-Step Guide to Achieving a Perfect Flex Seal Application
Success isn’t just about waiting for the right drying time—it starts with proper preparation and technique. Follow this timeline-based approach for best results:
- Day 1 – Surface Preparation (1–2 hours)
Clean the area thoroughly with soap and water. Remove dirt, grease, rust, and loose debris. Allow the surface to dry completely. For metal, lightly sand to create a “tooth” for better adhesion. - Day 1 – First Coat Application (30 minutes + 4 hours drying)
Shake the can vigorously for at least 30 seconds. Hold 10–12 inches from the surface and apply a thin, even coat. Avoid puddling. Let dry for at least 4 hours before assessing coverage. - Day 1 or Day 2 – Second Coat (if needed)
Apply a second thin layer if pinholes or uneven spots remain. Wait 24 hours between coats for optimal bonding. - Day 3 – Final Cure Check
After 72 hours, test the seal by gently pressing a fingernail into the surface. It should resist indentation and feel firm yet flexible. - Ongoing – Inspection & Maintenance
Check the seal every few months, especially after extreme weather. Reapply if cracking or lifting appears.
Tips for a Long-Lasting, Professional-Quality Seal
Even with correct drying times, small oversights can compromise performance. These expert-backed tips help ensure your Flex Seal job lasts for years.
- Don’t skip the shake. Inadequate shaking leads to inconsistent formula dispersion, resulting in weak spots.
- Work in sections. Large areas should be treated in manageable zones to maintain consistency and prevent partial drying mid-application.
- Avoid direct sunlight during application. UV rays can cause outer layers to skin over too quickly, trapping solvents underneath and leading to bubbling.
- Use the right nozzle. The precision nozzle is ideal for cracks and seams; the wide spray is better for large flat surfaces.
- Seal fasteners and joints first. Pay special attention to screws, nails, and overlapping materials—these are common leak points.
Real-World Example: Fixing a Leaky Roof Vent
Tom, a homeowner in Ohio, noticed water stains near his attic roof vent after heavy spring rains. Instead of calling a roofer, he decided to try Flex Seal. He cleaned the area around the vent pipe, removed old caulk, and dried the surface with a towel and fan. On a dry, 70°F afternoon, he applied the first coat of Flex Seal Liquid, focusing on the gap between the pipe and shingles. After 4 hours, the surface was dry to the touch. He added a second coat the next morning. By the third day, the seal was fully cured. When the next storm hit, there were no new leaks. Two years later, the seal remains intact with only minor fading—no peeling or cracking.
This example shows that with patience and correct timing, Flex Seal can deliver professional-grade results without the cost of a contractor.
Frequently Asked Questions
Can I apply Flex Seal in the rain?
No. The surface must be completely dry before application. Applying Flex Seal on a wet surface prevents proper adhesion and leads to premature failure. Wait until the area is dry and no precipitation is expected for at least 24 hours.
How many coats of Flex Seal do I need?
Most repairs require 2–3 thin coats for full coverage. One coat may suffice for minor cosmetic fixes, but structural or waterproofing jobs benefit from layered protection. Always allow each coat to dry before applying the next.
Does Flex Seal yellow or crack over time?
Over prolonged sun exposure, some discoloration (yellowing or fading) may occur, especially on white or light-colored surfaces. However, the sealant typically retains flexibility and waterproofing ability for years. For UV-heavy areas, consider Flex Seal Clear or follow up with a UV-protective topcoat.
Checklist for a Flawless Flex Seal Job
Use this checklist before, during, and after your project to maximize success:
- ☐ Surface is clean, dry, and free of debris
- ☐ Ambient temperature is above 60°F (15°C)
- ☐ Humidity is moderate (below 70%)
- ☐ Can has been shaken for at least 30 seconds
- ☐ First coat is thin and even—no pooling
- ☐ Minimum 4-hour drying time between inspection and second coat
- ☐ Full 72-hour cure observed before water exposure
- ☐ Edges and joints are fully covered and sealed
Final Thoughts: Patience Pays Off
Flex Seal offers an accessible solution for homeowners and DIYers tackling leaks and weatherproofing projects. But its effectiveness hinges on more than just spraying and walking away. Understanding drying versus curing, respecting environmental conditions, and following a disciplined application process make the difference between a temporary fix and a lasting repair.
By investing time in proper prep and allowing adequate drying, you unlock Flex Seal’s full potential. Whether you’re sealing a shed roof, mending a garden hose, or protecting outdoor fixtures, these practices ensure your work stands up to time and the elements.


 浙公网安备
33010002000092号
浙公网安备
33010002000092号 浙B2-20120091-4
Comments
No comments yet. Why don't you start the discussion?