
Creating your own accessories doesn’t have to be expensive or require advanced tools. A DIY cardboard watch is an excellent way to explore sustainable fashion while expressing creativity. This project combines artistry, precision, and practicality—perfect for beginners interested in upcycling materials into wearable designs. With just a few household items and some patience, you can build a lightweight, stylish timepiece that turns heads and sparks conversation.
Cardboard may seem like an unlikely material for a functional accessory, but when properly reinforced and sealed, it becomes surprisingly durable. Designers such as Elisa Strozyk and emerging eco-fashion collectives have embraced paper-based textiles and structural cardboard elements in high-concept wearables, proving that innovation often starts with humble materials.
Selecting the Right Materials
The success of your cardboard watch depends largely on the quality of materials used. Not all cardboard is created equal—some are too flimsy, while others may be overly thick or corrugated in ways that complicate shaping.
- Corrugated cardboard: Ideal for structural components due to its layered strength.
- Chipboard or cereal box cardboard: Thinner and easier to cut; suitable for decorative layers or dials.
- White glue or PVA adhesive: Provides strong bonding without warping if applied evenly.
- Clear sealant (mod podge or acrylic spray): Protects against moisture and adds shine.
- Ruler, compass, utility knife, cutting mat: Precision tools ensure clean edges and symmetrical shapes.
Design Planning and Measurements
Before cutting, sketch your design on paper. Decide whether you want a minimalist analog face, a retro digital-inspired look, or a bold geometric statement piece. Measure your wrist circumference using a flexible tape measure or string, then add 2–3 cm for overlap and strap adjustment.
A typical adult watch band ranges from 17 to 20 cm in length, with a width between 2 and 3 cm. The watch face usually measures between 4 and 6 cm in diameter. Use a compass or trace around a circular object like a cup or lid to achieve a smooth outline.
| Component | Recommended Size | Material Suggestion |
|---|---|---|
| Watch Face | 4–6 cm diameter | Double-layered chipboard |
| Strap (each side) | 8–10 cm long × 2.5 cm wide | Corrugated cardboard |
| Hinge Connector | 1.5 cm × 2.5 cm | Foam board or tripled chipboard |
| Clasp Mechanism | 2 cm × 1 cm tab with hole | Reinforced edge with glue |
“Sustainable design isn’t about perfection—it’s about intention. Projects like cardboard watches teach us to reimagine waste as resource.” — Dr. Lena Torres, Sustainable Material Researcher, Helsinki Institute of Design
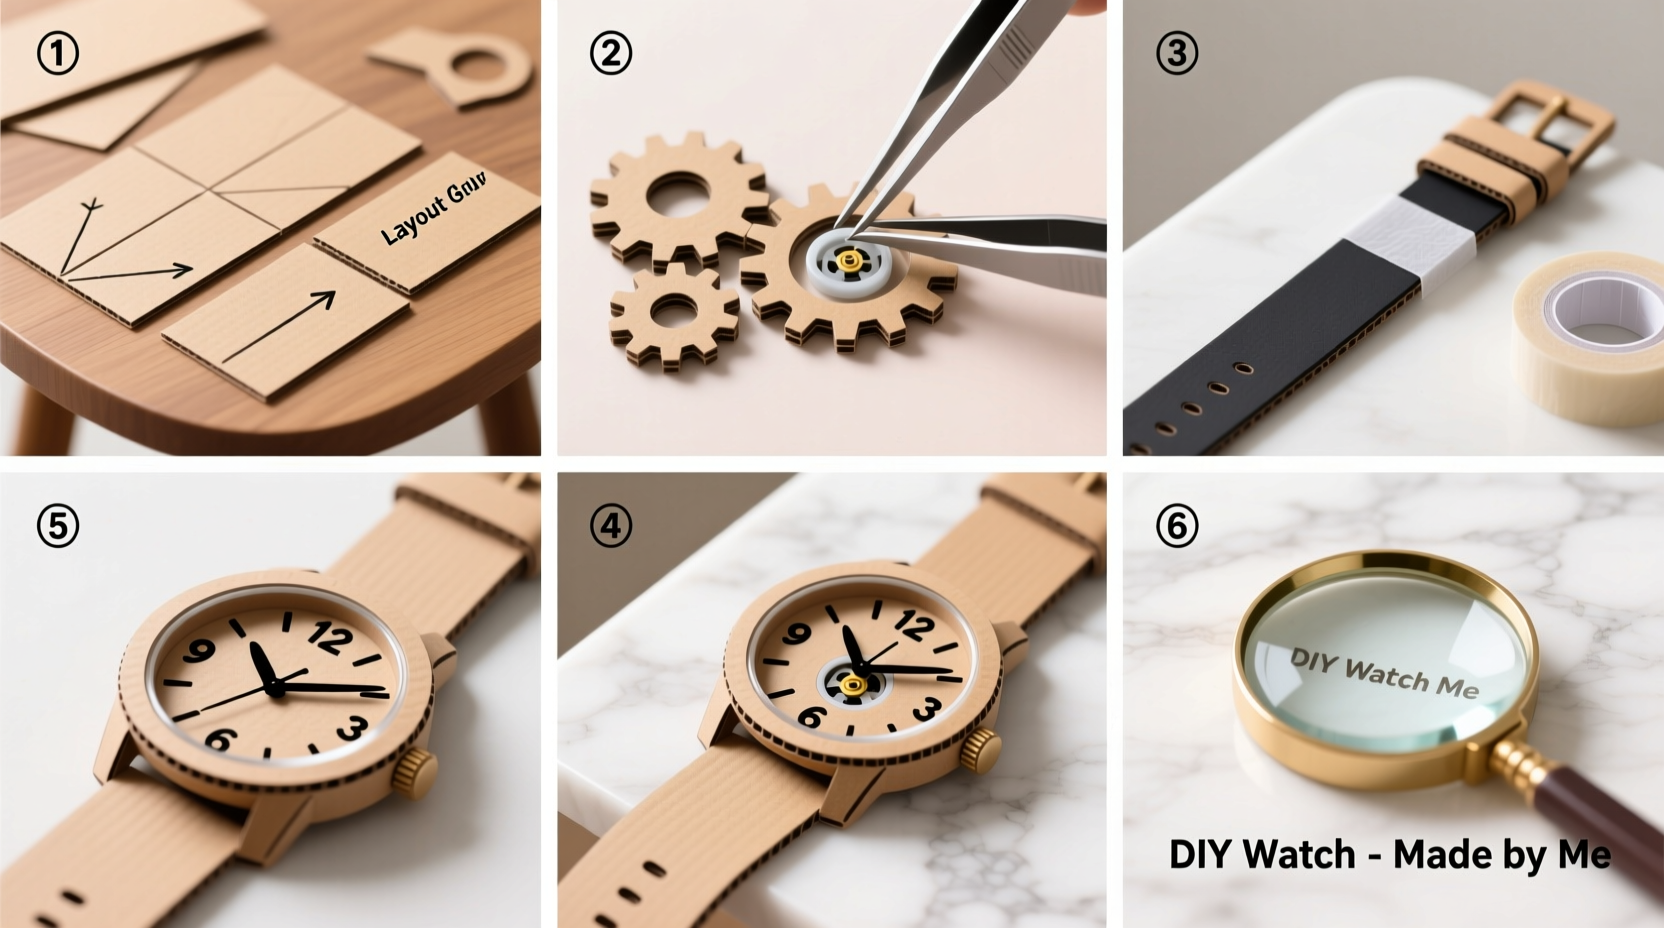
Step-by-Step Construction Guide
Follow these steps carefully to assemble a sturdy, visually appealing cardboard watch.
- Prepare the base layers: Cut two identical circles for the front and back of the watch face. Glue them together with PVA for rigidity. Let dry under light pressure (e.g., under a book).
- Create the dial: On one face, draw hour markers using a protractor or divide the circle into 12 equal sections (30° each). Add numbers or symbols with a fine-tip marker or printed decal.
- Make the hands: Cut hour and minute hands from thinner cardboard. Paint or cover with foil for contrast. Attach temporarily with a brad fastener through the center to test movement.
- Build the straps: Cut two strips to your measured length and width. Reinforce by gluing three layers together. Sand edges lightly for smoothness.
- Attach connectors: At one end of each strap, glue a small rectangular hinge piece (cardboard or plastic) that will link to the watch case. Allow full drying time (at least 2 hours).
- Assemble the case: Glue a bezel ring (optional) around the front face. You can create depth by stacking rings of decreasing diameter.
- Join strap to case: Align hinges and secure with small brass brads or fabric-covered buttons. Ensure straps move freely but stay firm.
- Add clasp: On one strap end, attach a small rectangular tab with a punched hole. On the other, add a paperclip-style hook or loop made from stiff wire or bent cardboard coated in resin.
- Seal the entire watch: Apply 2–3 coats of clear acrylic sealer or mod podge, allowing drying between layers. This protects against sweat and minor impacts.
- Final decoration: Embellish with paint, washi tape, metallic leaf, or stenciled patterns. Avoid adding weight unevenly, which could affect balance.
Real Example: Maya’s First Cardboard Watch Project
Maya, a 16-year-old student from Portland, decided to make a cardboard watch for her school’s sustainability fair. She used recycled Amazon boxes, gold acrylic paint, and a salvaged clock mechanism she removed from an old wall clock. After three attempts—her first broke at the strap joint—she discovered that layering three sheets of cardboard and sealing both sides prevented splitting.
Her final design featured a sunburst pattern painted by hand and a magnetic clasp made from tiny repurposed fridge magnets. The watch lasted over four months with daily wear, only needing a touch-up of sealant after exposure to rain. Her project won second place and inspired two classmates to start their own versions.
Common Pitfalls and How to Avoid Them
Even simple projects come with learning curves. Here are frequent issues and solutions:
- Strap breaks at connection point: Reinforce with extra glue layers or insert a thin plastic strip as an internal brace.
- Dial peels or smudges: Always seal before decorating, and use alcohol-based markers instead of water-soluble pens.
- Watch feels unbalanced: Keep decorations light and centered. If using a real clock mechanism, embed it flush with the back panel.
- Clasp fails to hold: Test closure strength early. Consider Velcro dots or elastic threading as backup options.
“In prototyping, failure teaches more than success. Every broken strap is data.” — Rafael Kim, Industrial Designer & Maker Mentor
Checklist: Build Your Cardboard Watch in Order
- ☐ Gather materials: cardboard, glue, cutting tools, ruler, compass
- ☐ Measure wrist and plan dimensions
- ☐ Sketch design including face, strap, and clasp style
- ☐ Cut and layer watch face; let dry completely
- ☐ Mark hours and decorate dial
- ☐ Cut and reinforce straps with multiple layers
- ☐ Attach hinge pieces to both ends of straps
- ☐ Connect straps to watch case using brads or rivets
- ☐ Install hands (static or functional)
- ☐ Create and test clasp mechanism
- ☐ Seal entire watch with protective coating
- ☐ Final inspection: check flexibility, comfort, symmetry
Frequently Asked Questions
Can I make a working cardboard watch?
Yes. Remove the mechanism from a cheap quartz watch or clock and embed it into the cardboard face. Secure with hot glue and ensure the stem remains accessible for setting time. Just remember: moisture and rough handling can damage the electronics.
How long does a cardboard watch last?
With proper sealing and careful use, a well-made cardboard watch can last 3–6 months of regular wear. Occasional resealing extends its life. Avoid submerging in water or wearing during intense physical activity.
Is this project safe for kids?
Yes, with supervision. Replace utility knives with safety scissors for younger crafters. Use non-toxic glue and paints. Focus on decorative, non-wearable versions if durability is not a priority.
Conclusion: Start Crafting Today
A handmade cardboard watch is more than a craft—it’s a statement of creativity, environmental awareness, and personal style. What begins as a simple weekend project can evolve into a portfolio piece, gift idea, or even a small business venture. No special skills are required, only curiosity and attention to detail.


 浙公网安备
33010002000092号
浙公网安备
33010002000092号 浙B2-20120091-4
Comments
No comments yet. Why don't you start the discussion?