
Creating your own accessories adds a personal touch to everyday items while allowing you to express creativity without breaking the bank. A pearl chain keychain combines elegance and practicality, transforming an ordinary set of keys into a fashion statement. Whether you're new to crafting or looking for a simple weekend project, this guide walks you through every detail—from selecting materials to finishing touches—so you can make a polished, wearable piece in under an hour.
Gathering Your Materials
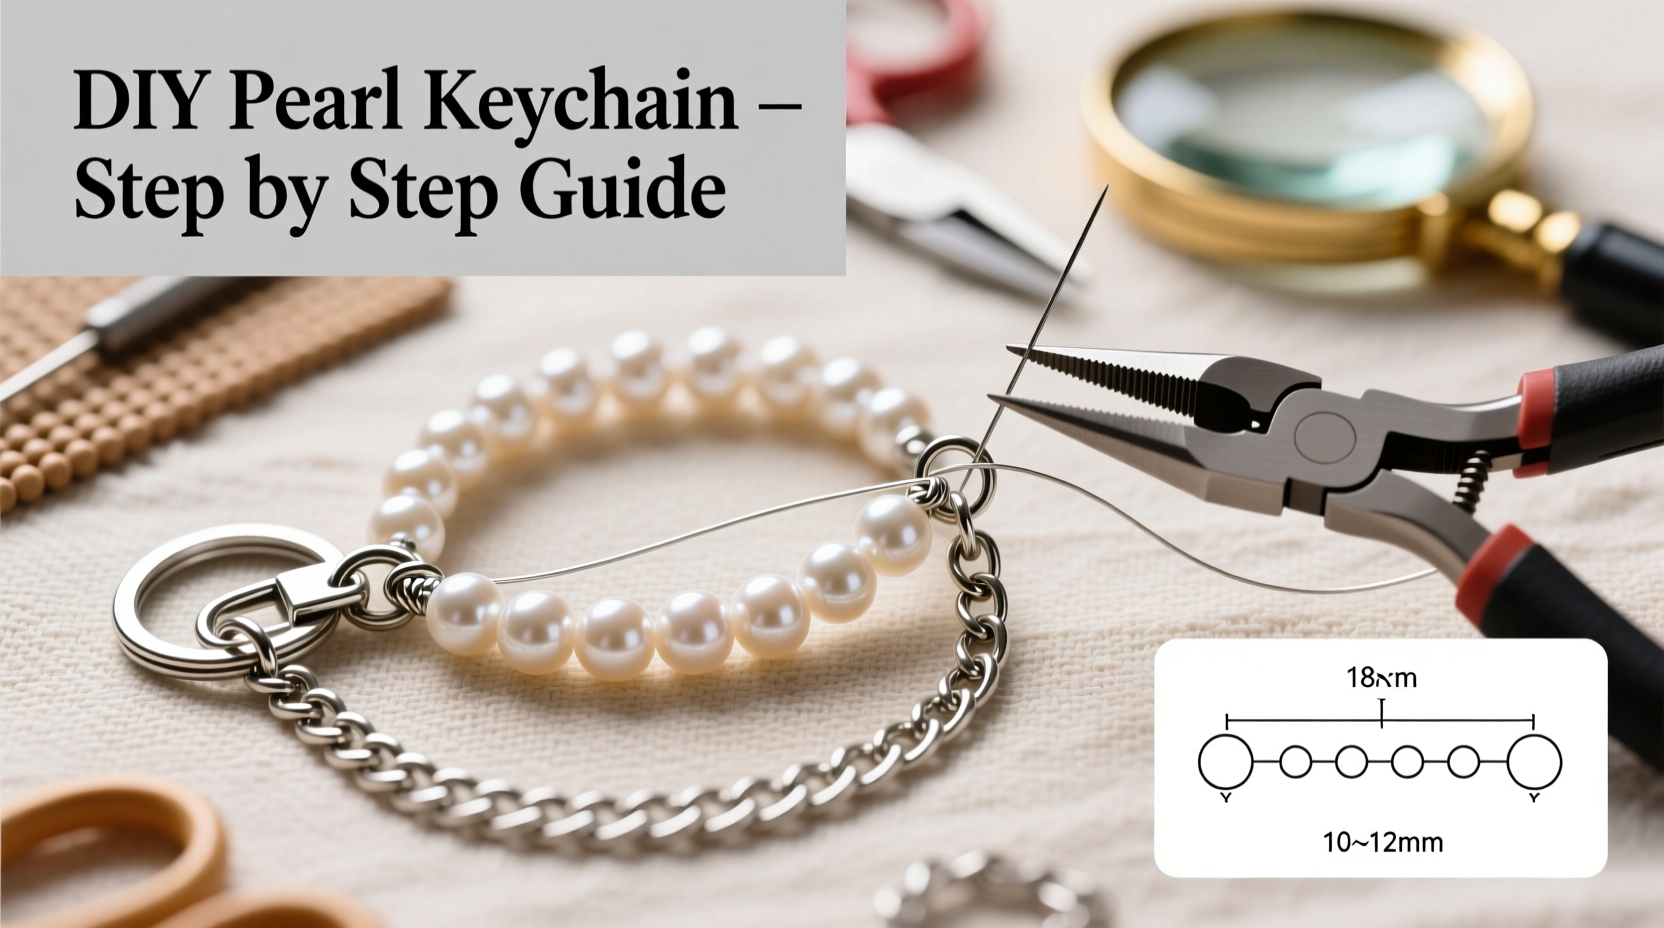
The foundation of any successful DIY project lies in preparation. For a pearl chain keychain, you’ll need a small collection of accessible supplies that are widely available at craft stores or online retailers like Etsy or Amazon. Choosing quality components ensures durability and a professional appearance, even for first-time crafters.
- Faux pearl beads (4–6mm recommended for beginners)
- Chain necklace (gold or silver tone, 16–18 inches)
- Spring ring clasp or lobster clasp
- Jump rings (4–5mm, matching metal tone)
- Pliers (flat-nose and round-nose preferred)
- Keyring (stainless steel or brass, 25–30mm)
- Optional: spacer beads, charms, or enamel accents
When sourcing faux pearls, consider luster and consistency. High-quality acrylic pearls reflect light evenly and feel slightly heavier than cheap alternatives. Chains with soldered links are less likely to break during use. If you plan to gift the keychain, packaging it in a small velvet pouch enhances presentation.
Step-by-Step Assembly Guide
Follow this structured sequence to build your keychain confidently and efficiently. Each step is designed with beginner clarity in mind, minimizing frustration and maximizing results.
- Cut the chain: Use wire cutters to snip the chain to your desired length—typically 4 to 5 inches for a compact drape. Avoid pulling links apart; cutting preserves structural integrity.
- Open a jump ring: Grip one side of the jump ring with each pair of pliers. Slide sideways to open—never pull outward, which deforms the ring.
- Attach the clasp: Thread the opened jump ring through the end link of the chain and the loop on the clasp. Close securely by reversing the opening motion.
- Add the first pearl: String a single pearl bead onto the opposite end of the chain. Let it rest near the final link.
- Secure the keyring: Open a second jump ring and connect it to the last chain link and the keyring. Add another pearl bead onto the same jump ring before closing it for balance.
- Incorporate spacers (optional): Insert tiny metal beads between pearls to prevent friction and add visual rhythm.
- Final check: Gently tug all connections to ensure stability. Rotate each joint to confirm smooth movement without snagging.
Take your time during assembly. Rushing increases the risk of misaligned closures or dropped beads. Work on a clean, well-lit surface with a tray to contain small parts.
Design Variations and Customization Ideas
Once you’ve mastered the basic structure, customization allows your personality to shine. The beauty of DIY lies in adaptability—no two pieces need to be identical.
| Style Theme | Material Suggestions | Best For |
|---|---|---|
| Minimalist Chic | Single pearl, delicate gold chain, tiny clasp | Daily use, professional settings |
| Vintage Glamour | Rice pearls, rose-gold chain, filigree charm | Gifting, special occasions |
| Boho Layered | Mixed bead sizes, tassel accent, oxidized silver | Festival wear, creative expression |
| Modern Edge | Black pearls, gunmetal chain, geometric clasp | Evening outings, bold statements |
You might also personalize with initials via alphabet charms or incorporate birthstone-colored spacers. One crafter in Portland layered three short pearl chains onto a single oversized keyring to mimic bracelet stacks—a favorite among her friends for its uniqueness.
“Accessories don’t have to be expensive to feel luxurious. Thoughtful design elevates simple materials.” — Lila Monroe, Jewelry Designer & Craft Educator
Avoiding Common Beginner Mistakes
New crafters often encounter predictable hurdles. Anticipating these challenges streamlines the process and prevents discouragement.
- Using pliers incorrectly: Pliers should twist open jump rings laterally, not pull them apart. Misuse weakens the connection and creates gaps where links can slip free.
- Skipping pre-stretching the chain: Some chains kink when cut. Lightly stretching before cutting helps identify weak spots.
- Overloading with beads: Too many pearls weigh down the chain, straining clasps and reducing usability.
- Ignoring metal allergies: Opt for nickel-free components if the keychain will touch skin frequently.
Frequently Asked Questions
Can I wash my pearl chain keychain?
Avoid submerging it in water. Instead, wipe gently with a soft, dry cloth. Moisture can corrode metal joints and dull pearl coatings over time.
How long does it take to make one?
First-timers typically finish within 45 minutes. With practice, construction takes 15–20 minutes. Allow extra time for intricate designs.
Are real pearls suitable for this project?
Possibly, but not recommended. Real pearls are porous and sensitive to chemicals, sweat, and friction. Faux pearls offer similar aesthetics with greater resilience for daily handling.
Checklist: Build Your Pearl Keychain Successfully
Use this checklist before starting to ensure you’re fully prepared:
- ☑ Gather all tools and materials
- ☑ Verify clasp and jump ring compatibility
- ☑ Choose a comfortable workspace with good lighting
- ☑ Lay out components in order of use
- ☑ Practice opening/closing jump rings safely
- ☑ Inspect chain for kinks or weak links
- ☑ Assemble and test functionality
- ☑ Clean hands before handling beads to avoid smudges
Conclusion: Start Crafting Today
A handmade pearl chain keychain blends simplicity with sophistication, proving that elegant accessories don’t require advanced skills or high costs. With just a few tools and thoughtful attention to detail, you can create something both functional and beautiful. Whether you keep it for yourself or give it as a heartfelt gift, each piece carries the value of time, care, and individuality. Now that you have the knowledge, there’s no better moment than today to begin.


 浙公网安备
33010002000092号
浙公网安备
33010002000092号 浙B2-20120091-4
Comments
No comments yet. Why don't you start the discussion?