
Transform a simple idea into a striking piece of home decor by crafting your own square clock. Unlike traditional round clocks, a square design offers a contemporary edge that complements minimalist, industrial, or Scandinavian interiors. This guide walks you through every stage—from selecting materials to installing the timekeeping mechanism—ensuring even first-time crafters can complete the project with confidence. With just a few tools and a bit of creativity, you’ll have a functional art piece that tells time and reflects your personal style.
Why Choose a Square Clock?
Square clocks stand out not only for their shape but also for the design freedom they offer. The straight edges allow for clean lines, geometric patterns, and integration with photo frames, mirrors, or layered wood designs. Interior designer Lena Torres notes:
“Square formats align naturally with architectural elements like shelves, doors, and picture rails. They create visual harmony in modern spaces where symmetry matters.” — Lena Torres, Interior Designer & Home Stylist
Beyond aesthetics, square clocks are easier to build from scratch using common materials like wood, MDF, or acrylic sheets. Their flat surfaces lend themselves well to painting, stenciling, or collage, making them ideal canvases for personal expression.
Materials and Tools You’ll Need
Gathering the right supplies is essential for a smooth workflow. Below is a checklist to help you prepare before starting.
Essential Materials
- Wood panel or MDF board (8” x 8” or custom size)
- Clock movement kit (quartz, includes hands, shaft, nut, and washer)
- Battery-powered clock mechanism (AA recommended)
- Sandpaper (120 and 220 grit)
- Acrylic or wood paint (base and accent colors)
- Paintbrushes or foam brush set
- Painter’s tape (for clean lines)
- Clear sealant (matte or gloss, depending on finish preference)
- Drill with 3/8” drill bit (for clock shaft)
- Ruler, pencil, and compass (for center marking)
- Decorative elements (optional: washi tape, stencils, fabric scraps, metallic leaf)
Optional Upgrades
- Felt backing (to protect walls)
- Magnetic number strips (for easy reconfiguration)
- LED backlighting (requires wiring knowledge)
- Hanging hardware (D-ring or sawtooth hanger)
Step-by-Step Construction Guide
Follow this timeline to assemble your square clock efficiently and accurately.
- Prepare the Base: Cut your wood or MDF to the desired square dimensions. An 8-inch square is ideal for beginners—it's large enough to read clearly but small enough to fit on most walls.
- Sand the Surface: Begin with 120-grit sandpaper to smooth rough edges, then switch to 220-grit for a fine finish. Wipe away dust with a dry cloth.
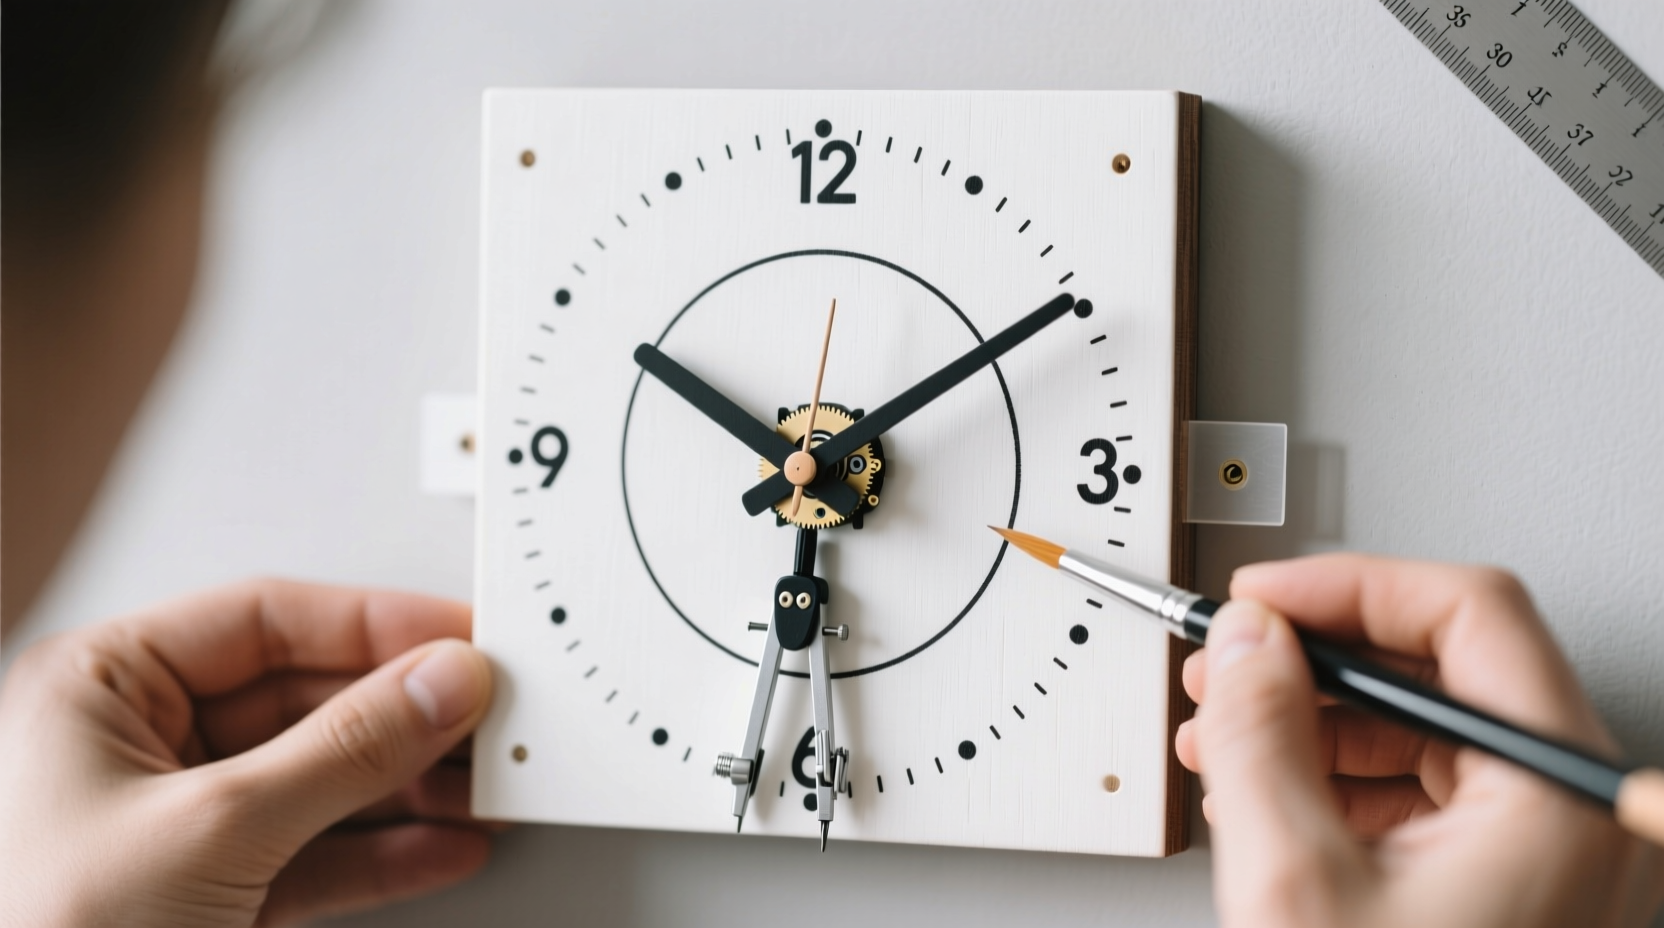
- Mark the Center: Use a ruler to draw diagonal lines from each corner. Where they intersect is the exact center—this is where the clock mechanism will go.
- Drill the Shaft Hole: Using a 3/8” drill bit, carefully drill through the center point. Keep the drill perpendicular to avoid an angled hole.
- Design the Face: Now comes the creative phase. Paint a solid base color and let it dry. Use painter’s tape to create stripes, chevrons, or a two-tone quadrant design. Add numbers manually or use adhesive numerals. Stencils ensure uniformity.
- Seal the Design: Once fully dry, apply a clear sealant in thin, even coats. Allow 2–4 hours between coats. Two coats are usually sufficient.
- Install the Movement: Insert the clock shaft through the front of the face. From the back, add the washer, then screw on the nut securely—but don’t overtighten, as this may damage the threads.
- Attach the Hands: Slide on the hour, minute, and second hands in order. Most kits allow hand placement in any position; align them to 12:00 when inserting.
- Insert Battery: Place a fresh AA battery into the mechanism. The second hand should begin moving immediately.
- Add Hanging Hardware: Attach a D-ring or sawtooth hanger to the back. For balance, position it one-third down from the top edge.
Design Inspiration and Customization Ideas
Your clock doesn’t need to follow convention. Consider these real-world examples to spark ideas:
Mini Case Study: The Monochrome Gallery Clock
Jamie, a graphic designer in Portland, created a series of three matching square clocks for her home office. Each used black walnut veneer with white stenciled numbers and brass hands. She arranged them in a vertical line beside her desk, syncing them to different time zones for both function and aesthetic rhythm. The result became a conversation starter during virtual meetings.
Customization options include:
- Natural Wood Finish: Emphasize grain with a light oil stain and no paint.
- Chalkboard Paint: Lets you redraw numbers weekly or write motivational messages.
- Photo Collage: Embed small printed photos around the perimeter, leaving the center clear for hands.
- Geometric Cutouts: Use a jigsaw to carve triangular or hexagonal openings around the edge, revealing a contrasting backing layer.
Common Pitfalls and How to Avoid Them
| Do | Don’t |
|---|---|
| Use a pilot hole when attaching hardware to prevent wood splitting. | Over-tighten the clock nut—this can stall the motor. |
| Let paint dry completely before sealing to avoid bubbling. | Place hands too close together—they may catch and stop the mechanism. |
| Double-check alignment before securing decorative elements permanently. | Ignore wall safety—ensure the hanging method supports the clock’s weight. |
| Test the mechanism outside the frame before final assembly. | Use water-based sealants on unfinished wood without sealing first—warping may occur. |
Frequently Asked Questions
Can I use a recycled picture frame for this project?
Absolutely. A sturdy wooden or metal frame with a flat surface works well. Remove the glass and backing, then use the front panel as your clock face. Just ensure the center is drillable and the frame won’t obstruct the hands’ movement.
What if my clock hands wobble or don’t move smoothly?
Wobbling usually means the shaft isn’t seated straight or the hands are bent. Gently adjust them with pliers. If the second hand jerks or stops, check the battery charge and confirm no debris is caught inside the mechanism.
How accurate are DIY clock movements?
Most quartz mechanisms are highly accurate, losing or gaining less than one minute per month under normal conditions. Store batteries in a cool place and replace them annually for consistent performance.
Final Touches and Display Tips
Once assembled, step back and evaluate your clock from a distance. Does the design feel balanced? Are the numbers readable from across the room? Consider adding felt pads to the bottom corners to prevent wall scratches when hanging.
For display, pair your square clock with other angular decor—like framed art or shelving units. It works especially well above a console table, in a gallery wall cluster, or in a kitchen near a backsplash with similar tones.
Start Crafting Today
Creating a stylish square clock is more than a weekend project—it’s a chance to blend craftsmanship with daily utility. Whether you make one for yourself or as a thoughtful handmade gift, the process builds confidence in working with tools and design principles. Every brushstroke and measurement becomes part of a functional heirloom.


 浙公网安备
33010002000092号
浙公网安备
33010002000092号 浙B2-20120091-4
Comments
No comments yet. Why don't you start the discussion?