
Footwear is more than just protection for your feet—it’s an expression of identity, comfort, and creativity. While store-bought shoes offer convenience, they often lack the perfect fit or personal flair many people desire. Crafting your own DIY shoes allows you to design exactly what you want: the shape, color, material, and function tailored to your lifestyle. With patience and the right approach, anyone can create one-of-a-kind footwear from scratch. This comprehensive guide walks you through every phase, from concept to completion.
Selecting Your Shoe Type and Design
The first step in creating custom shoes is deciding on the type and aesthetic. Are you making casual slip-ons, supportive sneakers, elegant flats, or rugged boots? Each style requires different materials, construction techniques, and time investment. Sketch your idea on paper or use digital tools to visualize proportions, heel height, toe box shape, and closure method (laces, straps, elastic, etc.). Consider both form and function—will these shoes be worn daily, for special occasions, or as artistic pieces?
Beginners should start with simple silhouettes like moccasins or sandals, which require minimal stitching and fewer structural components. As skills develop, more complex designs involving midsoles, shanks, or molded uppers become achievable.
Gathering Materials and Tools
Successful DIY shoemaking hinges on quality supplies. Unlike clothing, shoes endure constant pressure, friction, and moisture, so durability is critical. Below is a foundational list of materials and tools needed for most handmade footwear projects.
| Category | Items |
|---|---|
| Materials | Leather, canvas, or synthetic uppers; rubber or EVA outsoles; insole board; lining fabric; thread (waxed polyester or nylon); eyelets; laces or straps |
| Tools | Utility knife or rotary cutter; heavy-duty scissors; hammer; awl; stitching groover; edge beveler; last (foot-shaped mold); shoe glue (contact cement); clamps; ruler and measuring tape |
| Optional but Helpful | Sewing machine (for straight seams), leather punch, sandpaper, finish sealant, pattern paper |
Invest in a good pair of cutting tools and durable thread—these make a significant difference in precision and longevity. Leather sourced from reputable tanneries lasts longer and shapes better than low-grade alternatives.
Creating a Custom Pattern
A precise pattern ensures your shoes fit correctly and maintain structural integrity. Begin by tracing your foot onto thick paper while standing barefoot on a flat surface. Mark key points: heel center, ball of the foot, widest part, and toe tip. Add 1/2 inch around the perimeter for seam allowance. For more accuracy, use a shoe last that matches your foot size and shape.
- Wrap the last with masking tape and mark key zones (instep, arch, heel).
- Carefully remove the tape and lay it flat to form a base template. <3>Refine the shape using smooth curves and test-fit adjustments.
- Divide the upper into sections: vamp, quarters, tongue, heel counter, etc., depending on style.
- Transfer each section to cardboard or manila folder stock and cut out as durable stencils.
Test your pattern by cutting a mock-up from inexpensive fabric or scrap leather. Try it on, check for tightness or gaps, and adjust accordingly before cutting final materials.
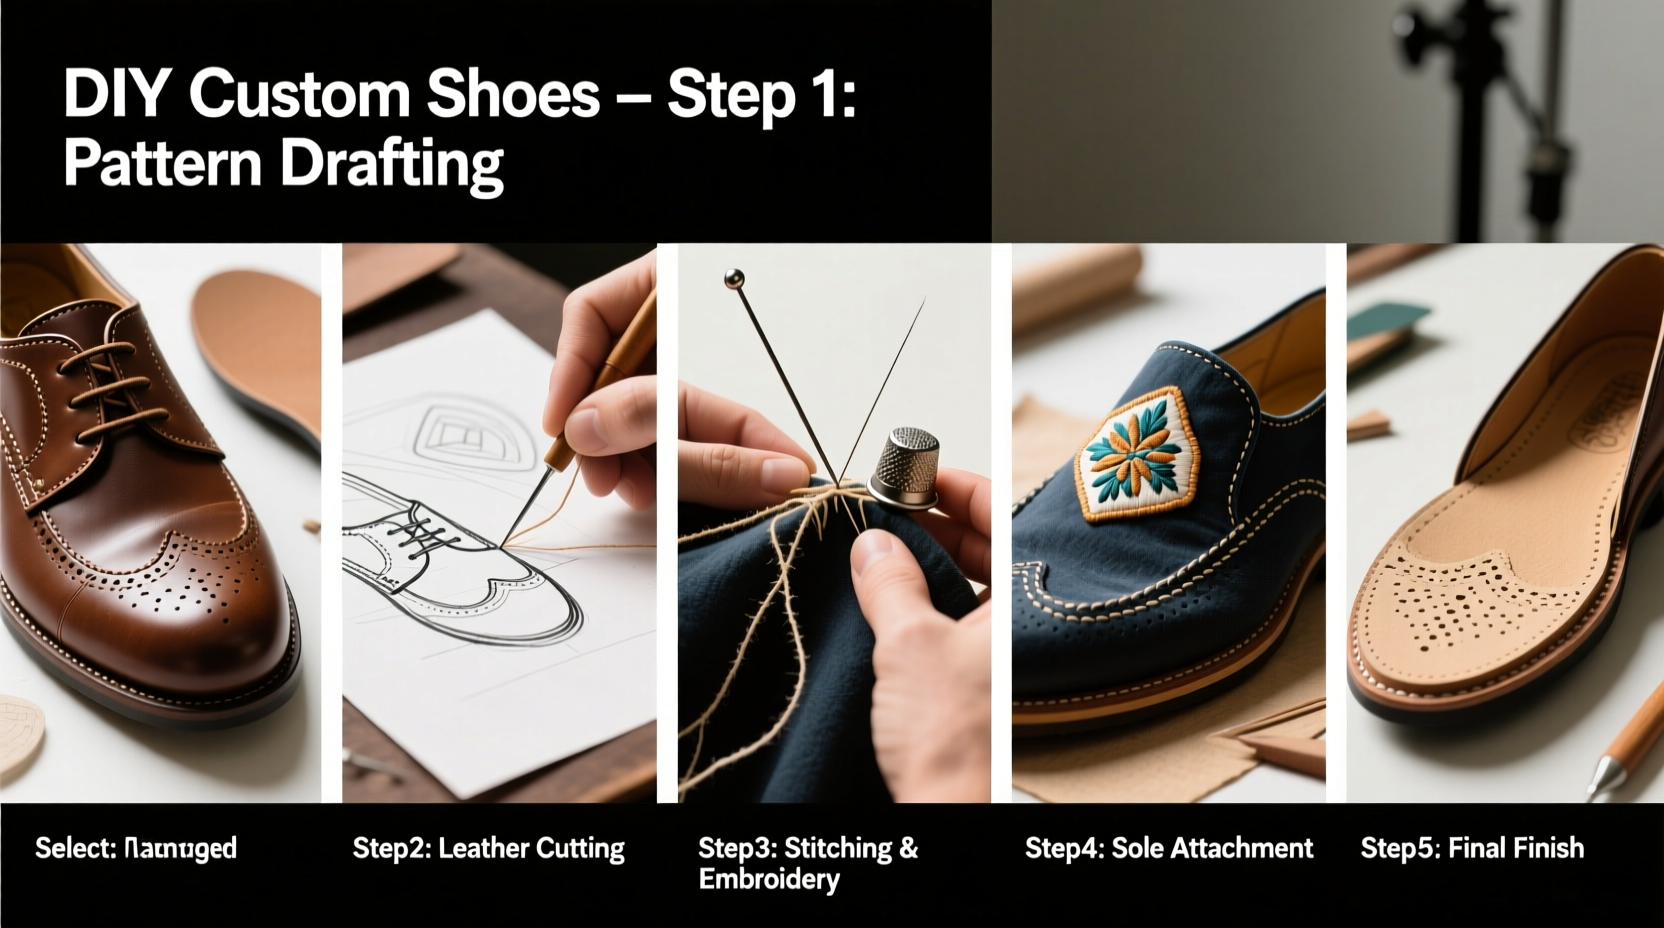
Constructing Your Shoes: Step-by-Step Assembly
Once your pattern is finalized, begin assembling the shoe in stages. The following sequence applies to most lace-up or slip-on styles using leather uppers and pre-made soles.
- Cut the Upper: Lay your pattern pieces on the chosen material and trace them carefully. Cut with sharp shears or a rotary blade for clean edges.
- Prepare the Sole: Use a premade rubber outsole or shape one from layered EVA foam or cork. Trace your foot or last base onto the sole material and cut precisely.
- Stitch the Upper: Join the upper sections using saddle stitch or machine sewing. Reinforce high-stress areas like the heel and toe box. If hand-stitching, use two needles and waxed thread for strength.
- Attach the Insole: Glue a firm insole board to the inside of the sole. This provides stability and defines the shoe’s interior footprint.
- Last the Shoe: Stretch the stitched upper over the last. Secure it temporarily with rubber bands or clips to hold the shape during assembly.
- Attach the Upper to the Sole: Apply contact cement to both the upper’s margin and the sole edge. Wait until tacky, then press firmly together. Use clamps or weights to ensure full adhesion.
- Finish Edges: Bevel and sand the sole edges smooth. Burnish with water and a wooden slicker for a polished look. Apply edge paint if desired.
- Add Final Details: Install eyelets, laces, labels, or decorative elements. Condition the leather with oil or cream to enhance appearance and water resistance.
Allow glued joints to cure for at least 24 hours before wearing. Rushing this step risks delamination under stress.
“Handmade shoes aren’t just about aesthetics—they teach respect for craftsmanship. Every stitch carries intention.” — Rafael Mendez, Artisan Shoemaker & Instructor
Maintenance and Longevity Tips
DIY shoes require care to remain functional and attractive. Rotate wear between multiple pairs to reduce strain and moisture buildup. After each use, wipe away dirt with a damp cloth and let them air dry naturally—never near direct heat.
- Re-waterproof leather every few months using beeswax or specialized conditioners.
- Replace worn laces or insoles promptly to extend overall life.
- Store shoes with cedar shoe trees to absorb moisture and retain shape.
- Inspect soles regularly for cracks or detachment, especially at the welt or adhesive line.
Real-World Example: Sarah’s Custom Garden Clogs
Sarah, a horticulturist from Oregon, wanted comfortable, washable clogs for her greenhouse work. Off-the-rack options either pinched her wide forefoot or wore out too quickly. Using a pair of old wooden clogs as inspiration, she designed a hybrid: a flexible EVA sole with a breathable mesh upper reinforced with leather overlays.
She used a foam last to shape the sole, stitched the upper by machine, and attached it with industrial shoe glue. She added antimicrobial lining to resist odors from damp soil. After three iterations, she achieved a lightweight, easy-to-clean shoe that supported her feet during eight-hour shifts. Neighbors began requesting pairs, and she now sells a small batch monthly at local farmers' markets.
Her success stemmed not from advanced skills, but from observing real needs and iterating based on feedback.
Frequently Asked Questions
Can I make waterproof shoes at home?
Yes, but it requires careful material selection and sealing. Use waterproof membranes like Gore-Tex or apply seam sealer after stitching. Fully coat leather with waxes or sprays, and avoid porous fabrics in wet environments.
How long does it take to make a pair of DIY shoes?
A beginner may spend 8–15 hours over several days, including drying times for glue and finishes. Experienced makers can complete a pair in 5–7 hours. Simpler styles like moccasins take less time than structured oxfords or boots.
Are DIY shoes durable enough for daily wear?
When constructed properly with quality materials, yes. Hand-stitched or Goodyear-welted styles often outlast mass-produced glued footwear. However, durability depends on technique, maintenance, and usage intensity.
Start Crafting Your Signature Style Today
Creating your own shoes is more than a hobby—it’s a reclaiming of individuality in a world of mass production. With thoughtful planning, attention to detail, and a willingness to learn from mistakes, you can produce footwear that fits flawlessly and tells your story. Whether you’re designing bold fashion statements or solving practical fit issues, the process empowers deeper connection to what you wear.


 浙公网安备
33010002000092号
浙公网安备
33010002000092号 浙B2-20120091-4
Comments
No comments yet. Why don't you start the discussion?