
Creating personalized accessories doesn’t require years of experience or expensive equipment. With a few basic supplies and a bit of patience, you can design beautiful pearl and diamond-style keychains that reflect your taste and craftsmanship. These delicate yet durable pieces make thoughtful gifts or charming additions to your everyday carry. Whether you're new to jewelry making or exploring a creative hobby, this guide walks you through every stage—from selecting materials to adding the final polish.
Gathering Essential Materials and Tools
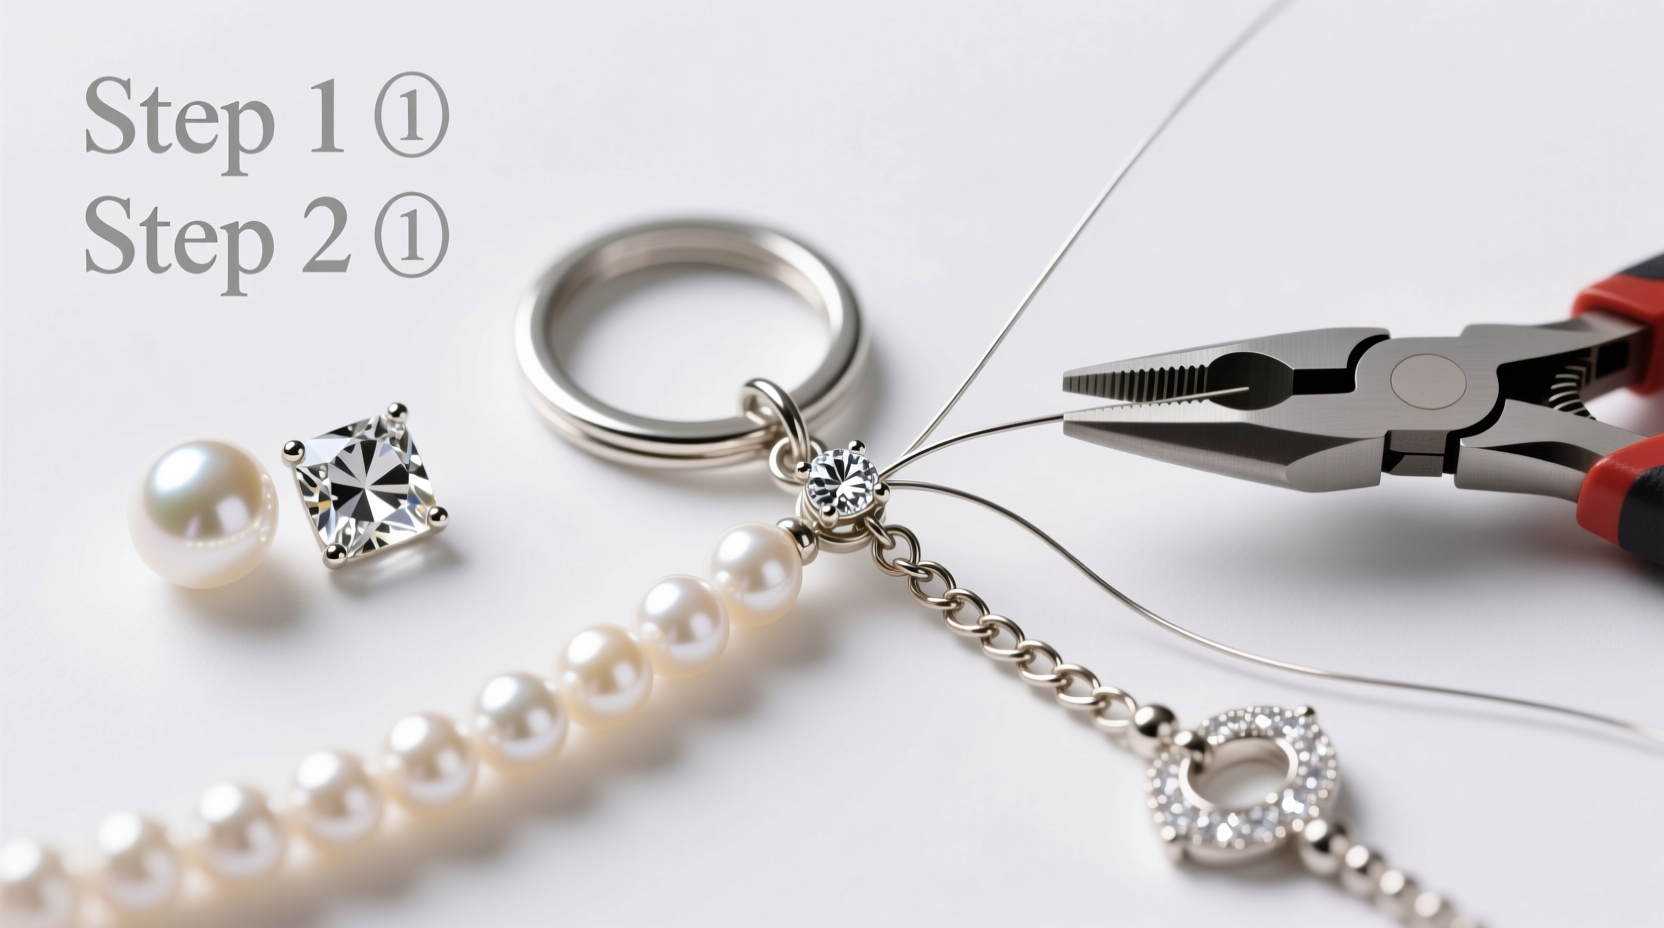
The foundation of any successful DIY project lies in preparation. Before beginning, ensure you have all necessary components on hand. The beauty of crafting pearl and faux diamond keychains is that they don’t require precious metals or real gemstones—high-quality imitations offer dazzling results at a fraction of the cost.
Here’s what you’ll need:
- Faux pearls (4mm–8mm recommended)
- Swarovski or cubic zirconia accent stones
- Jump rings (6mm, stainless steel or gold-plated)
- Keychain clasp (lobster claw or split ring style)
- Jewelry pliers (flat-nose and round-nose)
- Chain link (optional, for dangle designs)
- Glue (E6000 or GS Hypo cement for secure bonding)
- Soft cloth or tray to organize small parts
Design Planning: Sketch Your Vision
Before assembling, sketch a rough layout of your keychain. Consider symmetry, balance, and proportion. Will it feature a single pearl centerpiece? A cascade of alternating pearls and rhinestones? Or perhaps a minimalist bar with three evenly spaced gems?
A well-thought-out design ensures fewer mistakes during construction. For beginners, starting with a classic teardrop shape—a central pearl suspended from a halo of micro-diamonds—is both achievable and elegant.
“Even the simplest design gains sophistication through precision. Measure twice, connect once.” — Lila Nguyen, Artisan Jewelry Designer
Step-by-Step Assembly Process
Follow this structured sequence to build your keychain securely and beautifully.
- Prepare your workspace: Lay out tools and materials on a clean, well-lit surface. Use a tray to contain loose beads.
- Attach the base connector: Open a jump ring using two pairs of pliers (twist sideways, don’t pull apart). Slide it through the top loop of your keychain clasp, then close firmly.
- Create the focal element: If using a pendant setting, glue a larger faux pearl into the center cup. Allow 5 minutes to set before handling.
- Add accent stones: Arrange smaller rhinestones around the pearl using adhesive dots or micro-prong settings. Press gently and let dry for 10 minutes.
- Connect components: Link the finished charm to the jump ring on the clasp. Ensure movement is smooth but secure.
- Final inspection: Check all connections, wipe away fingerprints with a soft cloth, and verify no glue residue remains visible.
Material Comparison: Choosing Wisely for Durability and Shine
Not all imitation pearls and diamonds perform equally. Understanding material differences helps you select long-lasting options that mimic luxury without compromise.
| Material | Appearance | Durability | Best For |
|---|---|---|---|
| Acrylic Faux Pearls | Smooth, lustrous finish | Moderate – scratches over time | Beginner projects, lightweight designs |
| Crystal Rhinestones | High sparkle, prism effect | High – resistant to fading | Accent details, light reflection |
| Cubic Zirconia Settings | Near-diamond brilliance | Very high – scratch-resistant | Premium finishes, gift items |
| Resin-Coated Pearls | Deep iridescence | Low – sensitive to heat | Indoor use, display pieces |
Select materials based on intended use. For daily carry keychains, prioritize durability. For decorative or gift versions, aesthetic richness may take precedence.
Common Pitfalls and How to Avoid Them
Even careful crafters encounter setbacks. Recognizing frequent issues—and their solutions—keeps frustration low and results high.
- Glue overflow: Apply adhesives sparingly with a toothpick. Wipe excess immediately with a cotton swab.
- Loose jump rings: Always fully close them after insertion. Test stability by gently tugging connected parts.
- Uneven spacing: Use a ruler or template card with marked intervals when placing stones.
- Dull finish: Clean hands before handling gems. Oils from skin can reduce shine over time.
“A beginner’s greatest tool isn’t skill—it’s observation. Watch how professionals assemble layers, and replicate those proportions.” — Marcus Reed, Craft Educator
Real Example: Sarah’s First Keychain Project
Sarah, a college student with no prior jewelry experience, wanted to make matching keychains for her bridesmaids. She began with inexpensive acrylic pearls and basic lobster clasps. Her first attempt had uneven stone placement and one open jump ring that came loose within days.
After reviewing alignment techniques and switching to E6000 glue for stronger holds, her second batch showed dramatic improvement. By measuring distances between beads and using tweezers for precise placement, she created six identical, polished keychains. One year later, all remain intact—proof that learning curves lead to lasting results.
Frequently Asked Questions
Can I wash my pearl and diamond keychain?
Avoid submerging it in water. Moisture can weaken glue bonds and tarnish metal components. Instead, gently wipe with a dry microfiber cloth to remove dust and oils.
How long does the adhesive take to cure completely?
Most jewelry glues set in 5–10 minutes but reach full strength after 24 hours. Do not handle or test connections until the full curing period has passed.
Are these keychains safe to carry daily?
Yes, provided you use durable materials and secure fasteners. Avoid dropping on hard surfaces, which can chip stones or bend connectors.
Checklist: Build Your Keychain with Confidence
Use this checklist before, during, and after your project to stay organized and efficient.
- ☑ Gather all materials and tools
- ☑ Sketch a simple design or choose a template
- ☑ Prepare a clean, well-lit workspace
- ☑ Test jump ring opening/closing technique
- ☑ Apply adhesive precisely and allow proper drying time
- ☑ Inspect final product for security and appearance
- ☑ Store extras in a compartment box for future use
Conclusion: Start Crafting Today
There’s a quiet joy in holding something you’ve made with your own hands—especially when it carries elegance and purpose. Crafting pearl and diamond-style keychains opens a world of creativity accessible to anyone willing to try. No formal training, no large investment, just attention to detail and a desire to create.
Each piece you make becomes more than an accessory—it’s a testament to patience, personal style, and the satisfaction of handmade beauty. So gather your supplies, follow these steps, and let your imagination guide your next creation.


 浙公网安备
33010002000092号
浙公网安备
33010002000092号 浙B2-20120091-4
Comments
No comments yet. Why don't you start the discussion?