
Chinese knotting is an ancient art form that combines symbolism, symmetry, and craftsmanship into intricate designs. Once used as functional fasteners and decorative elements in traditional garments and homes, these knots are now popular in modern accessories like phone lanyards. Beyond their visual appeal, Chinese knots carry cultural significance—representing luck, prosperity, and protection. Creating your own Chinese knot phone lanyard is not only a rewarding craft project but also a way to connect with heritage through hands-on creativity. This guide walks you through the entire process, from selecting materials to finishing your first wearable piece.
Understanding the Basics of Chinese Knots
Chinese knotting dates back over a thousand years, originating during the Tang and Song dynasties. These knots were traditionally made from silk threads and used as closures for robes or decorative wall hangings. Each knot follows a specific pattern, often symmetrical, and many have symbolic meanings. For example, the \"double coin knot\" represents wealth, while the \"endless knot\" signifies harmony and continuity.
The most common knot used in phone lanyards is the **square knot**, known for its stability and clean appearance. It's beginner-friendly and serves as a foundation for more complex variations. Other knots like the panicle knot or lucky knot add visual interest and texture but require slightly more dexterity.
Unlike Western macramé, which often uses thicker cords and focuses on asymmetry, Chinese knotting emphasizes compactness, repetition, and balance. The result is a dense, polished look where every loop contributes to the overall harmony of the design.
“Chinese knots are more than decoration—they’re a language of intention woven in thread.” — Dr. Li Wen, Cultural Heritage Researcher at Beijing Institute of Folk Art
Materials and Tools You’ll Need
Before starting, gather all necessary supplies. Using the right materials ensures your lanyard is both durable and aesthetically pleasing.
| Item | Purpose | Recommended Type |
|---|---|---|
| Silk or satin cord | Main knotting material | 1.5–2mm thickness, 1–1.5 meters per lanyard |
| Scissors | Cutting cord cleanly | Sharp, small-tip scissors |
| Lighter or fray check | Sealing cut ends | Butane lighter for synthetic cords |
| Clip or pin | Holding work in place | Alligator clip or sewing pin |
| Phone charm ring or clasp | Attaching to device | Swivel lobster clasp or split ring |
Step-by-Step Guide to Making Your First Lanyard
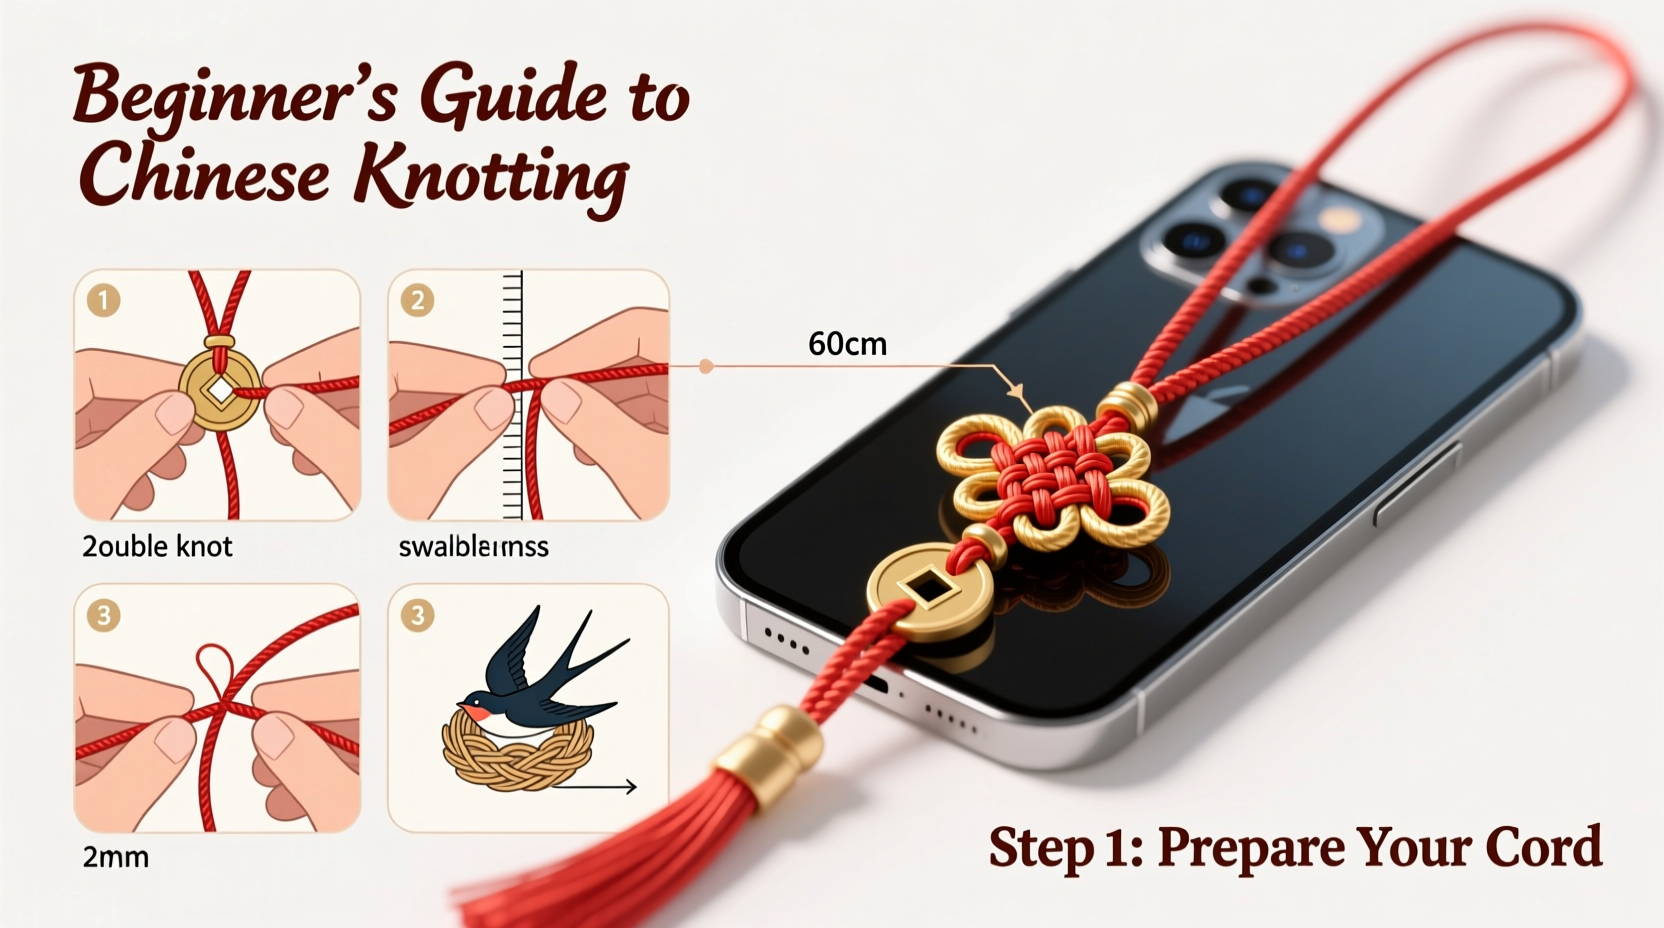
This section outlines a simple yet elegant Chinese knot phone lanyard using the square knot technique. The finished product will be approximately 30 cm long, ideal for attaching to smartphones or keychains.
- Prepare the Cord: Cut one main cord 120 cm long (this forms the body) and two shorter cords, each 40 cm (used for wrapping). Seal the ends with a lighter to prevent fraying.
- Anchor the Main Cord: Fold the 120 cm cord in half and secure the looped end to a clipboard or cushion using a pin or clip. This keeps your work stable.
- Add the Wrapping Cords: Place the two 40 cm cords horizontally across the center of the main cord. Fold them in half and tie a simple overhand knot around the vertical cords to anchor them.
- Create Square Knots: Take the left wrapping cord and cross it over the central vertical cords. Bring the right wrapping cord over it, under the verticals, and up through the left loop. Pull tight. Repeat on the opposite side to complete one full square knot unit. Continue for 8–10 units.
- Form the Pendant Loop: After completing the knotted section, separate the two halves of the main cord. Tie them together in a large loop using a secure knot (like a fisherman’s knot), leaving enough space for your fingers to grip.
- Add the Clasp: Thread a swivel clasp onto the bottom ends of the main cord. Secure with a double knot and seal the tips again with flame or glue.
- Trim and Finish: Neatly trim excess cord, ensuring all knots are tight. Gently tug each section to test durability.
With practice, this sequence can be completed in under 30 minutes. As you gain confidence, try incorporating additional knot types between square knot sections for visual variation.
Common Mistakes and How to Avoid Them
Beginners often encounter challenges when first learning Chinese knotting. Awareness of frequent errors helps ensure success.
- Tightening unevenly: Pull each strand with equal tension to maintain symmetry. Uneven pulls distort the knot’s shape.
- Using overly thick cord: Thicker cords make intricate patterns difficult and increase bulk. Stick to 1.5–2mm for starters.
- Skipping end sealing: Unsealed ends fray quickly, especially with synthetic cords. Always melt or coat tips after cutting.
- Rushing the process: Patience is essential. Rushing leads to miscounted knots and loose structures.
A Real Example: Maya’s First Lanyard Journey
Maya, a college student from Vancouver, decided to make a lanyard as a birthday gift for her grandmother who loved Chinese culture. She had no prior experience with knotting but followed a tutorial similar to this one. Her first attempt resulted in a lopsided knot due to inconsistent tension, but she didn’t give up. On her second try, she slowed down, counted each knot carefully, and used clips to stabilize her work. The final piece featured a red satin cord with a golden tassel and a small jade bead threaded into the loop. Her grandmother was moved—not just by the beauty of the lanyard, but by the time and thought behind it. Today, Maya sells custom lanyards at local craft fairs, inspired by that first imperfect knot.
Dos and Don’ts of Chinese Knot Crafting
| Do’s | Don’ts |
|---|---|
| Use smooth, non-stretchy cord | Use yarn or embroidery floss (too fluffy) |
| Work on a flat, stable surface | Knot in your lap without anchoring |
| Label cord ends with tape if multitasking | Leave unfinished pieces exposed to pets or wind |
| Practice basic knots separately before assembling | Assume all knots are reversible—some lose shape if undone |
Frequently Asked Questions
Can I wash my Chinese knot lanyard?
It’s best to avoid washing. If soiled, gently dab the area with a damp cloth and mild soap. Do not soak or machine wash, as moisture can weaken glued joints and cause discoloration.
How do I attach it to my phone securely?
Ensure your phone case has a lanyard hole or use a case with a built-in loop. Attach the clasp firmly, and periodically check the knots for wear, especially near stress points.
Are there cultural considerations when gifting Chinese knots?
Yes. Red knots symbolize joy and luck, making them excellent gifts for birthdays or Lunar New Year. Avoid giving white or black knots in celebratory contexts, as these colors are associated with mourning in some traditions.
Your Next Steps: Start Simple, Grow Confident
Every master artisan began with a single knot. What makes Chinese knotting special isn’t perfection—it’s the rhythm of looping, pulling, and creating something lasting from a simple thread. Begin with the square knot lanyard outlined here, then explore more complex patterns like the butterfly knot or crown knot. Share your creations with friends, incorporate beads or charms, or even personalize colors for different seasons or occasions.


 浙公网安备
33010002000092号
浙公网安备
33010002000092号 浙B2-20120091-4
Comments
No comments yet. Why don't you start the discussion?