
Transforming discarded materials into functional pet shelters is both environmentally responsible and deeply satisfying. Among the most accessible and resilient materials for outdoor cat housing is the humble car tire. Once destined for landfills, used tires can be repurposed into warm, weatherproof, and stylish homes for cats—whether they're beloved pets or community felines needing shelter. This guide walks you through the process of turning an old tire into a cozy, long-lasting refuge that combines creativity with practicality.
Why Build a Cat House from Tires?
Tires are remarkably durable, water-resistant, and insulating. Their thick rubber walls naturally buffer against wind, rain, and temperature swings, making them ideal for outdoor structures. When elevated and properly modified, a tire-based cat house offers stability, safety, and comfort year-round. Plus, recycling tires reduces environmental waste and supports sustainable living.
Cats themselves benefit from enclosed, slightly raised spaces where they feel secure. The circular shape of a tire mimics den-like environments that appeal instinctively to felines. With thoughtful design, a tire cat house becomes more than just shelter—it becomes a personalized retreat.
Materials and Tools You’ll Need
Before starting construction, gather all necessary supplies. Most can be sourced affordably or even for free through local garages, recycling centers, or online marketplaces.
| Material/Tool | Purpose | Notes |
|---|---|---|
| Used car tire (one or two stacked) | Main structure | Select clean, undamaged tires without exposed steel belts |
| Weather-resistant wood panel (e.g., marine plywood) | Floor and roof | At least ½ inch thick for durability |
| Outdoor-grade insulation foam or rigid board | Thermal lining | Helps retain heat in winter |
| Waterproof tarp or roofing membrane | Rain protection | Especially important if no overhang is built |
| Non-toxic exterior paint or sealant | Finish and UV protection | Avoid lead-based or aromatic paints |
| Screws, washers, and rust-resistant fasteners | Assembly | Stainless steel or coated screws recommended |
| Hand saw or jigsaw | Cutting wood and shaping openings | Power tools speed up the process |
| Drill with assorted bits | Securing components | Include countersink bit for flush finishes |
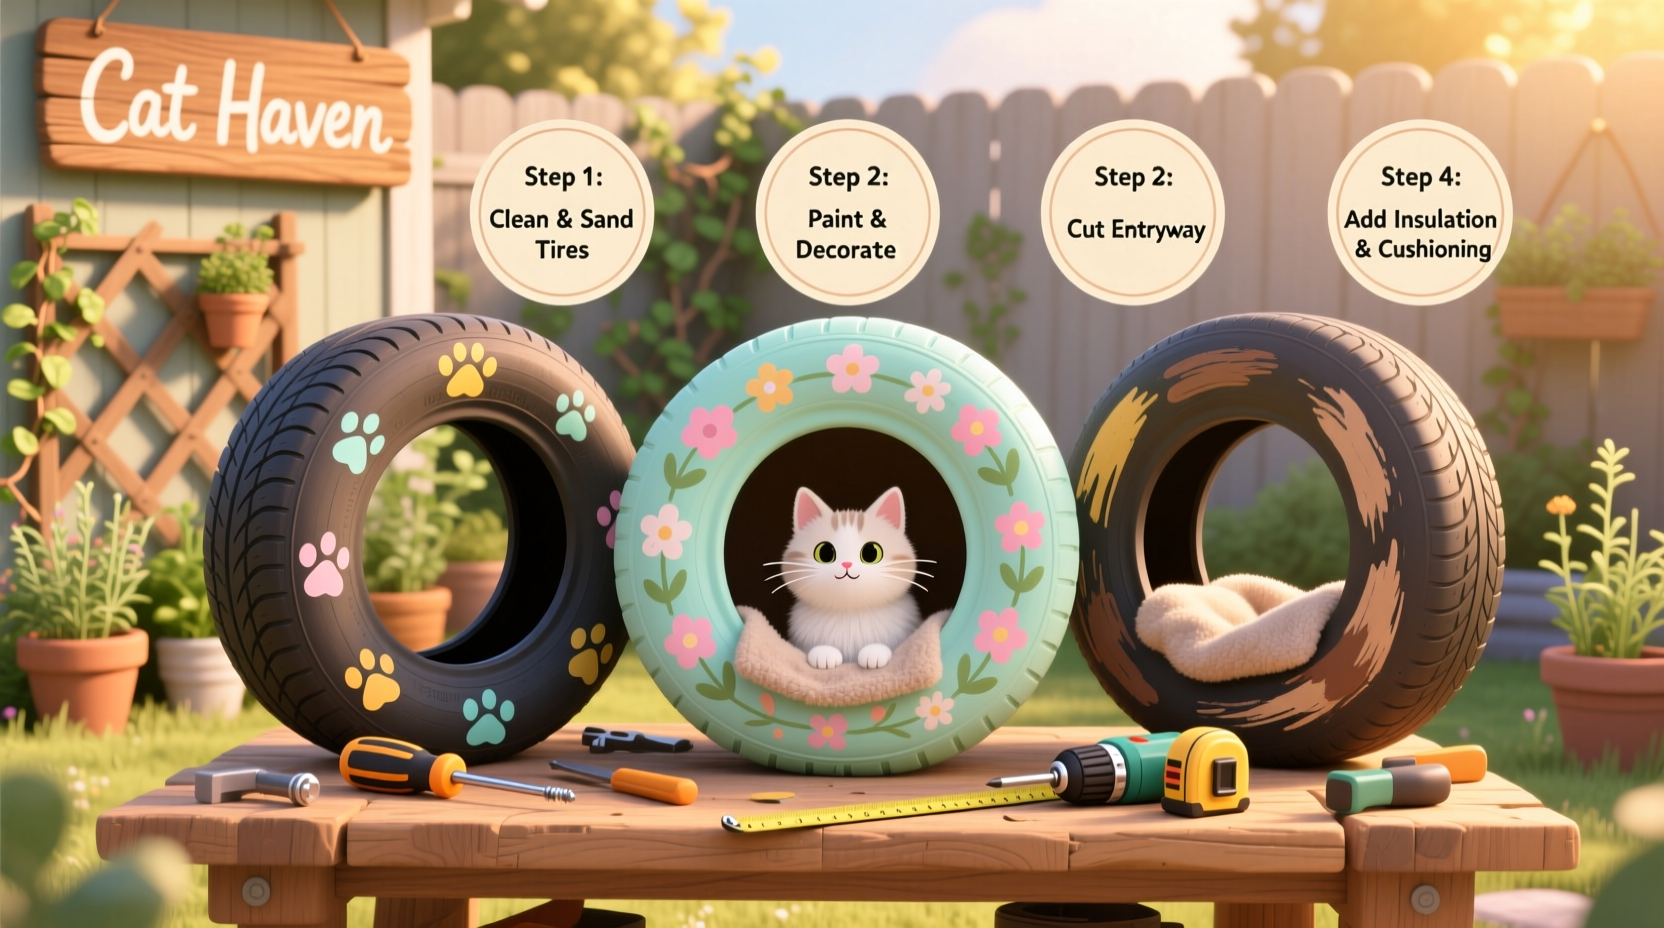
Step-by-Step Construction Guide
- Clean and Prepare the Tire
Wash the tire thoroughly with soapy water and a stiff brush. Remove dirt, grease, and debris. Allow it to dry completely. If the tire has studs or metal fragments, file them down or cover with sealant to prevent injury. - Create a Raised Base
Cut a circular piece of marine plywood slightly larger than the tire’s outer diameter (about 2–3 inches wider). This will act as a base and elevate the house off damp ground. Drill small drainage holes around the edge to prevent water pooling. - Install the Floor
Cut another circle from plywood to fit snugly inside the tire’s inner cavity. This forms the floor. Attach it securely to the base using stainless screws driven through the bottom of the tire sidewall into the wood. Apply silicone caulk around the edges to seal gaps and prevent moisture intrusion. - Add Insulation Layer
Cut a rigid foam insulation board to match the floor’s size. Place it on top of the floor before adding interior lining. For colder climates, consider adding vertical insulation strips along the inner wall before covering with fabric or soft material. - Build the Entryway
Use a jigsaw to cut a cat-sized opening (approximately 7–8 inches in diameter) near the bottom of the tire sidewall. Round the edges to prevent snagging. Position the entry away from prevailing winds if possible. - Construct the Roof
Cut a circular roof panel from plywood, again extending 2–3 inches beyond the tire’s edge to create a protective overhang. Cover the top with a waterproof membrane or folded tarp, secured with staples or adhesive. Attach the roof using hinges or removable brackets for easy cleaning access. - Finish and Decorate
Paint the exterior with non-toxic, outdoor-safe paint. Earth tones blend well with gardens; brighter colors make the house easier to spot. Line the interior with a washable cushion or fleece pad secured with Velcro. - Elevate and Position
Place the completed house on bricks, wooden blocks, or a pallet to keep it above ground level. Choose a quiet, sheltered location—under a porch, beside a shed, or behind bushes—where cats feel safe.
Real-Life Example: The Neighborhood Watch Cat Shelter
In Boulder, Colorado, a group of residents transformed five discarded tires into insulated cat houses for a local colony of stray cats. Each unit was painted with reflective stripes for visibility at night and lined with recycled wool blankets donated by a textile co-op. Positioned beneath a covered patio, the shelters reduced winter illness rates among the cats by an estimated 60%, according to the city’s volunteer outreach coordinator. One resident noted, “The cats took to them immediately. They’re dry, warm, and surprisingly stylish.”
Expert Insight on Feline Shelter Design
“Cats seek out microclimates—small spaces that trap body heat and shield from elements. A tire’s thermal mass helps stabilize internal temperature, which is why these DIY shelters often outperform store-bought models.” — Dr. Lena Patel, Animal Behavior Specialist and Urban Wildlife Consultant
Do’s and Don’ts of Tire-Based Cat Houses
| Do’s | Don’ts |
|---|---|
| Use only tires without cracks or exposed wires | Never use tires that have carried hazardous chemicals |
| Seal all wood edges with waterproof varnish | Don’t leave sharp edges or protruding nails |
| Provide ventilation via small upper gaps | Don’t completely enclose the structure—airflow prevents mold |
| Inspect monthly for pests or wear | Don’t place food inside the shelter—this attracts rodents |
Maintenance Checklist
- ☐ Clean interior every 4–6 weeks with pet-safe disinfectant
- ☐ Replace bedding seasonally or when soiled
- ☐ Check roof sealant and reapply annually
- ☐ Tighten loose screws and inspect structural integrity
- ☐ Rotate or flip floorboard yearly to prevent warping
- ☐ Clear debris and leaves from around the base monthly
Frequently Asked Questions
Is rubber from tires toxic to cats?
Intact, cleaned tires pose minimal risk. The main concern arises from degraded rubber or tires exposed to oil and chemicals. Always choose tires from standard passenger vehicles, avoid painting the interior, and ensure good ventilation. No evidence suggests healthy, sealed tires harm cats through off-gassing under normal conditions.
Can I build this for indoor use?
Absolutely. Indoor versions can skip the heavy weatherproofing but still benefit from the tire’s sound-dampening and insulating properties. Swap the wood base for a softer platform, add carpet lining, and incorporate a hidden litter tray compartment underneath for multifunctionality.
How long will a tire cat house last?
With proper maintenance, a well-constructed tire cat house can last 5–10 years outdoors. The rubber degrades slowly, especially when shaded and elevated. Replacing wooden components every few years extends longevity significantly.
Final Thoughts and Call to Action
Building a cat house from recycled tires merges sustainability with compassion. It’s a project that requires minimal investment but delivers lasting value—to pets, communities, and the planet. Whether you’re crafting a luxury hideaway for your own feline or supporting outdoor cats in need, this design proves that ingenuity and care go hand in paw.


 浙公网安备
33010002000092号
浙公网安备
33010002000092号 浙B2-20120091-4
Comments
No comments yet. Why don't you start the discussion?