
Dogs love plush toys—not just for chewing, but for cuddling, shaking, and carrying around like prized trophies. Yet store-bought plush toys often fall apart after a few energetic sessions. Threads unravel, stuffing spills, and safety hazards emerge. A better solution? Make your own. With thoughtful materials and construction, you can create a plush dog toy that’s both soft enough for snuggling and tough enough to survive daily play.
This guide walks you through designing and building a custom, long-lasting plush toy from scratch. Whether you’re crafting for a teething puppy or a seasoned chewer, this method balances creativity with durability, ensuring your handmade gift stands up to real-world use.
Why Homemade Plush Toys Outperform Store-Bought
Mass-produced plush toys are often made with thin fabrics, weak seams, and low-grade polyester fill. While cute, they rarely withstand determined dogs. Homemade versions let you control every aspect: fabric strength, seam integrity, stuffing density, and even design personality.
By choosing reinforced materials and strategic stitching techniques, you can build a plush toy that resists rips, retains shape, and remains safe if minor damage occurs. Plus, personalizing the toy adds emotional value—for both pet and owner.
“Dogs form attachments not just to people, but to objects that carry comfort and consistency. A well-made toy becomes part of their routine.” — Dr. Lena Torres, Canine Behavior Specialist
Materials That Matter: Choosing for Safety and Strength
The foundation of a durable plush toy lies in material selection. Avoid fluffy fleece alone—it looks cozy but shreds easily. Instead, combine layers strategically.
- Outer Fabric: Use heavy-duty cotton canvas or denim for the exterior layer. These resist punctures and hold stitching well.
- Inner Lining: Back it with ripstop nylon or upholstery-grade polyester. This hidden layer acts as a barrier against tearing.
- Filling: Opt for high-density polyester fiberfill or recycled PET stuffing (made from plastic bottles). It holds shape longer than standard fluff.
- Optional Additions: Insert a small crinkle sleeve or squeaker wrapped in double-layered fabric casing for sensory engagement.
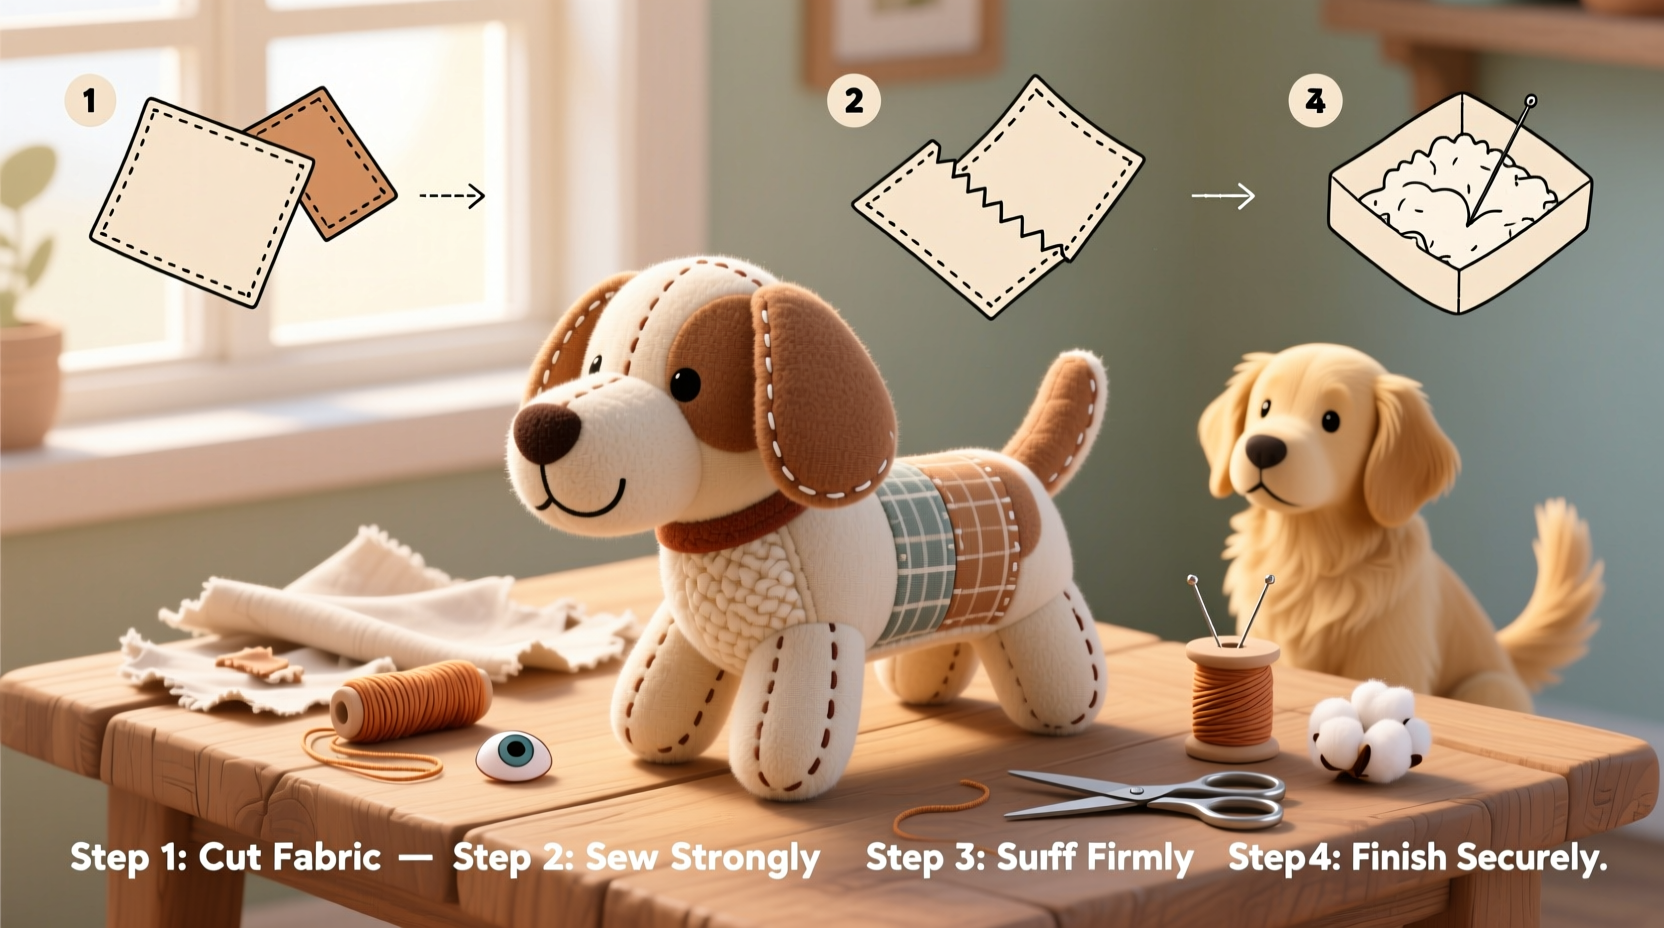
Step-by-Step Construction: Building Toughness Into Every Seam
Follow this timeline to assemble a plush toy designed for resilience. Estimated time: 2–3 hours, including cutting, sewing, and finishing.
- Design Your Shape
Create a simple pattern—like a bone, fish, or animal silhouette—on paper. Keep edges smooth and corners rounded to reduce stress points during chewing. - Cut Two Identical Pieces
Use fabric scissors to cut matching shapes from both outer and inner fabrics. If using layered construction, cut one set from canvas and another from ripstop nylon. - Pinning and Layering
Place right sides together. Align edges precisely. Pin every 1.5 inches to prevent shifting during sewing. - Sew With Reinforced Stitching
Use a straight stitch with a ⅜-inch seam allowance. For extra strength, go over the seam twice—once forward, once backward at the start and end. Consider a zigzag stitch along high-stress zones like ears or tails. - Clip Curves and Turn
Carefully clip notches into curved areas (without cutting stitches) to allow smooth turning. Turn the toy right side out using a blunt chopstick or turning tool. - Stuff Firmly, Not Fully
Add stuffing gradually, focusing on shaping the ends first. Pack more densely in the center; leave slightly softer tips for comfort. Overstuffing causes strain on seams. - Close the Opening Securely
Hand-stitch the opening closed using a ladder stitch (invisible seam). Double-knot thread and bury the end within the stuffing.
Adding Playful Personality
Personalize your toy with embroidered eyes, a fabric tongue, or appliquéd patches. Avoid plastic buttons or small parts that could detach. Embroidery floss is strong and safe when stitched deeply through multiple layers.
Do’s and Don’ts of DIY Dog Toy Design
| Do | Don’t |
|---|---|
| Use double-layered fabric construction | Rely solely on fleece or knit fabrics |
| Reinforce seams with backstitching | Leave long thread tails or single-pass seams |
| Wash fabrics before use | Use toxic dyes or treated outdoor fabrics |
| Add crinkle material safely enclosed | Insert loose beans or small choking hazards |
Real Example: The Case of Scout’s Squirrel
When Sarah noticed her border collie Scout destroyed every plush squirrel within days, she decided to make her own. She used navy canvas for the body, lined it with black ripstop nylon, and added a crinkle packet inside the tail—wrapped in an extra fabric pouch for safety. She stitched the seam twice and hand-closed the belly opening.
Three months later, the toy still holds up. One ear has a small fray, but no stuffing has escaped. “It’s not perfect,” Sarah says, “but it’s lasted five times longer than anything I’ve bought.” She now makes birthday toys for friends’ dogs, always using the same layered method.
Essential Checklist Before Gifting or Use
- ✅ All seams are tight and doubly stitched
- ✅ No loose threads or exposed knots
- ✅ Filling is evenly distributed and firm
- ✅ No detachable parts (buttons, ribbons)
- ✅ Fabric is non-toxic and pet-safe
- ✅ Toy has been inspected under light tension (gentle tug test)
Frequently Asked Questions
Can I wash a homemade plush dog toy?
Yes, if constructed properly. Machine wash on gentle cycle using cold water and mild detergent. Air dry completely—avoid direct heat, which can degrade fibers and weaken seams. Always inspect after washing for signs of wear.
What if my dog starts pulling out threads?
Trim loose threads immediately with scissors. Do not pull them. If the seam begins to open, retire the toy or repair it with a reinforcing patch on the inside. Continued use on a compromised toy risks ingestion of fabric or stuffing.
Are squeakers safe in DIY toys?
Only if fully encapsulated. Wrap the squeaker in a scrap fabric sleeve before inserting it into the main body. Test that it cannot shift near the outer seam. Monitor your dog closely the first few times they play with it.
Conclusion: Craft With Care, Play With Confidence
Creating a durable DIY plush dog toy isn’t just about sewing skills—it’s about intention. Every choice, from fabric thickness to stitch length, contributes to a safer, longer-lasting companion for your dog. This project blends creativity with practicality, offering a meaningful alternative to disposable pet products.
Start small with a basic shape, refine your technique, and soon you’ll be crafting toys that become family heirlooms—chewed, loved, and irreplaceable. The joy on your dog’s face when they claim their new favorite toy is worth every careful stitch.


 浙公网安备
33010002000092号
浙公网安备
33010002000092号 浙B2-20120091-4
Comments
No comments yet. Why don't you start the discussion?