
Adding a pearl chain to your keychain is more than just a fashion statement—it’s a blend of elegance, personalization, and practicality. Pearls have long symbolized refinement, and when thoughtfully integrated into everyday accessories like keychains, they elevate even the most mundane objects. But attaching a delicate strand of pearls securely requires more than just tying a knot. Done poorly, the chain may slip off or break; done right, it becomes a lasting, stylish extension of your personality.
The challenge lies in balancing aesthetic appeal with durability. Keys are heavy, jostle frequently, and endure friction from pockets, bags, and surfaces. A secure attachment method must withstand this daily wear while preserving the integrity of the pearls. This guide explores innovative, accessible, and reliable techniques to fasten a pearl chain to your keychain without compromising beauty or function.
Why Attach a Pearl Chain to Your Keychain?
At first glance, pairing pearls with keys might seem unconventional. Yet, the trend has gained momentum among fashion-conscious individuals who value subtle luxury in their daily carry items. Beyond aesthetics, there are practical advantages:
- Easy identification: A pearl-accented keychain stands out in a crowded bag or pocket.
- Personal expression: Pearls can reflect heritage, taste, or sentiment—ideal for commemorating milestones.
- Deterrence against loss: The visual weight of pearls makes the keychain harder to overlook or misplace.
- Multifunctional design: Some users repurpose the chain as a necklace in emergencies or for quick styling adjustments.
Materials You’ll Need
Before beginning, gather materials that ensure both strength and elegance. Not all components are created equal, and selecting the right ones significantly impacts longevity.
| Material | Purpose | Recommended Type |
|---|---|---|
| Pearl chain | Main decorative element | Freshwater pearls on nylon-coated stainless steel wire |
| Keyring | Attachment base | Double-loop or split-ring (30mm diameter) |
| Jump rings | Connector hardware | Stainless steel, 6mm closed type |
| Split ring pliers | Tool for opening/closing rings | Needle-nose with fine tips |
| Beading crimp tube | Secures end connections | Silver-tone, 2mm size |
| Glue (optional) | Reinforcement | Jewelry-grade epoxy, not super glue |
Using high-tensile wire within the pearl strand prevents snapping under stress. Avoid silk-threaded chains unless reinforced—they fray easily with friction.
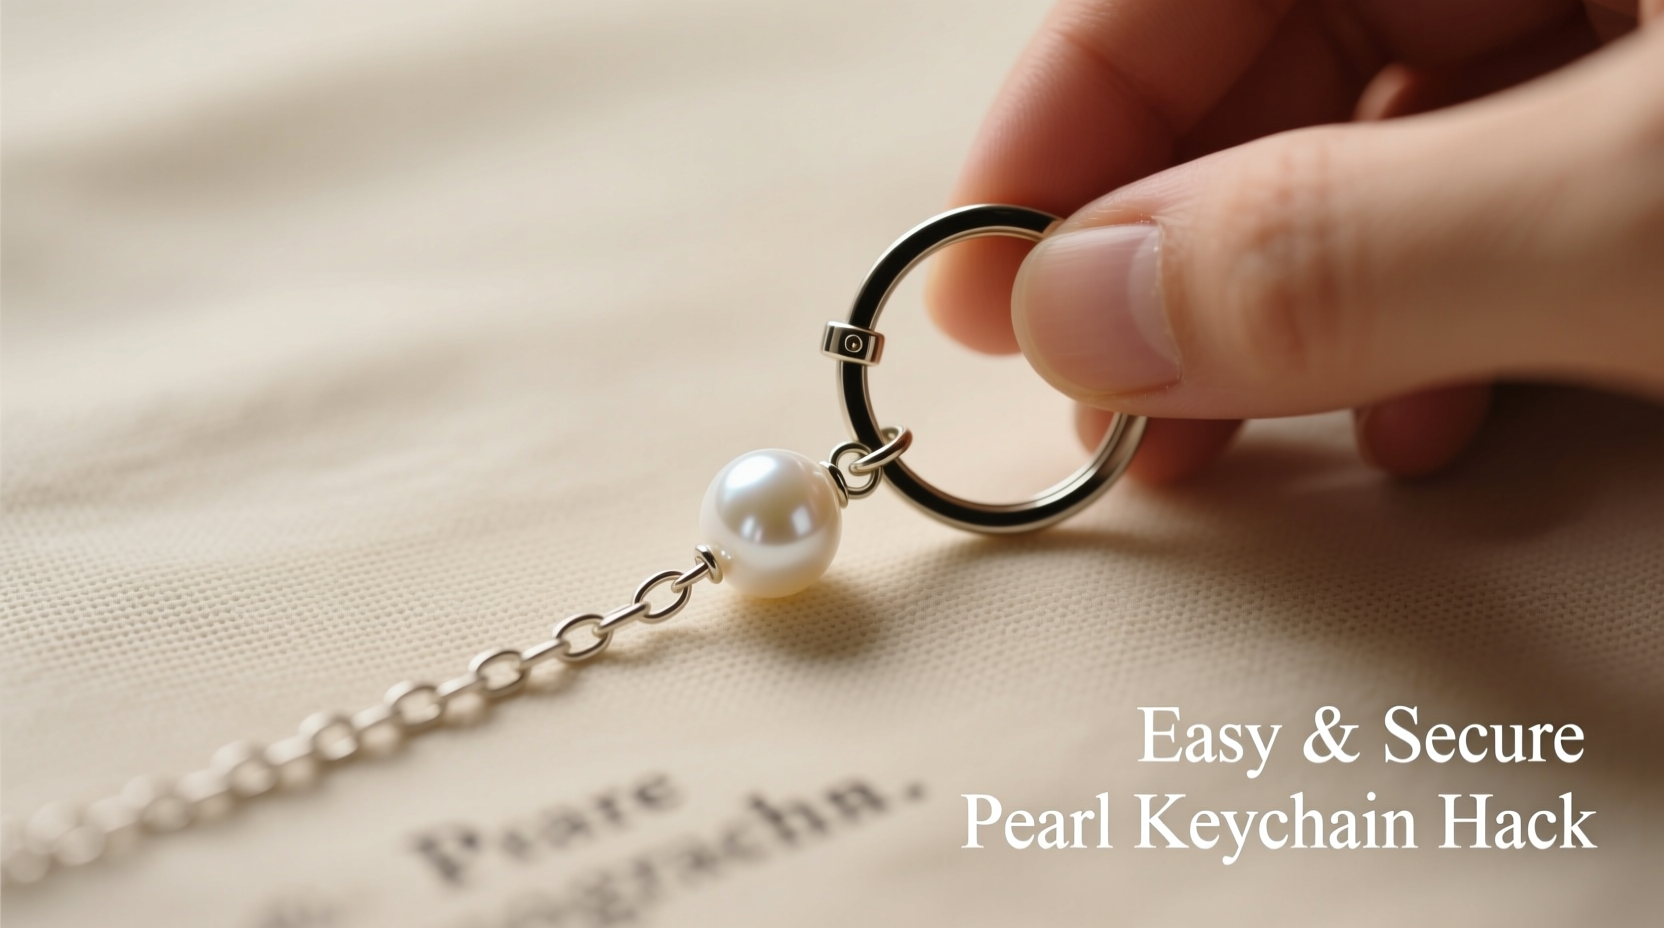
Step-by-Step Guide to Secure Attachment
Follow this proven sequence to ensure your pearl chain stays firmly attached through months of use.
- Cut the chain to desired length: Measure 8–10 inches for optimal drape without tangling.
- Inspect the end clasp or loop: If absent, add a small metal loop using a crimp tube and crimping tool.
- Open a jump ring with pliers: Twist sideways—never pull apart—to maintain shape.
- Link the jump ring through the keyring and chain loop: Align both components before closing.
- Close the jump ring securely: Use pliers to twist back into a fully sealed circle.
- Test tension: Gently tug the chain to verify no slippage.
- Optional reinforcement: Apply a tiny drop of jewelry epoxy inside the jump ring before closure.
This method distributes weight across multiple connection points, minimizing strain on any single part of the chain.
Alternative Methods for Different Styles
Not every pearl chain comes with a built-in loop, and some designs call for subtler integration. Consider these alternatives:
- Clamp-style key fob adapter: Slide the end of the chain into a spring-loaded clamp often used for ID badges. Ideal for temporary or interchangeable use.
- Knot-and-bead anchor: Tie a surgeon’s knot at the chain end, thread a decorative bead over it, then link to the keyring. The bead hides the knot and adds flair.
- Magnetic connector: Install micro magnetic clasps—one on the chain, one on the keyring—for quick detachment. Best for lighter chains.
- Silicone key sleeve wrap: Wrap a clear silicone band around keys and loop the chain through it. No tools required and protects keys too.
Mini Case Study: From Heirloom to Everyday Carry
Sophie, a graphic designer in Portland, inherited a short strand of cultured pearls from her grandmother. Rather than leave it tucked in a jewelry box, she wanted to “wear” the memory daily. She shortened the chain, added a crimped loop, and connected it to her leather key fob using a closed jump ring. After six months of regular use—including bike commutes and travel—the piece remains intact. “People compliment it all the time,” she says. “It feels like carrying a piece of her with me.” Her success stemmed from using marine-grade wire threading and avoiding excessive tugging when retrieving keys.
Expert Insight on Durability and Design
“Pearls aren’t fragile if treated with intelligent engineering. The key is transferring mechanical stress away from the beads and onto robust connectors.” — Lena Torres, Jewelry Designer & Accessory Engineer
Torres emphasizes that most failures occur at junction points, not along the chain itself. “A well-made jump ring or crimp joint will outlast the wearer’s interest in the trend,” she notes. She recommends inspecting connections every eight weeks and replacing worn hardware proactively.
Checklist: Securing Your Pearl Chain in 5 Minutes
Use this quick-reference checklist before finalizing your attachment:
- ✅ Confirm the chain ends with a secure loop or clasp
- ✅ Select a corrosion-resistant jump ring (stainless steel or titanium)
- ✅ Use proper pliers to open and close the ring without deformation
- ✅ Double-check that the connection cannot slide off the keyring
- ✅ Perform a firm pull test before daily use
- ✅ Store keys flat when not in use to reduce chain strain
Frequently Asked Questions
Can I attach a real pearl necklace to my keys?
Yes, but only if modified for durability. Real pearls strung on silk should be re-strung with flexible wire and include protective knots between beads. Frequent use may scratch the surface, so consider lab-grown or imitation pearls for daily carry.
How do I clean a pearl chain that’s been on a keychain?
Wipe gently with a soft, damp cloth after exposure to sweat or dirt. Never soak pearls. For deeper cleaning, use a mild solution of water and a drop of pH-neutral soap, then dry immediately. Avoid ultrasonic cleaners.
Will the chain damage my keys or pocket lining?
A smooth, properly finished chain won’t scratch metal keys. To protect fabric, opt for smaller pearls (6–8mm) and avoid sharp connectors. A fabric-covered key organizer can also act as a buffer.
Conclusion: Elevate the Everyday with Intentional Design
Attaching a pearl chain to your keychain is a small act with meaningful impact. It transforms an overlooked object into a curated accessory, blending tradition with modern utility. By choosing resilient materials, applying sound mechanics, and respecting the limitations of delicate elements, you create something both beautiful and enduring. Whether honoring a memory, expressing individuality, or simply enjoying a touch of glamour, the right technique ensures your creation lasts.


 浙公网安备
33010002000092号
浙公网安备
33010002000092号 浙B2-20120091-4
Comments
No comments yet. Why don't you start the discussion?