
Custom curtains transform a room from ordinary to exceptional. Unlike off-the-shelf options, handmade drapes fit your windows precisely, complement your decor, and reflect your personal style. With the right approach, creating custom curtains is an accessible DIY project that delivers professional results. This guide walks you through every stage—from measuring and choosing fabrics to sewing techniques and finishing touches—so you can craft window treatments that elevate your space.
Why Custom Curtains Matter
Prefabricated curtains often fall short in proportion, color accuracy, or drape quality. Ready-made panels rarely align with unusual window sizes or ceiling heights, leading to awkward gaps or pooling on the floor. Custom curtains solve these issues by being built for your specific dimensions and aesthetic goals.
Beyond function, custom drapes influence light control, insulation, and acoustics. Heavier fabrics like velvet or blackout lining enhance privacy and reduce outside noise, while sheer linen or cotton voile brightens a room with diffused sunlight. Tailoring each curtain ensures harmony between form and function.
“Custom curtains are the final stitch in a well-designed room. They frame the view, set the mood, and tie everything together.” — Lena Torres, Interior Designer & Textile Consultant
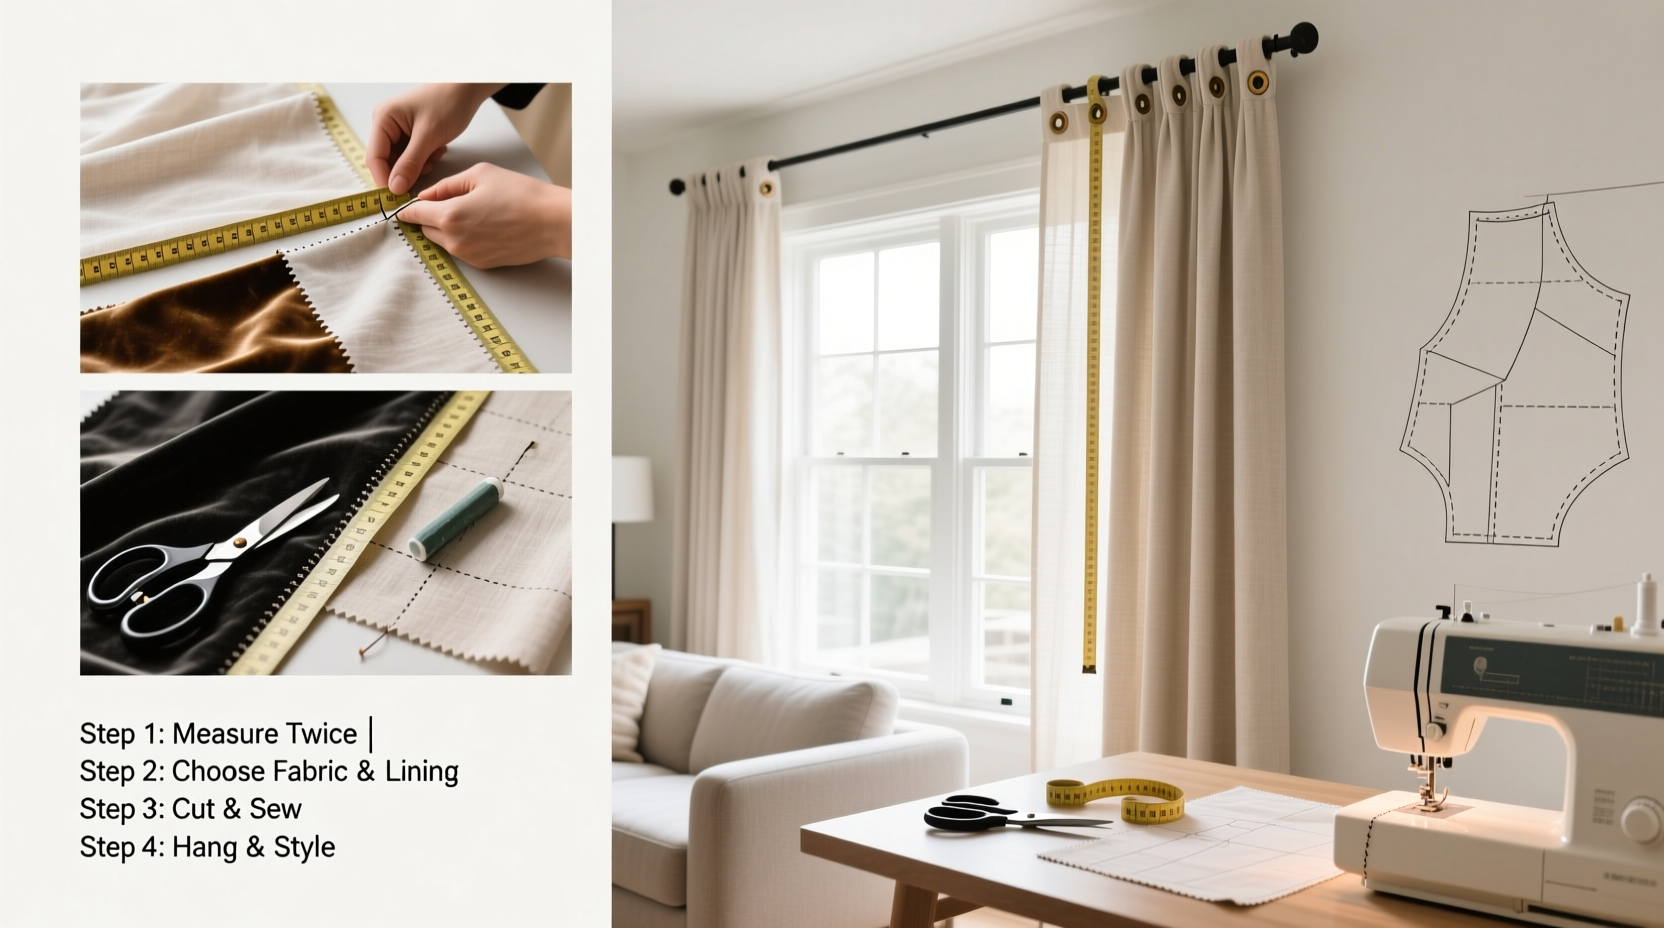
Step-by-Step: How to Measure and Plan Your Curtains
Accurate measurements are the foundation of any successful curtain project. Even the most beautiful fabric will look unprofessional if the proportions are off. Follow this timeline to get it right:
- Determine the mounting position: Decide whether curtains will hang inside the window frame (for a clean, minimalist look) or outside (to create the illusion of a larger window).
- Measure width: For fullness, multiply the track or rod width by 1.5 to 2.5 times. A 60-inch window should have at least 90 inches of fabric width for a soft gather; 150 inches for dramatic fullness.
- Measure height: From the top of the rod to the desired endpoint—typically just above the floor (½ inch), touching the floor, or puddling slightly (2–4 inches). Include hem allowances in your total.
- Account for hardware: Add 1–2 inches above the rod to allow for heading styles like grommets or pinch pleats.
- Sketch a layout: Draw a simple diagram of your window with all dimensions labeled. Note seam allowances (usually ½ inch) and double hems (6–9 inches).
Fabric Selection: Matching Material to Purpose
The fabric you choose affects durability, light filtration, and maintenance. Consider both aesthetics and practicality based on the room’s use:
| Fabric Type | Best For | Avoid In | Care Notes |
|---|---|---|---|
| Linen | Living rooms, bedrooms (light filtering) | High-moisture areas like bathrooms | Prone to wrinkling; dry clean or hand wash |
| Cotton | Kitchens, nurseries (versatile, washable) | Sun-drenched rooms (may fade) | Machine washable; pre-wash to prevent shrinkage |
| Velvet | Drawing attention, formal spaces | High-traffic areas (shows marks easily) | Spot clean or professional cleaning only |
| Sheer Voile | Layering, daylight rooms | Rooms needing privacy | Gentle machine wash; iron on low |
| Blackout Polyester | Bedrooms, media rooms | Decorative focal points | Durable and easy-care; resists fading |
Always order a swatch before purchasing. View the fabric in your actual room under natural and artificial light. Drape it near the window to assess texture, weight, and transparency.
Sewing Your Curtains: A Practical Guide
With materials selected and measurements confirmed, it’s time to sew. You don’t need industrial equipment—a standard home sewing machine works fine with the right needle (size 14 for medium-weight fabrics).
Materials Needed:
- Fabric (pre-washed and pressed)
- Sewing machine + matching thread
- Scissors or rotary cutter
- Pins or clips
- Iron and pressing cloth
- Tape measure and fabric chalk
Construction Steps:
- Cut the fabric: Using your measurements plus seam and hem allowances, cut panels straight and square. For wide windows, seam multiple widths together using a ½-inch allowance.
- Sew side seams: With right sides together, pin and stitch edges. Press seams open to reduce bulk.
- Create the header: Options include rod pockets (simple casing), grommets (modern), or pinch pleats (elegant). For a rod pocket, fold the top down 2 inches, then again 4 inches, and stitch along the bottom edge, leaving ends open for the rod.
- Hem the bottom: Fold up 1 inch, press, then fold another 5–8 inches depending on desired length. Stitch close to the inner folded edge. For heavy fabrics, use a blind hem stitch to minimize visibility.
- Add lining (optional): Attach lining separately or sandwich it between fabric layers for added insulation and UV protection. Baste layers together before final hemming.
Design Ideas for Unique Spaces
Not all windows are standard rectangles. Creative solutions help you adapt curtains to architectural quirks.
Mini Case Study: The Bay Window Challenge
In Portland, homeowner Maya redesigned her 1920s bungalow’s bay window. Instead of one oversized panel, she installed three separate rods—one per section—with continuous fabric runs. She used lightweight cotton-linen blend in sage green, allowing gentle folds without overwhelming the space. By measuring each segment individually and using identical hardware, the result looked unified and intentional. “It was about working with the architecture, not against it,” she said.
Other unconventional applications:
- Slanted ceilings: Hang tracks along the slope and let curtains follow the angle, emphasizing height.
- French doors: Use tie-backs or side-draw panels that clear the opening when open.
- Narrow sidelights: Frame them with slim, floor-length panels to balance symmetry.
Checklist: Before You Begin Sewing
- ☐ Measure window width and height accurately
- ☐ Choose rod or track type and install it
- ☐ Select fabric and obtain a swatch
- ☐ Pre-wash and press fabric to prevent post-hang shrinkage
- ☐ Calculate total fabric needed (include fullness and hems)
- ☐ Cut panels with consistent grain alignment
- ☐ Test drape with pinned mock-up before final stitching
FAQ
How much fullness should my curtains have?
For a balanced look, aim for 1.5 times the width of the rod. For luxury hotel-style draping, use 2 to 2.5 times fullness. More fullness requires more fabric but creates richer gathers.
Can I make curtains without a sewing machine?
Yes, though with limitations. Use iron-on hem tape for clean edges and no-sew heading tapes for rod pockets. These work best for lightweight fabrics and temporary setups, but lack durability for daily use.
What if my ceiling is too high for standard fabric widths?
Fabrics typically come in 54” or 60” widths. For ceilings over 9 feet, seam horizontal strips (called \"drops\") together. Match patterns carefully and press seams flat. Alternatively, consider floor-to-ceiling panels with a contrasting border at the top or bottom for a designer touch.
Final Touches and Styling Tips
Once hung, adjust the drape manually. Gently pull pleats into place and smooth out wrinkles. Use holdback brackets or decorative tiebacks to showcase views during the day.
Consider layering: pair sheer under-curtains with heavier outer panels for versatility. Open the sheers during daylight and close the opaque layer at night for privacy and insulation.
Accessorize thoughtfully. Finials—decorative rod ends—add personality, from crystal knobs to rustic wood spheres. Ensure they match other finishes in the room, like drawer pulls or lighting fixtures.
Conclusion
Making custom curtains is more than a sewing project—it’s an act of intentional design. When you tailor every dimension, fabric choice, and detail to your space, the result isn’t just functional window coverage, but a statement of care and creativity. Whether you’re dressing a cozy reading nook or framing panoramic views, the process empowers you to shape your environment with precision and flair.


 浙公网安备
33010002000092号
浙公网安备
33010002000092号 浙B2-20120091-4
Comments
No comments yet. Why don't you start the discussion?