
Handmade accessories offer a personal touch that mass-produced items often lack. Among the most charming and whimsical trends in craft jewelry is the miniature food pendant—particularly the tiny, realistic bagel charm. A DIY bagel pendant keychain combines creativity, craftsmanship, and everyday utility into one delightful piece. Whether you're crafting for yourself, as a gift, or to sell at artisan markets, this project delivers both visual appeal and sentimental value. With polymer clay, basic tools, and a bit of patience, you can create a durable, eye-catching keychain that stands out from the crowd.
Why Make a Bagel Pendant Keychain?
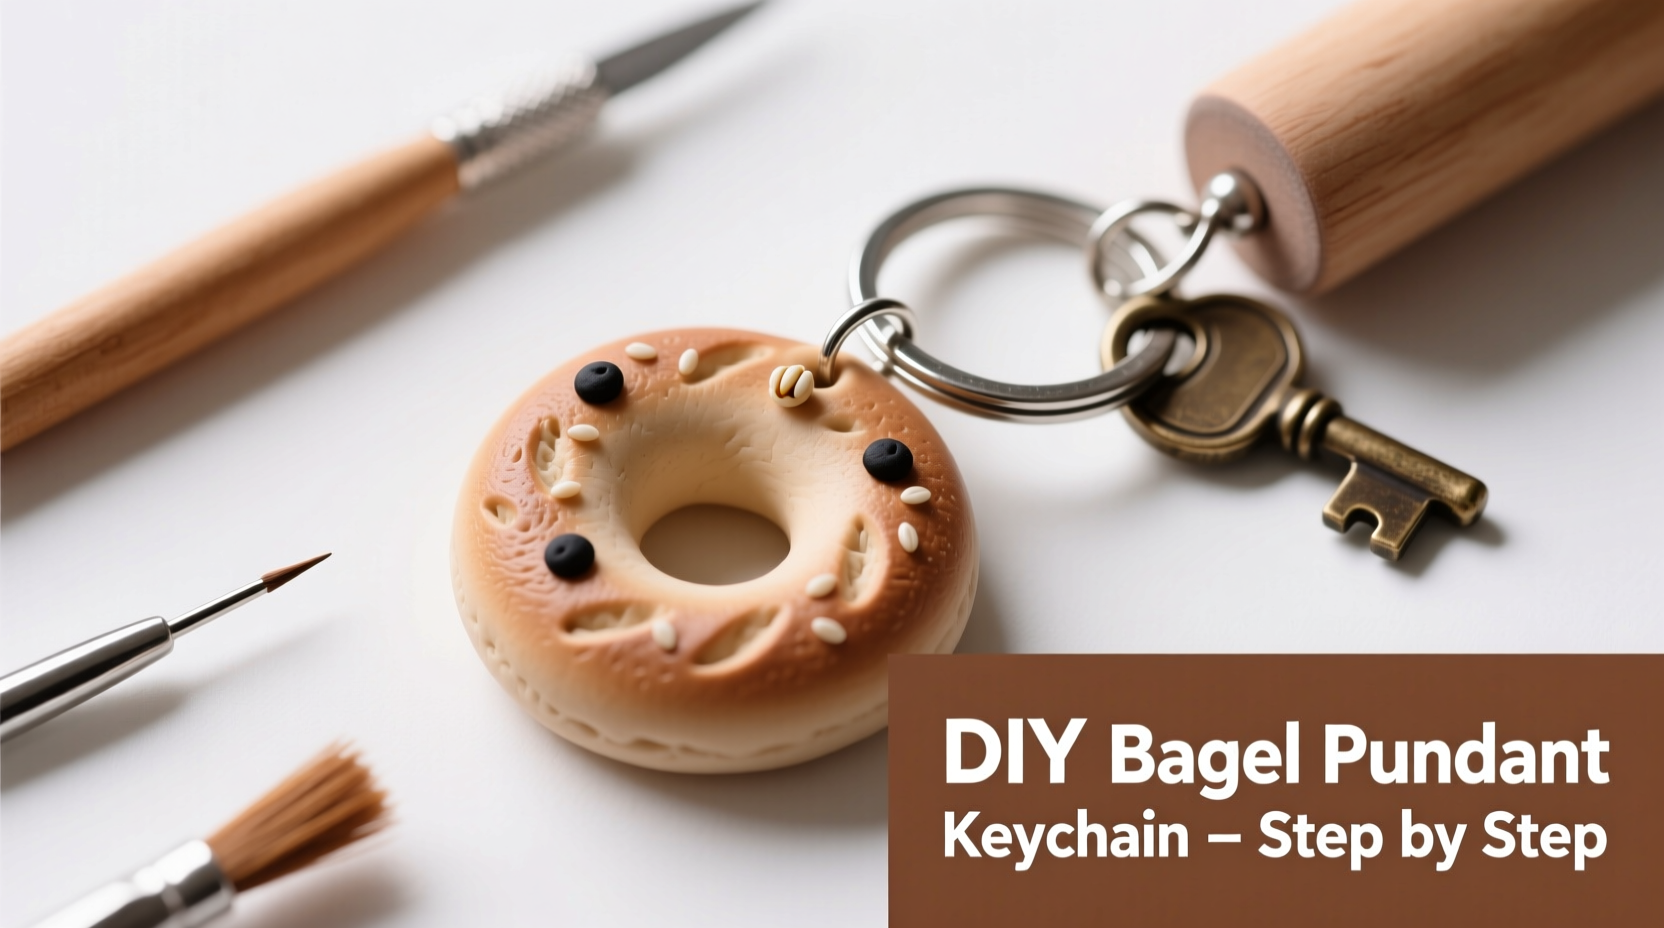
The popularity of food-themed accessories has surged in recent years, especially among younger audiences who appreciate playful, nostalgic designs. A miniature bagel pendant taps into this trend while allowing room for personalization—choose your favorite bagel type, add a cream cheese spread, or even \"top\" it with poppy seeds or sesame. Beyond aesthetics, creating such a piece enhances fine motor skills, encourages mindfulness, and fosters a sense of accomplishment. Plus, once sealed and assembled properly, these pendants are surprisingly durable for daily wear.
“Miniature food crafts bridge art and emotion—people don’t just see a tiny bagel, they remember breakfasts with loved ones.” — Lena Torres, Artisan Jewelry Designer
Materials and Tools You’ll Need
Gathering the right supplies ensures a smooth crafting experience. Most materials are affordable and reusable across multiple projects.
- Polymer clay (brown for the bagel base, white or tan for cream cheese, optional colors for toppings)
- Clay roller or acrylic rolling pin
- Blade or precision knife
- Bamboo skewer or thin needle tool
- Sandpaper (fine grit: 400–600)
- Baking tray lined with parchment paper
- Oven (for curing clay)
- Jewelry glue (E6000 or similar strong adhesive)
- Keyring or split ring
- Jump ring (small metal loop)
- Clear varnish or liquid polymer clay (for glossy finish)
Step-by-Step Guide to Crafting Your Bagel Pendant
Follow this detailed process to create a realistic and durable bagel pendant ready for everyday use.
- Condition the clay: Knead brown polymer clay until soft. Roll it into a small ball about 1 inch in diameter.
- Shape the bagel: Flatten the ball slightly, then use your finger to press a hole in the center, forming a ring. Aim for a thickness of about ¼ inch.
- Add texture: Use a toothpick or fine tool to gently etch lines around the surface, mimicking the porous texture of real bagel dough.
- Create the cream cheese layer: Take a smaller amount of white or tan clay and flatten it into a thin oval. Drape it partially over one side of the bagel to simulate a schmear.
- Attach toppings (optional): For added realism, roll tiny specks of black (poppy seeds) or yellow (sesame seeds) clay and press them onto the surface.
- Pre-punch the hole: Before baking, use a bamboo skewer to make a small vertical hole near the top edge of the bagel—this will later hold the jump ring.
- Bake according to instructions: Place on a parchment-lined tray and bake at the temperature specified by the clay brand (usually 275°F / 135°C for 15–20 minutes).
- Cool and sand: Let cool completely. Lightly sand any rough edges with fine-grit sandpaper for a smooth finish.
- Seal the surface: Apply 1–2 coats of clear varnish or liquid polymer clay to give the bagel a shiny, appetizing look. Allow to dry fully between coats.
- Assemble the keychain: Open the jump ring using pliers, slide it through the baked hole and attach one end to the keyring. Close securely.
Design Variations and Creative Ideas
Once you’ve mastered the basic bagel, experiment with different styles to expand your collection.
| Bagel Type | Clay Colors | Toppings | Special Touch |
|---|---|---|---|
| Plain | Brown base, white cream cheese | None | Add a tiny lox slice from red clay |
| Sesame | Brown base | Yellow specks pressed on top | Use matte sealant for natural look |
| Everything | Brown base | Mix of black, yellow, brown, orange specks | Layer toppings before baking |
| Cinnamon Raisin | Tan-brown swirl base | Small purple dots (raisins) | Glaze with amber-tinted varnish |
Mini Case Study: Emma’s Gift Keychains
Emma, a college student from Portland, started making bagel pendants after seeing similar items online for $25 each. She decided to try making her own using leftover polymer clay. After perfecting her technique over a weekend, she crafted six unique bagel keychains—one for each of her close friends. Each pendant reflected the recipient’s favorite flavor: everything, cinnamon raisin, onion, and plain with extra cream cheese. Her friends were delighted not only by the humor but also by the thoughtfulness. Within weeks, classmates began requesting custom orders, and Emma launched a small Etsy shop. Her initial investment of $15 in supplies yielded over $200 in sales within two months, proving that even simple handmade items can resonate deeply when made with care.
Common Pitfalls and How to Avoid Them
Even experienced crafters encounter challenges. Here are frequent issues and their solutions:
- Cracking during baking: Caused by uneven thickness or under-conditioned clay. Always roll evenly and knead thoroughly before shaping.
- Hole closes during baking: Re-pierce with a needle immediately after removing from oven while still slightly pliable.
- Dull finish: Skipping the sealant leaves the clay matte and prone to scuffing. Always apply a glossy topcoat for realism and protection.
- Weak attachment: Using weak glue or improper jump rings leads to lost pendants. Invest in quality E6000 adhesive and sturdy stainless steel findings.
Frequently Asked Questions
Can I make the bagel without baking?
No—polymer clay requires heat curing to harden properly. Air-dry clay is an alternative, but it’s less durable and may shrink or crack. Baked polymer clay offers better longevity for jewelry.
How do I make the cream cheese look realistic?
Apply the cream cheese layer unevenly—thicker on one side, tapering off. Gently press with a flat tool to create soft ridges, mimicking how real cream cheese spreads.
Is this safe for children to make?
With adult supervision, yes. The materials are non-toxic when used as directed, but baking should be done by an adult due to oven safety and fumes. Use well-ventilated areas when applying adhesives or varnishes.
Checklist: Before You Begin Your Project
- ✔ Gather all materials listed
- ✔ Preheat oven to correct temperature
- ✔ Prepare non-stick work surface
- ✔ Condition all clay colors
- ✔ Test jump ring and keyring fit
- ✔ Have sandpaper and sealant ready for post-bake steps
Conclusion: Wear Your Creativity with Pride
A DIY bagel pendant keychain is more than a quirky accessory—it’s a testament to individuality and craftsmanship. In a world of uniform fashion, handmade pieces invite conversation, evoke joy, and carry personal meaning. Whether you're new to polymer clay or expanding your jewelry-making repertoire, this project offers immediate satisfaction and lasting charm. Every detail—from the simulated sesame seeds to the glossy glaze—adds depth and authenticity. Once completed, your bagel keychain isn’t just functional; it’s a wearable smile.


 浙公网安备
33010002000092号
浙公网安备
33010002000092号 浙B2-20120091-4
Comments
No comments yet. Why don't you start the discussion?