
Cats are creatures of habit, and their feeding environment plays a bigger role in their well-being than many realize. Elevated, stable, and thoughtfully designed feeding stations can reduce neck strain, prevent mess, and even minimize food aggression in multi-cat homes. While commercial options exist, crafting your own DIY cat bowl setup allows you to tailor size, height, aesthetics, and materials to your space and your cat’s needs. With basic tools and a bit of creativity, you can build a durable, hygienic, and visually appealing feeding station that blends seamlessly into your home.
Why Customize Your Cat’s Feeding Station?
Standard pet bowls often sit flat on the floor, forcing cats to hunch uncomfortably while eating. This posture can lead to digestive issues over time. A properly elevated station aligns the cat’s neck and spine, promoting better digestion and comfort—especially for older or arthritic cats. Additionally, DIY solutions let you control material safety, ease of cleaning, and integration with your interior design.
Mass-produced plastic bowls can harbor bacteria and contribute to feline acne. By selecting non-toxic, food-safe materials like stainless steel, ceramic, or solid wood with proper sealing, you create a healthier feeding zone. Customization also means you can include features like removable trays for crumb collection, designated water and food zones, or even built-in storage for treats and utensils.
Materials and Tools You’ll Need
The success of your DIY cat feeding station hinges on choosing the right components. Below is a breakdown of recommended materials and tools based on durability, safety, and ease of use.
| Category | Recommended Items | Avoid |
|---|---|---|
| Base Material | Hardwood (oak, maple), bamboo, or marine-grade plywood | Particleboard, MDF, untreated softwoods |
| Bowl Inserts | Stainless steel or glazed ceramic bowls (removable) | Plastic bowls, unglazed ceramics |
| Adhesives & Sealants | Food-safe epoxy, polyurethane sealant (water-based, non-toxic once cured) | Regular wood glue, solvent-heavy finishes |
| Tools | Measuring tape, jigsaw or handsaw, sandpaper (120–220 grit), drill, clamps | Power tools without safety gear |
Always ensure any finish applied is fully cured before introducing the station to your cat. Most water-based sealants require 72 hours to off-gas completely.
Step-by-Step Construction Guide
Follow this detailed sequence to build a sturdy, attractive feeding station suitable for one or multiple cats.
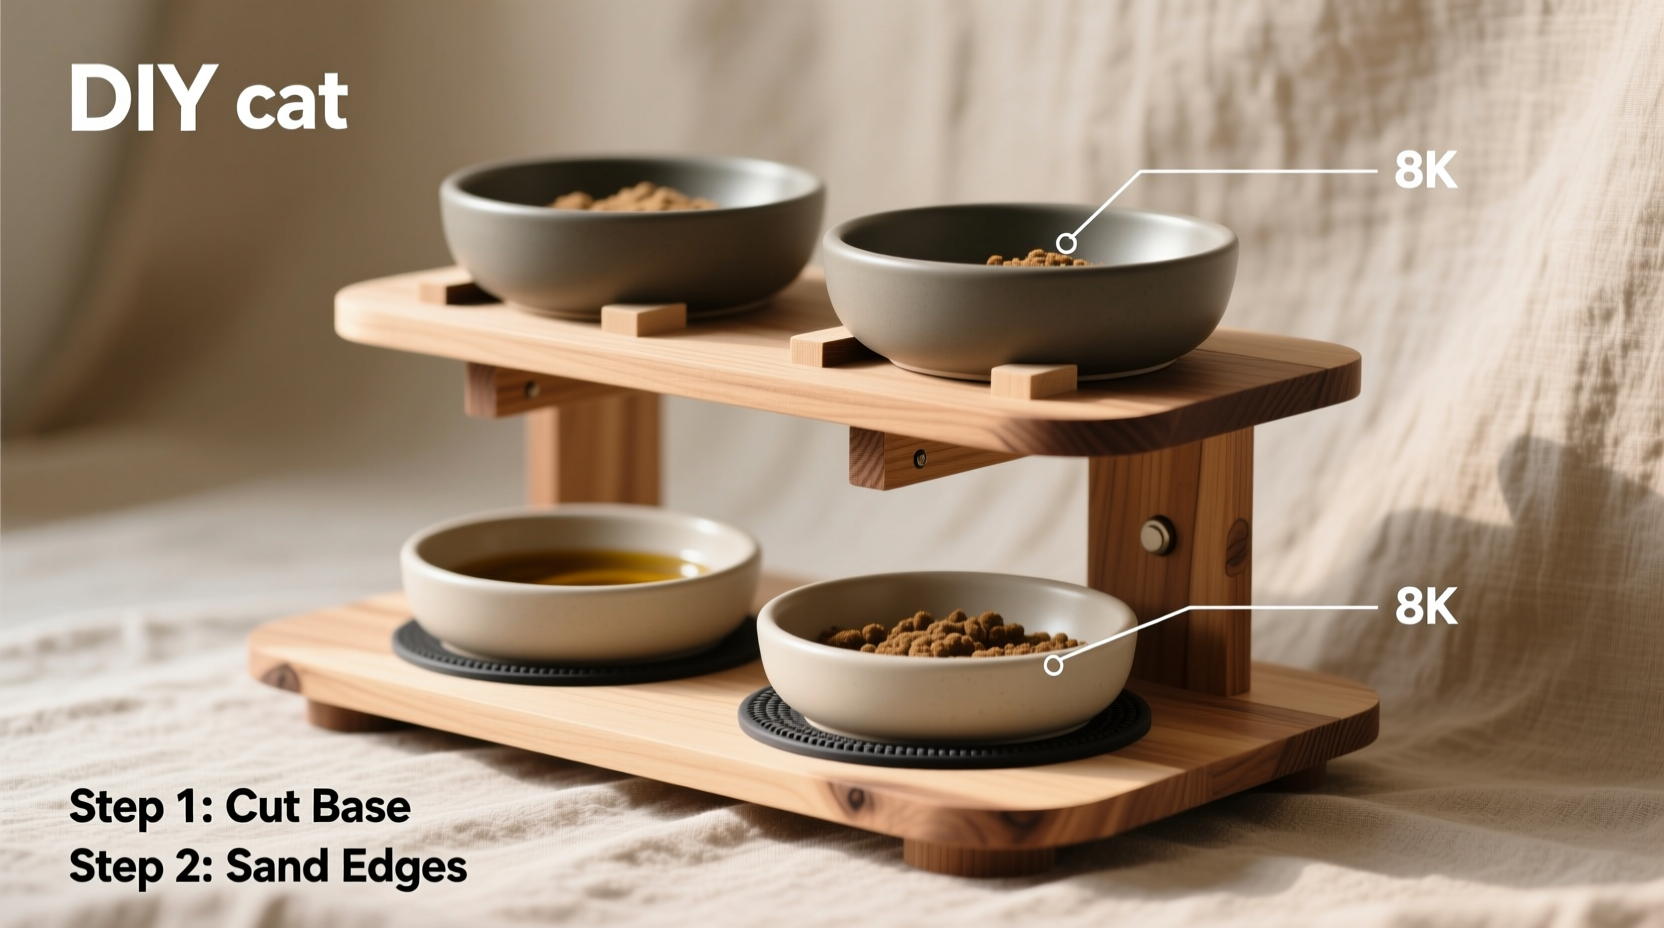
- Design Your Layout: Sketch a simple plan. Decide if you want a single-tier or double-tier station. For two cats, allocate 10–12 inches per bowl with at least 18 inches between centers to reduce tension.
- Measure and Cut the Base: Use a saw to cut your chosen wood into a rectangular base (e.g., 16\"x10\" for two bowls). Sand all edges smooth to prevent splinters.
- Create Bowl Recesses: Trace the outer rim of your stainless steel or ceramic bowls onto the base. Use a jigsaw or hole saw to carefully cut recesses 1/4 inch deep so bowls sit flush and don’t wobble.
- Sand and Seal: Sand the entire surface, then apply two coats of food-safe sealant, allowing full drying time between coats. This protects against moisture and makes cleaning easier.
- Assemble Optional Features: Add small wooden legs (2–6 inches high) using waterproof wood glue and screws. Alternatively, mount the base directly on a countertop or shelf.
- Insert Bowls and Test Stability: Place bowls into the recesses. Ensure they don’t shift when nudged. If needed, add silicone rings beneath for grip.
Real-Life Example: The Minimalist Bamboo Station
Sarah, a graphic designer in Portland, wanted a feeding area that matched her Scandinavian-style kitchen. She used a sustainably sourced bamboo board (20\"x10\") and embedded two 4-inch stainless steel bowls. After routing precise recesses and applying three layers of beeswax-based sealant, she mounted the unit on brushed steel hairpin legs for an airy look. Her two cats adapted within a day, and cleanup became effortless—she simply lifts out the bowls and wipes the base with a damp cloth. “It looks like part of my kitchen island,” she says. “No more plastic bowls underfoot.”
“Elevated feeding isn’t just about comfort—it supports better digestion and reduces stress around mealtimes.” — Dr. Lena Reyes, Feline Behavior Specialist
Design Ideas for Every Home Style
Your DIY station doesn’t have to be utilitarian. Consider these creative variations:
- Rustic Farmhouse: Reclaimed barn wood base with hammered metal bowl inserts.
- Modern Industrial: Blackened steel frame with a concrete top and inset stainless bowls.
- Compact Urban: Wall-mounted fold-down tray with magnetic removable bowls—ideal for small apartments.
- Kid-Friendly: Brightly painted, sealed pine with labeled compartments for each pet.
You can also integrate subtle functionality: carve a shallow trough behind the bowls to catch stray kibble, or add a lift-up lid to conceal dry food during the day.
Frequently Asked Questions
Can I use regular wood varnish on the feeding station?
No. Standard varnishes may contain solvents or additives that can leach into food or irritate your cat’s paws and mouth. Always use a product explicitly labeled as food-safe and non-toxic after curing, such as shellac or certified water-based polyurethane.
How do I keep the bowls from sliding?
Ensure the recess is slightly smaller than the bowl’s outer diameter so it fits snugly. For extra grip, place a thin silicone jar opener ring between the bowl and base. These are dishwasher-safe and easy to replace.
Is it safe to use glue near food areas?
Yes, but only if you use food-safe adhesives like two-part epoxy rated for kitchen countertops or FDA-compliant wood glues. Avoid construction adhesives or super glues, which can emit harmful fumes even after drying.
Essential Checklist Before Completion
- ✅ Measured cat’s shoulder height for proper elevation
- ✅ Used non-porous, easy-to-clean bowl inserts (stainless steel preferred)
- ✅ Sealed all wood surfaces with pet-safe, fully curable finish
- ✅ Ensured no sharp edges or loose parts accessible to pets
- ✅ Allowed 72 hours for sealant to cure in a ventilated area before use
- ✅ Tested stability with gentle pressure—bowls should not tip or shift
Final Thoughts and Call to Action
Creating a custom feeding station for your cat is more than a craft project—it’s an investment in their health, comfort, and daily routine. By combining thoughtful design with safe materials, you eliminate common pitfalls of store-bought options while adding a personal touch to your living space. Whether you opt for a sleek modern design or a cozy rustic piece, the result is a functional upgrade that both you and your cat will appreciate every day.


 浙公网安备
33010002000092号
浙公网安备
33010002000092号 浙B2-20120091-4
Comments
No comments yet. Why don't you start the discussion?