
Integrating pet essentials into modern living spaces often means balancing functionality with aesthetics. A cat litter box, while necessary, can disrupt the flow of a well-designed room. This DIY project transforms that eyesore into an elegant piece of furniture: a custom litter box bench that conceals the litter area while offering extra seating or storage. Built with affordability, durability, and style in mind, this solution keeps your space clean, organized, and welcoming—for both humans and felines.
Why Build a Litter Box Bench?
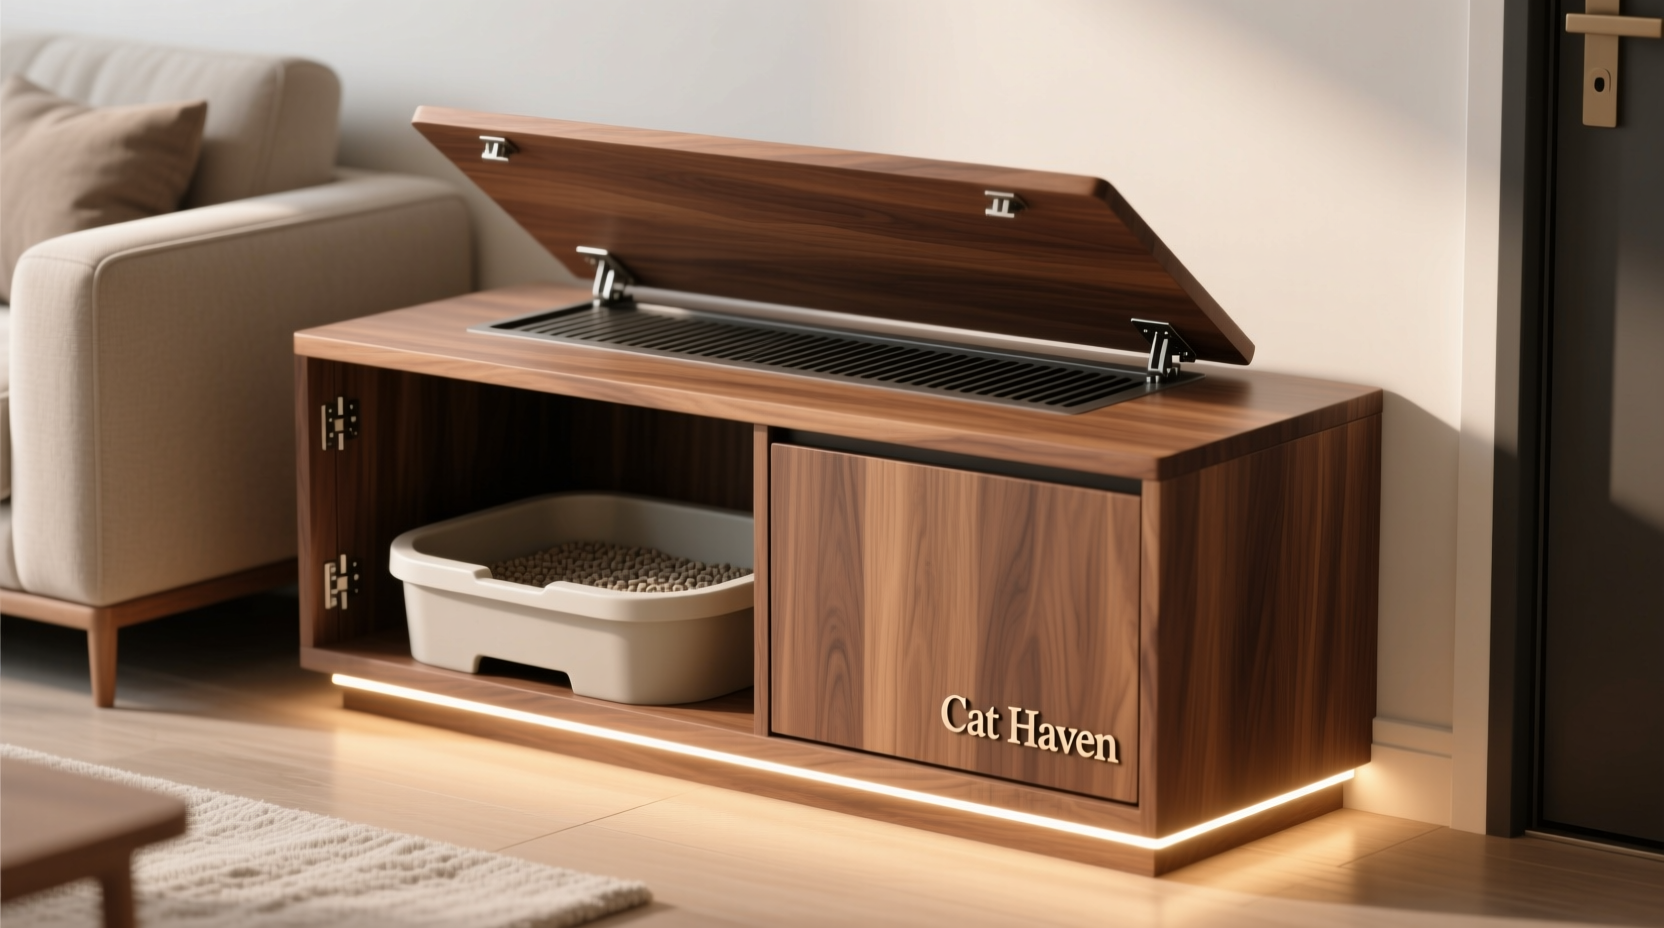
A concealed litter box improves indoor air quality by reducing odor dispersion and limits tracked litter. Beyond hygiene, it eliminates visual clutter. Many homeowners place litter boxes in laundry rooms or closets, but not every home has such dedicated space. A litter box bench allows you to position the box in high-traffic areas—like beside a sofa or under a console table—without compromising design.
Additionally, cats appreciate privacy. An enclosed space encourages consistent use and reduces stress-related elimination issues. By building a bench with proper ventilation and easy access for cleaning, you support both your cat’s behavioral health and your home’s aesthetic harmony.
“Enclosing a litter box within functional furniture is one of the most effective ways to maintain cleanliness without sacrificing interior design.” — Dr. Lena Torres, Feline Behavior Consultant
Materials and Tools Needed
This project uses common woodworking materials available at most hardware stores. Choose unfinished pine or poplar for a natural look, or opt for pre-primed MDF if you prefer painting over staining.
Materials List:
- 1×12 pine board (8 feet) – 2 pieces
- 1×6 pine board (8 feet) – 1 piece
- ¾” plywood (2’x4’) – 1 sheet
- Wood screws (1¼”, 2½”)
- Wood glue
- Sanding blocks (120 & 220 grit)
- Finishing product (stain, paint, or sealant)
- Hinges (2 small butt hinges)
- Magnetic catch or latch
- Non-slip shelf liner (optional)
Tools Required:
- Circular saw or miter saw
- Drill/driver
- Tape measure
- Square
- Clamps
- Orbital sander
Step-by-Step Construction Guide
- Measure and cut all pieces: Cut two 30” long side panels from the 1×12 boards. These form the outer walls. From the plywood, cut:
- Top panel: 30” x 18”
- Base: 30” x 18”
- Front and back panels: 18” wide x desired height (approx. 15”) – adjust based on your litter box size.
- Door panel: 17.5” x 14.5” (allowing ¼” clearance).
- Assemble the frame: Attach the front and back panels between the two side panels using wood glue and 2½” screws. Ensure corners are square before securing. Then attach the base from below using 1¼” screws.
- Install internal shelf (litter tray platform): Measure your litter box height and set the internal shelf about 1–2 inches higher to allow clearance. Cut a shelf from ¾” plywood (approx. 28” x 17”). Attach with corner brackets or dado joints for strength. This shelf holds the litter box and prevents direct contact with the floor.
- Add ventilation: Drill 6–8 ¾” holes near the top of the front and back panels for airflow. Position them high enough to avoid litter spray but low enough to pull odors upward. Cover inside holes with fine mesh screen glued behind the opening to block debris.
- Attach the top: Secure the 1×12 top boards across the frame with wood glue and screws from underneath. Sand edges smooth.
- Build and mount the door: Attach hinges to the door panel and fix it to the front of the bench. Install a magnetic catch so it stays closed but opens easily during cleaning. Add a cutout handle or knob for grip.
- Sand and finish: Sand all surfaces starting with 120-grit, finishing with 220-grit. Wipe clean, then apply stain or paint. Allow 24 hours to cure before placing indoors.
Design Considerations and Customization Options
The beauty of a DIY bench lies in its adaptability. You can modify dimensions to fit specific spaces or match existing furniture. Here are several upgrades to consider:
- Integrated lighting: Battery-powered LED strips inside illuminate the area for easier scooping.
- Removable top cushion: Add foam and fabric to create a padded seat. Use Velcro to secure it.
- Hidden storage compartment: Include a second drawer or lift-up section opposite the litter area for storing bags, gloves, or toys.
- Double-litter configuration: For multi-cat homes, widen the unit and include two separate compartments with individual doors.
| Feature | Benefit | Consideration |
|---|---|---|
| Ventilation holes | Reduces odor buildup | Mesh lining required to prevent litter escape |
| Lift-up top | Easier access for deep cleaning | Requires hinge reinforcement |
| Side entry door | Better for larger cats | May compromise structural integrity |
| Wheels or glides | Mobility for cleaning | Can reduce stability if not secured |
Real-World Example: The Urban Apartment Solution
In a 650-square-foot Brooklyn apartment, Sarah, a graphic designer and owner of two rescue cats, struggled with where to place her litter boxes. The bathroom was too small, and the kitchen felt unhygienic. After researching solutions, she built a 32” long bench using birch plywood, matching her Scandinavian-style dining table. She added a soft gray cushion on top and installed a discreet magnetic door with a brushed nickel pull.
The result? Her cats adapted within a day, drawn to the quiet, semi-dark space. Guests rarely notice the bench’s purpose. “It looks like extra seating,” she says. “And I finally stopped tripping over the box in the hallway.”
Essential Checklist Before You Begin
- Measure your current litter box (length, width, height)
- Determine available floor space and traffic patterns
- Choose location with good airflow and easy cleaning access
- Select wood type and finish compatible with your home’s decor
- Purchase all materials and verify tool condition
- Sketch a simple blueprint with measurements labeled
- Confirm cat’s comfort with enclosed spaces (test with cardboard box first)
Frequently Asked Questions
Will my cat use an enclosed litter box?
Most cats adapt well, especially if introduced gradually. Start by leaving the door open for a few days, letting your cat explore. Place familiar litter and a used scoop inside to encourage use. Avoid forcing entry—let curiosity lead the way.
How do I clean the bench regularly?
Lift the litter box weekly for full cleaning. Wipe down interior surfaces with pet-safe disinfectant. Vacuum ventilation holes monthly to remove dust and hair. Reapply protective finish annually if exposed to moisture.
Can I make this without power tools?
Yes, though it will take longer. Hand saws and screwdrivers work, but precision suffers. Consider renting tools or using a community makerspace with workshops. Pre-cut kits from lumberyards also simplify the process.
Final Thoughts and Next Steps
A handmade cat litter box bench is more than a storage hack—it’s a statement of thoughtful cohabitation. It respects your cat’s need for privacy while honoring your desire for a beautiful, functional home. With basic carpentry skills and a few weekend hours, you can eliminate one of pet ownership’s most persistent design challenges.


 浙公网安备
33010002000092号
浙公网安备
33010002000092号 浙B2-20120091-4
Comments
No comments yet. Why don't you start the discussion?