
Handmade accessories carry a quiet elegance that mass-produced items rarely match. A flower bag charm keychain is more than just a decorative accent—it’s a statement of creativity, care, and personal expression. Whether clipped to a handbag, backpack, or keys, this delicate charm adds a touch of whimsy and craftsmanship to everyday items. Best of all, it can be made entirely from scratch using accessible materials and simple techniques. This guide walks you through every step, offering expert tips, material insights, and design ideas to help you create a piece that feels both professional and deeply personal.
Gathering Your Materials and Tools
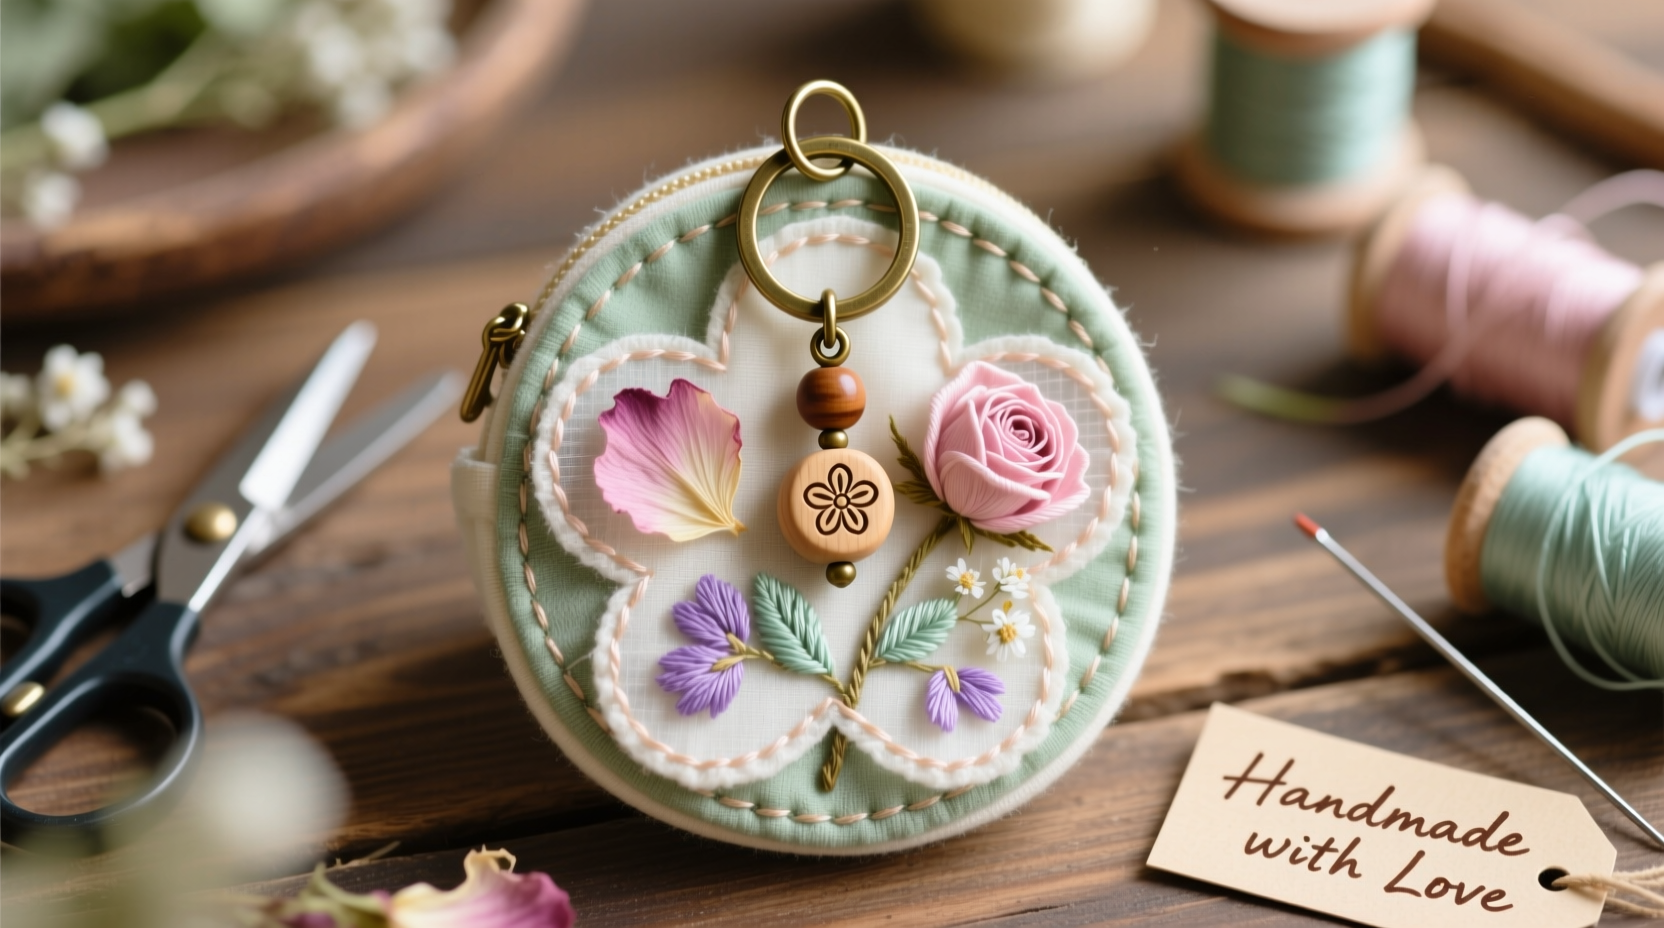
The foundation of any successful DIY project lies in preparation. For a flower bag charm keychain, you’ll need a mix of crafting essentials and decorative elements. The beauty of this project is its adaptability—you can customize colors, textures, and sizes based on your aesthetic preference or intended use.
Here’s what you’ll need to get started:
- Fabric scraps (cotton, felt, or silk for petals; lining fabric for backing)
- Embroidery floss or thin yarn (for stamens and stitching)
- Small buttons, beads, or sequins (optional, for centers)
- Sewing needle and thread (preferably color-matched)
- Scissors (small, sharp ones for precision)
- Pliers (for opening and closing jump rings)
- Keychain ring or lobster clasp
- Fabric glue (non-toxic, quick-drying)
- Cardboard or template paper (for tracing petal shapes)
- Stuffing (polyester fiberfill or cotton wadding, if making 3D flowers)
Designing Your Flower: Shape, Size, and Style
Before cutting any fabric, consider the design of your flower. Will it be flat and minimalist, or full-bodied and dimensional? Each approach offers different visual effects and levels of complexity.
Flat fabric flowers are quicker to assemble and lie smoothly against surfaces—ideal for subtle accents. 3D layered flowers have depth and texture, mimicking real blossoms more closely. Both styles work beautifully as charms.
“Handcrafted details elevate ordinary accessories into wearable art. A single handmade flower can transform a plain tote into a signature piece.” — Lila Montgomery, Textile Artist & Craft Educator
To begin, sketch or trace your petal shape onto cardboard to create a reusable template. Common choices include:
- Oval or teardrop petals (daisy-like appearance)
- Rounded, scalloped edges (roses or peonies)
- Long, pointed petals (lilies or irises)
For consistency, cut multiple petals at once by stacking fabric layers. Aim for symmetry but embrace slight variations—they add character.
Step-by-Step Assembly Process
Follow this structured timeline to build your flower charm from start to finish. With patience and attention to detail, the process becomes meditative and rewarding.
- Trace and cut petals: Use your template to cut 5–7 petals per flower, depending on desired fullness.
- Shape the petals: Gently curl the edges outward using a pencil or tweezers for a natural curve.
- Layer and stitch: Arrange petals in a circular pattern, slightly overlapping each layer. Hand-stitch them together at the base using a whipstitch or running stitch.
- Create the center: Wrap embroidery floss tightly around a small bundle of threads to form a pom-pom stamen, or glue a button or bead in the middle.
- Reinforce the base: Attach a small circle of contrasting fabric or felt to the back to hide stitches and add durability.
- Add dimension (optional): For 3D flowers, lightly stuff between layers before securing the final backing.
- Attach the jump ring: Sew or glue a small metal jump ring to the top of the flower base.
- Connect the keychain: Use pliers to open the jump ring and slide on a keychain clasp or split ring.
Customization and Creative Variations
Once you’ve mastered the basic technique, experiment with personalized touches that reflect your style or suit a specific recipient.
| Variation | Materials Needed | Ideal For |
|---|---|---|
| Miniature bouquet charm | 3–5 small flowers + green fabric leaves | Gifts, bridal accessories |
| Vintage lace overlay | Lace trim, pearl beads | Retro-themed bags |
| Seasonal color palette | Red/white (winter), pastels (spring) | Holiday gifting |
| Eco-chic look | Recycled sari silk, wooden beads | Sustainable fashion lovers |
You can also incorporate embroidery along the petal edges, use metallic threads for shimmer, or dye fabric scraps with natural pigments like beet juice or turmeric for an organic feel.
Real Example: A Mother’s Day Gift That Blossomed Into a Business
Sophie, a teacher from Portland, began making flower charms as handmade Mother’s Day gifts for her colleagues. She used leftover quilting cotton and vintage buttons from her grandmother’s sewing box. The response was overwhelming—one friend asked to buy one, then another. Within three months, Sophie launched a small Etsy shop. Her “Botanical Charm Collection” now features seasonal designs and custom orders. What started as a 20-minute DIY project became a side business rooted in creativity and connection.
Care and Longevity Tips
While fabric charms are durable, they benefit from mindful handling. Avoid prolonged exposure to moisture or direct sunlight, which can fade colors and weaken fibers. If the charm gets dirty, gently dab it with a damp cloth—never submerge it.
Frequently Asked Questions
Can I wash the flower charm if it gets dirty?
It’s best to avoid washing. Instead, spot-clean with a soft cloth and mild soapy water. Allow it to air dry completely before reattaching to your bag.
What if I don’t know how to sew?
No problem. You can create the entire charm using fabric glue. Cut out two identical flower shapes, glue them together with stuffing inside, and attach the jump ring before sealing the edges.
How long does it take to make one charm?
A simple flat flower takes about 20–30 minutes. A layered 3D version may take 45–60 minutes, especially if you’re adding intricate details like hand-wrapped centers.
Final Thoughts and Call to Action
Creating a flower bag charm keychain is more than a craft—it’s a celebration of individuality and intention. In a world of fast fashion and disposable accessories, taking the time to make something by hand is an act of resistance and beauty. Each stitch, fold, and choice of color carries meaning. Whether you keep it for yourself or gift it to someone special, this little blossom speaks volumes.
Now it’s your turn. Gather your scraps, choose your colors, and let your imagination bloom. When you’re done, share a photo with a friend, tag a crafting community online, or start a series of charms for every season. Creativity grows when shared.


 浙公网安备
33010002000092号
浙公网安备
33010002000092号 浙B2-20120091-4
Comments
No comments yet. Why don't you start the discussion?