
In an age where personalization meets practicality, combining style with utility has never been more accessible. One of the most useful yet underutilized accessories is a phone case that doubles as a card holder. Instead of purchasing a mass-produced version, creating your own allows you to tailor the fit, design, and functionality exactly to your needs. This guide walks through a step-by-step process to craft a durable, custom phone case with space for essential cards—no special tools required, just creativity and attention to detail.
Why Build Your Own Phone Case?
Commercial phone cases with card slots often compromise on protection, fit, or aesthetics. Many are bulky, prone to wear, or limit access to ports and buttons. By designing your own, you control the materials, thickness, layout, and visual appeal. Whether you want a minimalist wallet for one ID and a credit card or a rugged outdoor-ready shell with multiple compartments, DIY gives you full autonomy.
Beyond customization, building your own case supports sustainability. Instead of contributing to e-waste with poorly made accessories, you create a long-lasting product from durable or recycled materials. It's also an opportunity to experiment with textures, colors, and embedded elements like photos, fabric swatches, or even small LED accents.
Materials and Tools You’ll Need
The beauty of this project lies in its adaptability. You can use household items or specialty supplies depending on your desired outcome. Below is a comprehensive list categorized by function:
| Category | Item | Purpose |
|---|---|---|
| Base Structure | Hard plastic sheet, old phone case, or leather scrap | Forms the foundation and back panel |
| Adhesive | E6000 glue, contact cement, or strong double-sided tape | Bonds layers securely |
| Card Holder Material | Folded denim, synthetic leather, or vinyl strip | Holds cards snugly without slipping |
| Customization | Paint, fabric, stickers, resin, or printed paper | Adds personal design flair |
| Tools | Scissors, ruler, utility knife, sandpaper, clamps | For precise cutting and shaping |
“We’re seeing a resurgence in handmade tech accessories because people want products that reflect their identity—not just generic black plastic.” — Lena Torres, Sustainable Product Designer
Step-by-Step Construction Process
Follow this timeline to build a sturdy, functional case in under two hours (excluding drying time):
- Measure and trace your phone: Place your phone on the chosen base material and trace its outline with a fine-tip marker. Add 2–3mm extra around all edges to accommodate phone bumps and camera modules.
- Cut the base: Use scissors or a utility knife to carefully cut along the traced line. Sand rough edges smooth if using plastic or wood.
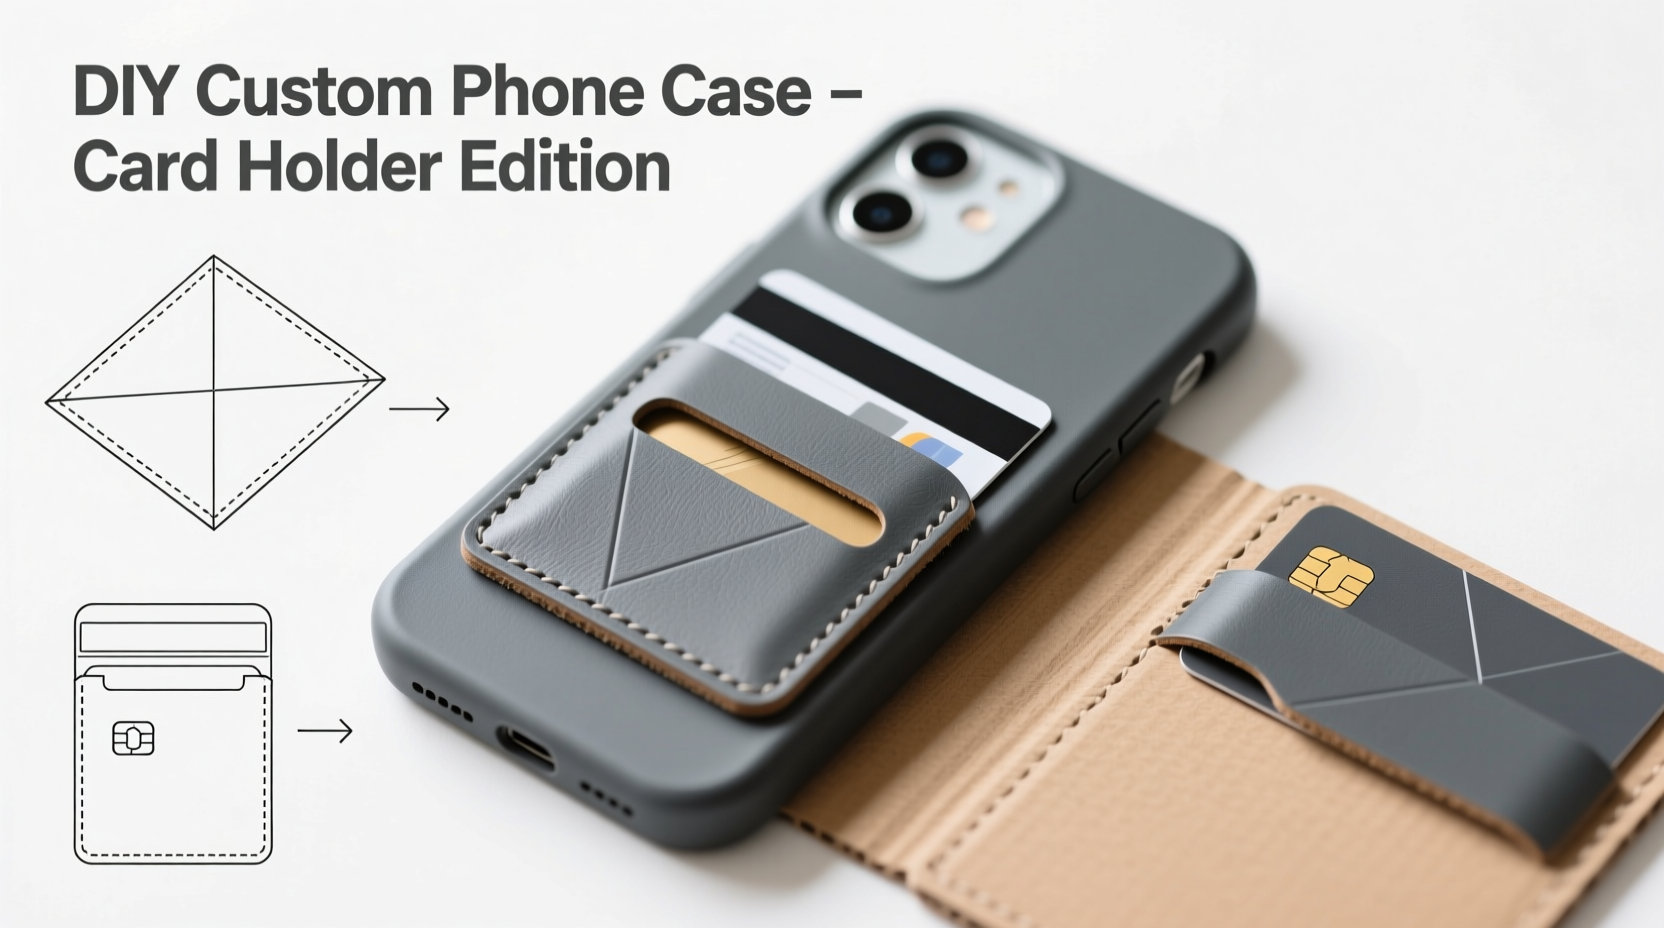
- Create the card slot: Cut a rectangular strip of durable fabric or synthetic leather, approximately 3.5 inches wide and 2.5 inches tall. Fold it in half lengthwise so the open end faces upward—this forms the pocket. Sew or glue the sides shut, leaving the top open.
- Attach the card holder: Position the pocket vertically along the inner center or side of the back panel. Ensure it’s high enough not to interfere with wireless charging but low enough for easy card access. Secure with strong adhesive and clamp for 30 minutes.
- Design the exterior: Apply paint, decals, or fabric overlays. For layered designs, seal with clear Mod Podge or epoxy resin for durability.
- Add lining (optional): Glue soft microfiber or felt inside the card slot to prevent scratches on cards.
- Test fit and adjust: Insert your phone and slide a card in and out. If the fit is too tight, gently widen the slot. If loose, add a thin foam strip inside the pocket for friction.
Real-World Example: Urban Commuter Upgrade
Sophie, a graphic designer in Portland, needed a sleek way to carry her phone and transit pass without a full wallet. She repurposed an old leather journal cover, cutting a piece to match her phone size. Using navy-blue denim from a worn-out jacket, she stitched a vertical card sleeve and glued it inside. She painted a geometric pattern on the outside with acrylics sealed in resin. After three months of daily use—including bike commutes and coffee shop drops—the case still holds firm, and her ORCA card slides in and out effortlessly. “It’s saved me from digging through my bag every morning,” she says. “Plus, people always ask where I bought it.”
Do’s and Don’ts for Longevity
To ensure your creation lasts, follow these best practices:
| Do’s | Don’ts |
|---|---|
| Use weather-resistant adhesives like E6000 or UV-cured resin | Don’t rely on school glue or weak tapes |
| Allow 24 hours drying time before heavy use | Don’t rush assembly; premature stress breaks bonds |
| Choose flexible materials for drop resistance | Don’t use brittle plastics that crack on impact |
| Size the card slot to fit 1–2 cards max for slimness | Don’t overstuff—bulky cases attract lint and strain seams |
FAQ
Can I still use wireless charging with a DIY card holder case?
Yes, but only if the card slot is positioned away from the phone’s charging coil (usually center-back). Avoid thick metal inserts or excessive layers in that area. Test charging before finalizing the design.
What’s the best material for a waterproof case?
Vinyl, silicone sheets, or marine-grade canvas work well. Seal all seams with waterproof glue and consider adding a flap or snap closure if exposed to rain frequently.
How do I clean a custom-made case?
Wipe with a damp cloth and mild soap. For fabric surfaces, use a soft brush. Never submerge unless fully sealed with resin or waterproof coating.
Checklist: Building Your Custom Case
- Measure phone dimensions accurately
- Select durable base and card slot materials
- Cut and shape the back panel
- Create and reinforce the card pocket
- Securely attach the pocket to the case
- Personalize the exterior surface
- Seal and protect decorative elements
- Test phone and card fit
- Allow full curing time before regular use
Conclusion
A custom phone case with a built-in card holder isn’t just a convenience—it’s a statement of intentionality. Every choice, from material to motif, reflects your lifestyle and priorities. With basic tools and mindful construction, you can create something far superior to off-the-shelf options: slimmer, stronger, and uniquely yours. The process encourages problem-solving, creativity, and a deeper connection to the objects you use daily.


 浙公网安备
33010002000092号
浙公网安备
33010002000092号 浙B2-20120091-4
Comments
No comments yet. Why don't you start the discussion?