
Personalizing everyday accessories is more than a trend—it’s a way to express individuality. Bag pendants and keychains are small but powerful statements, turning ordinary bags, keys, or zippers into curated extensions of personal style. Instead of purchasing mass-produced trinkets, crafting your own allows for complete creative control, sustainability, and meaningful gifting. This guide walks through practical, imaginative methods to design standout pieces using accessible materials, tools, and techniques that anyone can master with minimal experience.
Why Make Your Own Bag Pendants and Keychains?
Commercially available pendants often lack uniqueness and emotional resonance. Handmade versions, on the other hand, carry intention—whether they reflect a memory, a favorite color palette, or a specific craft technique you’ve learned. Beyond aesthetics, DIY creations reduce reliance on plastic-based products and support slow fashion principles. Plus, the process itself is meditative: threading beads, shaping clay, or knotting cordage engages focus and creativity in equal measure.
“Handcrafted accessories connect us to the objects we use daily. A pendant made with care transforms a functional item into something cherished.” — Lila Nguyen, Artisan Jewelry Designer
Essential Materials and Tools
Before diving into construction, gather the foundational supplies. Most can be found at craft stores or repurposed from household items. Below is a categorized checklist to help organize your workspace.
Basic Supplies
- Jump rings (6mm or 8mm, stainless steel or brass)
- Lobster clasps or key rings
- Pliers (flat-nose, round-nose, and chain-nose)
- Glue (E6000 or epoxy for strong bonds)
- Scissors or wire cutters
Material Options
- Fimo or Sculpey polymer clay
- Wooden blanks (circles, shapes, slices)
- Resin kits with molds and pigments
- Leather scraps or cork fabric
- Acrylic pieces, vintage buttons, or broken jewelry parts
- Beads (glass, wood, metal, seed beads)
Optional Embellishments
- Paints (acrylic, metallic, or UV resin paint)
- Tassels, pom-poms, or embroidery floss
- Miniature photo transfers
- Stickers, washi tape, or decoupage paper
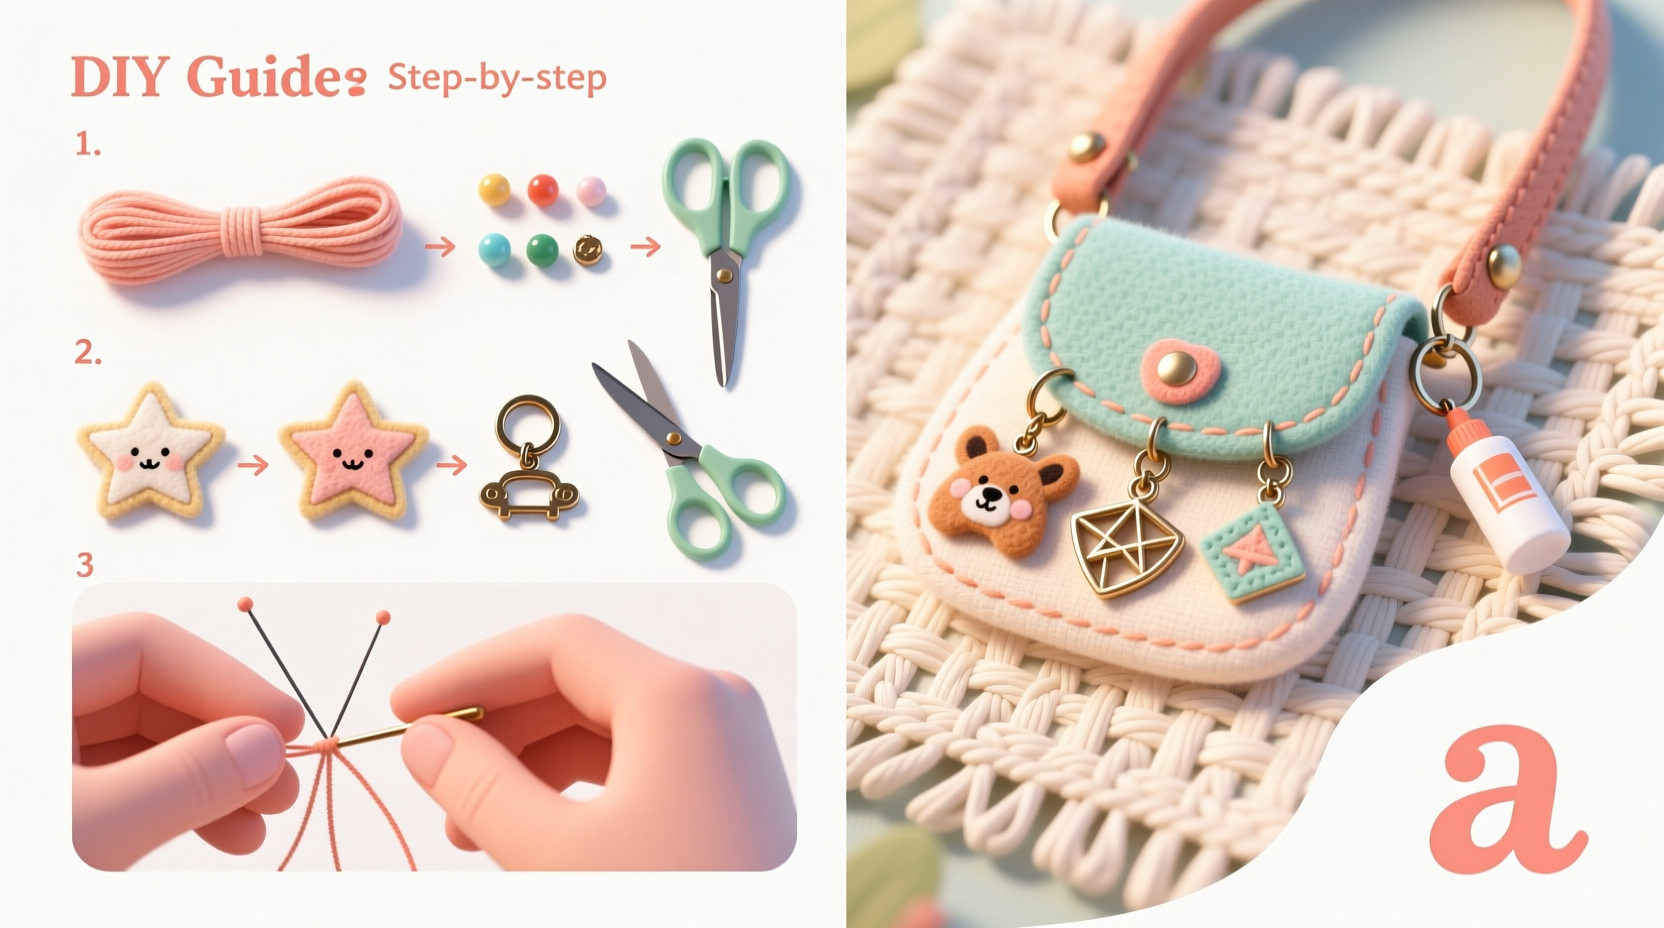
Step-by-Step Projects You Can Try Today
Start simple and build confidence. These three beginner-friendly designs progress in complexity, introducing new skills while remaining approachable.
1. Polymer Clay Charm Pendant
- Condition a small piece of polymer clay by kneading it until soft.
- Roll it flat using a rolling pin or acrylic bottle, aiming for 3–5mm thickness.
- Cut into desired shape using a cookie cutter or blade (hearts, circles, stars).
- Press in texture with lace, stamps, or toothpicks; embed tiny beads if desired.
- Poke a small hole near the top using a needle or skewer for hanging.
- Bake according to package instructions (usually 25–30 minutes at 110°C/230°F).
- Cool completely, then sand edges lightly and seal with matte or glossy varnish.
- Attach a jump ring and lobster clasp or keychain ring.
2. Resin Geode Keychain
- Select a silicone mold (geode-shaped or freeform).
- Mix clear resin according to manufacturer directions; work in a dust-free area.
- Pour a thin base layer and let sit for 15 minutes to reduce bubbles.
- Sprinkle mica powders, glitter, or crushed glass in irregular patterns to mimic mineral veins.
- Add a second layer to encapsulate decorations fully.
- Cure for 24 hours in a level, warm space away from direct sunlight.
- Demold carefully, attach a metal tray backing or jump ring, and secure with adhesive if needed.
3. Braided Cord Tassel Pendant
- Cut three strands of embroidery floss or waxed cotton cord (each 30cm long).
- Knot them together at one end and braid tightly for 10–15cm.
- Secure the end with a knot and trim evenly.
- Wrap a shorter piece of thread around the braid 1cm from the top to form a “neck.”
- Tuck the wrapped end under itself to hide threads, securing with glue.
- Attach a jump ring through the top loop before the wrap sets completely.
- Optional: Add beads along the braid or create a dual-tassel design.
Design Tips for Maximum Impact
Creating visually cohesive pendants goes beyond assembling parts. Consider these principles to elevate your designs:
| Principle | Do | Avoid |
|---|---|---|
| Balance | Distribute weight and color evenly across the piece | Overloading one side with heavy elements |
| Color Harmony | Use complementary or analogous color schemes | Clashing brights without neutral grounding |
| Durability | Seal porous materials; reinforce stress points | Using weak adhesives on metal-to-clay joints |
| Theme Consistency | Stick to a concept (e.g., ocean, retro, minimalist) | Mixing too many unrelated symbols or textures |
Real-Life Inspiration: Maya’s Memory Keychain
Maya, a college student in Portland, wanted a meaningful accessory to honor her grandmother who passed away. She scanned a tiny handwritten note from an old recipe card, resized it to fit a 25mm resin mold, and embedded it beneath a crystal-clear dome. Around the edge, she pressed dried lavender from her grandmother’s garden into the curing resin. The finished keychain now hangs from her backpack—a private tribute that sparks conversation and comfort alike. Her project proves that even simple techniques can yield deeply personal results.
Frequently Asked Questions
Can I wash my handmade pendants?
Most should not be submerged. Clean gently with a dry or slightly damp cloth. Avoid water exposure for paper, fabric, or unfinished wood elements. Sealants help, but prolonged moisture degrades adhesives and materials over time.
What’s the best glue for attaching metal to clay?
E6000 or two-part epoxy provides the strongest bond. Apply in a well-ventilated area and clamp or hold pieces steady for 2–3 minutes until set. Allow 24 hours for full cure before handling.
How do I make pendants safe for children’s bags?
Avoid small detachable parts that could become choking hazards. Secure all components with industrial-strength adhesive and consider using nylon cords instead of metal chains. Test pull strength before giving to a child.
Final Checklist Before You Begin
- ✔ Choose a theme or inspiration (nature, travel, nostalgia)
- ✔ Gather all tools and lay them out
- ✔ Select durable, compatible materials
- ✔ Prepare your workspace with protective covering
- ✔ Plan attachment method (key ring, clip, or swivel hook)
- ✔ Allow adequate drying or curing time
- ✔ Label and store extras for future customization
Make It Yours, Then Share It
There’s no single right way to create a pendant. Whether you’re drawn to bold colors, quiet minimalism, or nostalgic collage, your choices tell a story. These small adornments accumulate meaning over time—jostling against coffee thermoses, swinging from lockers, or dangling from laptop zippers. They become part of your rhythm. Once you’ve completed your first piece, consider teaching a friend, gifting a matched set, or starting a micro-business online. The act of making connects us—to our hands, our memories, and each other.


 浙公网安备
33010002000092号
浙公网安备
33010002000092号 浙B2-20120091-4
Comments
No comments yet. Why don't you start the discussion?