
As winter fades and the first blooms appear, people begin refreshing their wardrobes, accessories, and even everyday carry items. Among the most overlooked yet impactful pieces is the humble keychain. A well-designed DIY keychain can reflect personality, elevate style, and serve as a conversation starter. This season, skip mass-produced options and embrace handmade charm with custom spring-inspired designs that blend color, texture, and creativity.
Spring brings renewal—soft pastels, floral patterns, and a sense of lightness. These themes translate beautifully into wearable art on a small scale. With accessible materials and a bit of imagination, crafting standout keychains becomes both enjoyable and rewarding. Whether you're making one for yourself or gifting to friends, these projects offer room for self-expression while staying functional.
Choose Materials That Capture Spring’s Essence
The foundation of any standout keychain lies in its materials. For spring, opt for components that evoke freshness, warmth, and vibrancy. Natural elements like wood beads, dried flowers, and cotton tassels pair well with seasonal palettes. Resin allows for encapsulating delicate florals or glitter for a glossy finish, while enamel charms add polish without sacrificing playfulness.
Fabric scraps in floral prints or gingham patterns can be repurposed into tiny bows or fabric-wrapped rings. Embroidery floss works well for macramé-style chains or pom-poms in soft pinks, mint greens, and sky blues. Consider using eco-friendly supplies such as recycled glass beads or biodegradable resin to align your creations with sustainable values.
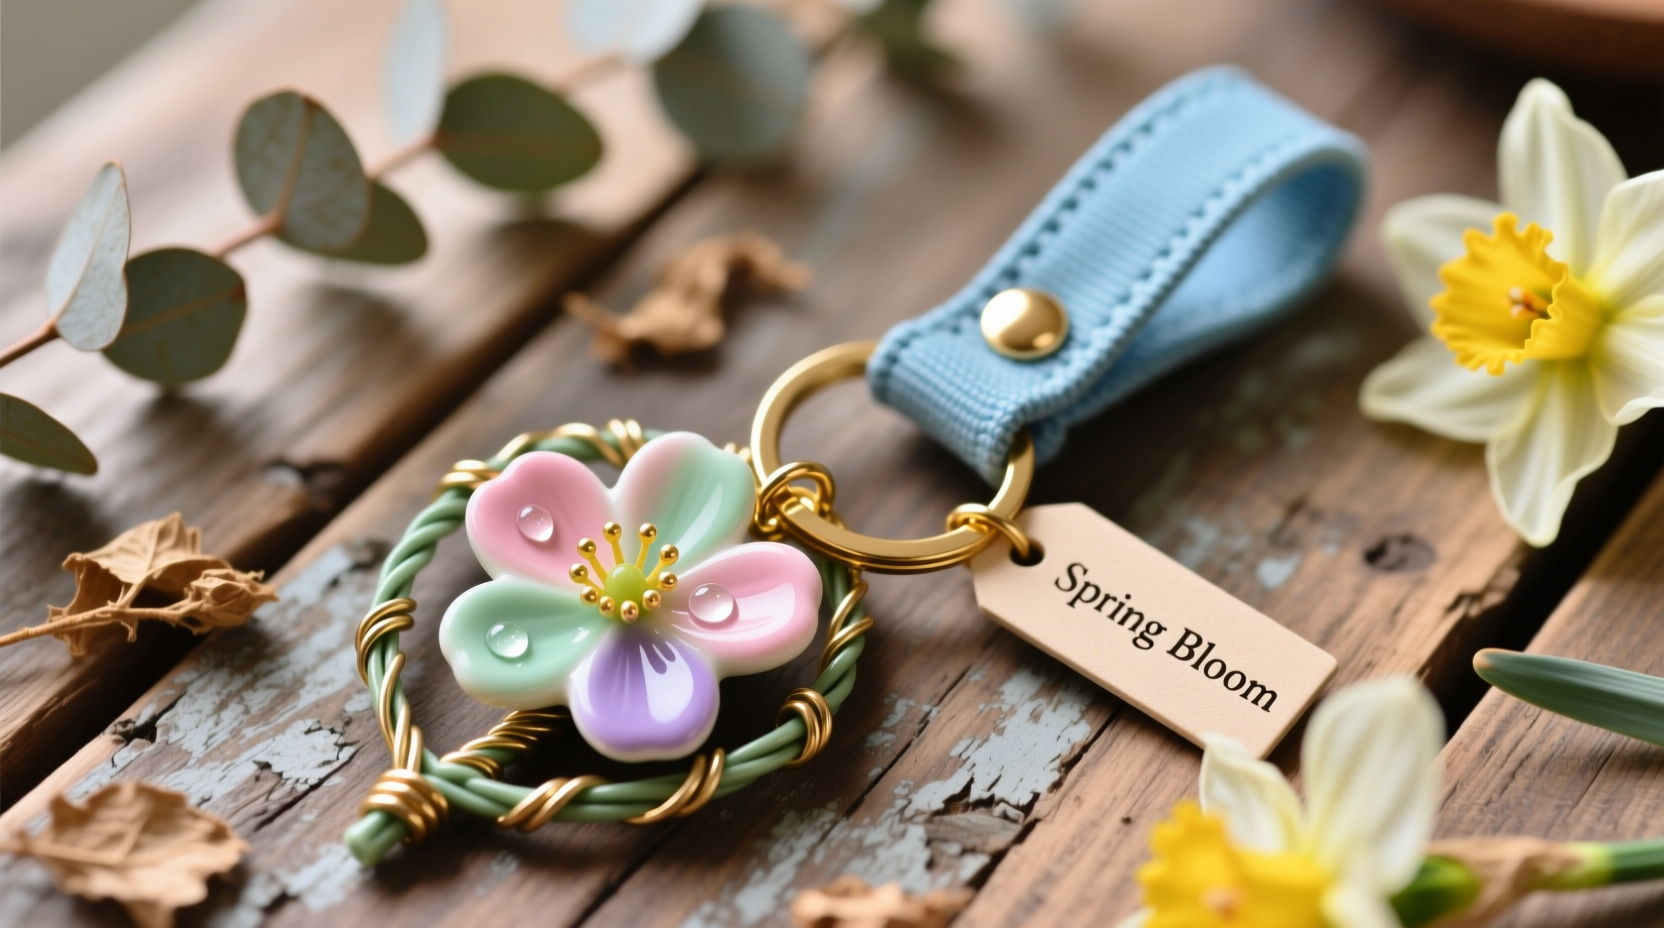
Create Dimension with Layered Design Techniques
Flat keychains rarely catch attention. To make yours stand out, build depth through layering. Combine different textures—such as a leather base with a fabric appliqué and a dangling charm—to create visual interest. Try stacking multiple small acrylic shapes painted with watercolor effects, then securing them with jump rings.
Another technique involves embedding objects within clear resin layers. For example, place a pressed pansy at the bottom layer, add a sprinkle of gold mica powder, then seal it with another pour. Once cured and attached to a metal ring, the result is a miniature work of art.
For those who enjoy sewing, consider stitching a three-dimensional fabric flower that fans out when viewed from the front. Attach it to a sturdy backing disc so it holds shape over time.
“Small accessories are where personal style truly shines. A thoughtfully made keychain tells a story before you even speak.” — Lila Nguyen, Accessory Designer & Craft Educator
Step-by-Step Guide: Make a Pressed Flower Resin Keychain
This project combines nature’s beauty with modern durability. Follow this timeline to craft a lasting keepsake infused with spring energy.
- Day 1 – Gather & Press Flowers: Collect small, flat blossoms like violets, forget-me-nots, or daisies. Place between parchment paper inside a heavy book for 5–7 days until fully dried.
- Day 8 – Prepare Molds: Select silicone keychain molds (circle, heart, or leaf-shaped). Clean thoroughly and let dry.
- Day 9 – First Resin Pour: Mix UV or epoxy resin according to instructions. Pour a thin base layer into each mold. Cure under UV lamp or let sit 12 hours.
- Day 10 – Add Elements: Position a pressed flower on each cured base. Use tweezers for precision. Lightly mist with resin sealer if needed.
- Final Pour & Finish: Cover with another resin layer. Pop bubbles with a toothpick or lighter flame. Cure completely, demold, and attach metal key rings.
What You’ll Need:
- Pressed flowers (small varieties)
- Silicone keychain molds
- UV or two-part epoxy resin
- Mixing cups and stir sticks
- Tweezers and toothpicks
- Jump rings and lobster clasps (optional)
- Protective gloves and workspace cover
Incorporate Trending Themes and Personalization
To ensure your keychains feel current, tap into 2024’s top accessory trends: cottagecore aesthetics, Y2K nostalgia, and minimalist maximalism. A tiny embroidered mushroom charm nods to whimsical woodland styles, while holographic beads echo early 2000s flair. Enamel pins repurposed into key fobs merge vintage sentiment with utility.
Personalization elevates emotional value. Use alphabet beads to spell names or meaningful words. Hand-paint initials onto wooden discs with fine brushes. Laser-cut acrylic pieces with custom quotes or symbols also make bold statements.
| Trend Theme | Material Ideas | Design Tip |
|---|---|---|
| Cottagecore | Dried lavender, wooden slices, linen thread | Add a tiny clay snail charm for storytelling detail |
| Y2K Revival | Holographic film, chunky plastic beads, smiley faces | Mix bright colors with metallic finishes |
| Minimalist Maximalism | Clear resin, micro-beading, layered charms | Cluster small elements but maintain balance |
Avoid Common Crafting Pitfalls
Even experienced crafters can misstep when rushing or improvising. Awareness prevents frustration and wasted materials.
- Overloading designs: Too many charms weigh down keys and risk breaking connections.
- Poor sealing: Unsealed paper or fabric deteriorates quickly with daily use.
- Ignoring hardware quality: Cheap split rings open easily; invest in solid brass or nickel-coated options.
- Skipping ventilation: Resin fumes require airflow—work near an open window or use a mask.
Mini Case Study: The Campus Crafter’s Success
Jess Lin, a college student in Portland, started making keychains as stress-relief crafts during finals week. She used leftover embroidery floss to knot colorful tassels and added mini succulent charms from thrifted jewelry. After posting her creations on Instagram, classmates began requesting custom orders for birthdays.
Within two months, Jess launched a small Etsy shop focused on “mood-based” keychains—each designed to match emotions like joy, calm, or confidence. Her “Sunbeam Series,” featuring yellow pom-poms and lemon-slice resin drops, sold out in under a week. By pricing affordably and packaging each item with a handwritten note, she built a loyal local following—all rooted in simple springtime inspiration.
Essential Checklist for Your DIY Keychain Project
Before starting, run through this list to ensure success:
- Choose a theme or color palette inspired by spring
- Gather all materials and tools in advance
- Test adhesives or resin on scrap pieces
- Ensure hardware (rings, clasps) is durable and rust-resistant
- Allow ample drying/curing time—don’t rush the process
- Add a protective coating if using paper, fabric, or natural elements
- Attach securely to actual keys to test balance and usability
Frequently Asked Questions
How do I keep my fabric keychains from fraying?
Apply a small amount of fabric sealant or clear nail polish along cut edges. Alternatively, use pinking shears when cutting material to minimize unraveling.
Can I wash a beaded keychain?
Spot clean only. Submerging beaded or glued pieces may weaken adhesive bonds or tarnish metal components. Use a damp cloth with mild soap for surface cleaning.
Are resin keychains safe for everyday use?
Yes, once fully cured, epoxy and UV resins are waterproof, scratch-resistant, and non-toxic. Avoid dropping on hard surfaces to prevent chipping.
Bring Joy to the Everyday
A keychain doesn’t need to be flashy to be memorable. Sometimes, the most striking designs are those that carry meaning—a petal from your garden, a bead from an old necklace, or a hue that reminds you of a perfect spring morning. When functionality meets heartfelt creation, the ordinary transforms into something cherished.
These DIY projects aren’t just about fashion—they’re acts of mindfulness, creativity, and connection. Whether you're designing for yourself or sharing handmade gifts, each piece carries intention. This spring, let your keys jingle with personality and purpose.


 浙公网安备
33010002000092号
浙公网安备
33010002000092号 浙B2-20120091-4
Comments
No comments yet. Why don't you start the discussion?