
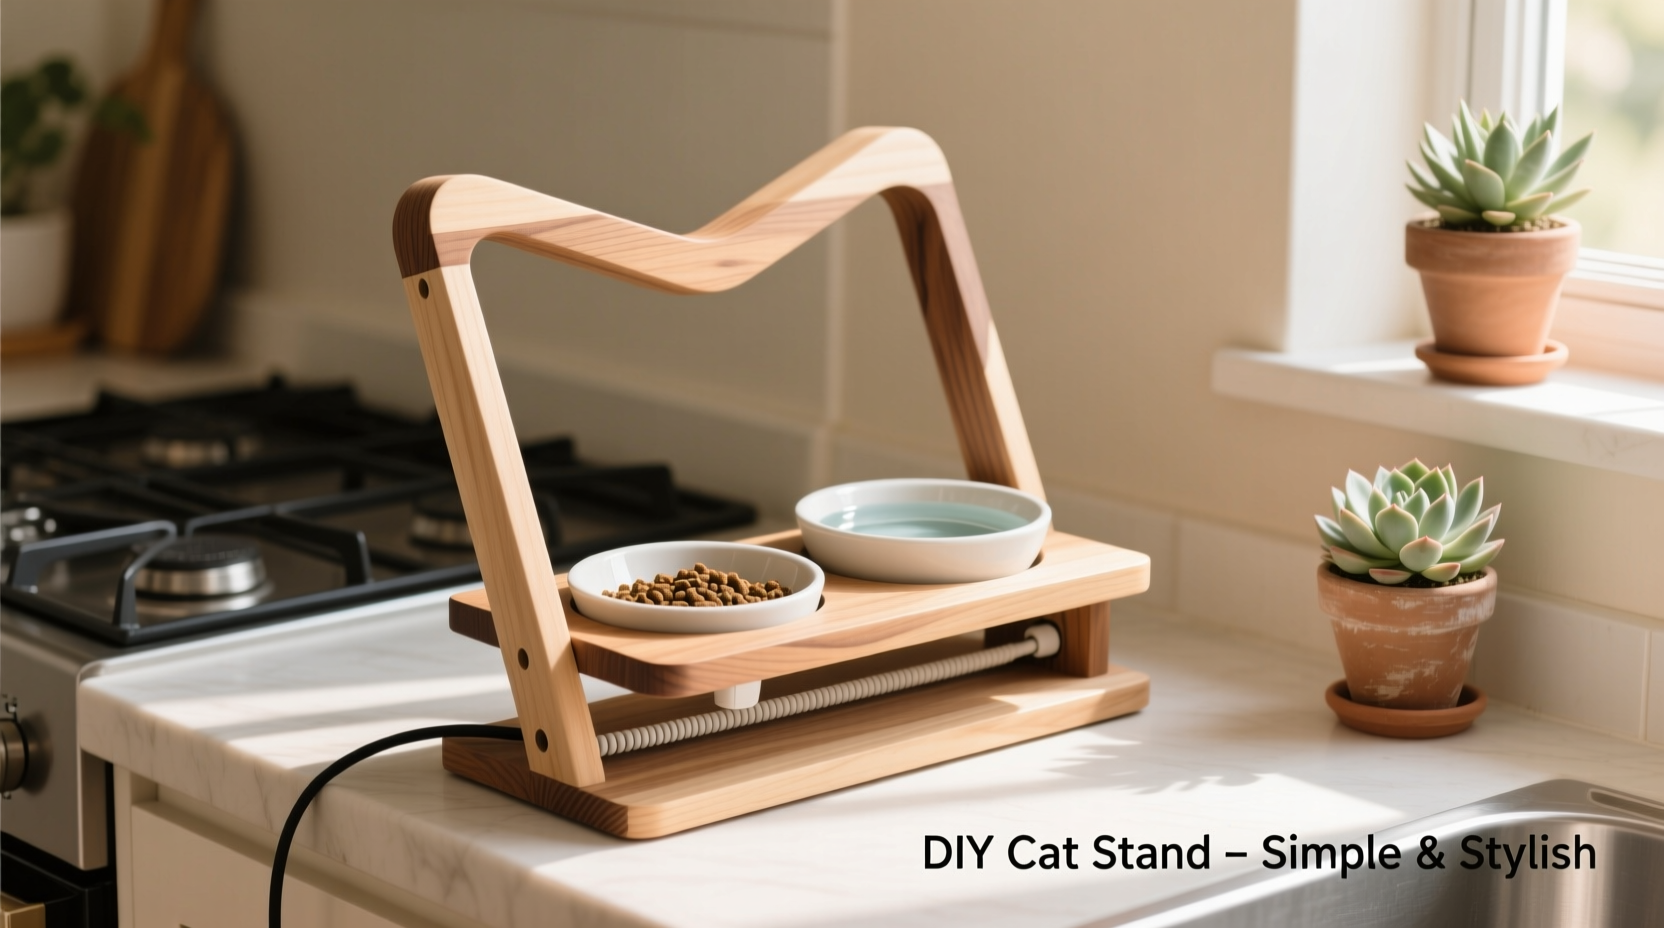
Feeding your cat shouldn’t mean placing bowls directly on the floor. A raised cat bowl stand promotes better posture, reduces neck strain, and keeps meals cleaner by minimizing tracking of food and water. While commercial options exist, building your own DIY cat bowl stand allows for customization, durability, and personal flair. With common household materials and basic tools, you can craft a functional, long-lasting, and aesthetically pleasing solution that complements your home while supporting your pet’s health.
Why a Raised Cat Bowl Stand Matters
Cats, especially older or larger breeds, benefit from eating and drinking at an elevated height. When bowls sit flush with the floor, cats must crouch or stretch their necks downward, which over time can lead to discomfort or digestive issues. A properly designed stand brings the bowl closer to elbow level, encouraging a more natural spine alignment during meals.
Beyond ergonomics, a custom stand prevents spills and messes. Floor-level bowls often become surrounded by scattered kibble or pooled water, attracting pests and creating cleaning challenges. A raised platform contains spills more effectively and is easier to wipe down. Additionally, integrating the stand into your interior design—whether rustic wood, modern metal, or repurposed furniture—adds character to your space.
“Elevated feeding supports feline digestion and joint health, especially in senior cats or those with arthritis.” — Dr. Lena Reyes, DVM, Feline Wellness Specialist
Choosing the Right Materials for Durability and Style
The longevity and appearance of your cat bowl stand depend heavily on material selection. The ideal choice balances sturdiness, ease of cleaning, and visual harmony with your home. Below are common materials used in DIY stands, along with their pros and cons.
| Material | Durability | Aesthetic Flexibility | Maintenance |
|---|---|---|---|
| Hardwood (e.g., oak, maple) | High – resists warping and scratches | Excellent – can be stained or painted | Easy – wipe with damp cloth; reseal annually |
| Plywood (marine-grade) | Moderate – strong if sealed properly | Good – paintable but less refined grain | Requires sealing to resist moisture |
| Bamboo | High – naturally water-resistant | Excellent – sleek, eco-friendly look | Low maintenance; avoid soaking |
| Recycled Furniture Parts (drawer, stool) | Variable – depends on original condition | Unique – vintage or industrial charm | May need refinishing or reinforcement |
| Concrete or Ceramic Base | Very high – extremely stable | Modern, minimalist appeal | Heavy; clean with mild detergent |
For most DIYers, hardwood or bamboo offers the best balance. They’re easy to work with, last years, and can be finished to match kitchen cabinetry or living room accents. If opting for recycled items like small stools or nightstands, ensure structural integrity and sand down sharp edges.
Step-by-Step Guide: Building a Wooden Cat Bowl Stand
This guide walks through constructing a minimalist, two-tier hardwood stand suitable for both food and water bowls. Total cost: under $30. Estimated build time: 2–3 hours.
- Gather Tools and Supplies: Measuring tape, saw (hand or power), sandpaper (120 and 220 grit), drill, 1/4\" drill bit, wood glue, clamps, finish nails or screws, non-toxic wood sealant, two rubber bowl inserts or stainless steel bowls.
- Cut the Wood: Use pre-sanded hardwood boards (1” thick). Cut one base piece (12” x 8”), two side supports (8” tall x 4” wide), and two top platforms (6” x 6”). Ensure all edges are square.
- Sand All Pieces: Begin with 120-grit to smooth rough spots, then finish with 220-grit for a silky surface. Pay attention to corners where cats might brush against the stand.
- Assemble the Frame: Apply wood glue to the bottom edge of each side support. Position them vertically at either end of the base, aligning with the width. Clamp and reinforce with screws or finish nails driven at an angle.
- Attach Top Platforms: Glue and screw the 6” x 6” platforms to the upper ends of the side supports. Angle ensures slight tilt for spill drainage toward the back.
- Drill Bowl Holes (Optional): Trace the bowl diameter on the top platforms. Drill starter holes inside the circle, then use a jigsaw to cut out recessed spaces so bowls sit flush and don’t slide.
- Seal the Wood: Apply two coats of water-based, pet-safe sealant, allowing full drying between layers. This protects against humidity and accidental spills.
- Test Stability: Place on a flat surface and gently shake. No wobbling should occur. Add felt pads to the base feet if needed.
Once complete, position the stand in a quiet corner near your cat’s usual feeding zone. Introduce it gradually by placing familiar bowls on top.
Alternative Creative Designs for Unique Homes
Not every home suits a traditional wooden stand. Here are three inventive alternatives using upcycled or unconventional materials.
- Repurposed Drawer Stand: An old dresser drawer (with front removed) can be mounted vertically on wall brackets. Line the interior with a waterproof mat and insert bowls. Keeps floors clear and adds industrial charm.
- Concrete & Steel Minimalist: Use a pre-cast concrete block as the base and attach a brushed steel tray on top with epoxy bolts. Ideal for modern lofts or urban apartments.
- Hanging Wall Shelf with Guardrails: Mount a floating shelf at cat elbow height. Install low wooden or acrylic barriers on three sides to prevent bowl displacement. Saves floor space in compact homes.
Mini Case Study: Transforming a Vintage Stool into a Feeding Station
Sarah M., a pet owner in Portland, repurposed a thrifted wooden milking stool into a dual-bowl stand for her two Persian cats. Concerned about their chronic hairballs and sluggish digestion, she researched elevated feeding and decided to customize a solution.
She sanded the stool’s surface, reinforced loose joints with wood glue, and painted it in matte sage green to match her kitchen. A circular recess was carved into the top using a router to snugly fit stainless steel bowls. After adding non-slip silicone mats underneath each bowl, she introduced the stand slowly over three days.
Within a week, Sarah noticed both cats ate more calmly and left fewer crumbs. “It looks like a piece of decor, not a pet accessory,” she said. “And my vet mentioned improved digestion at the next checkup.”
Checklist: Building Your Own Cat Bowl Stand
Follow this checklist to ensure a safe, functional, and attractive result:
- ☐ Measure your cat’s elbow height when standing (ideal bowl elevation)
- ☐ Choose non-toxic, durable materials
- ☐ Sand all edges to prevent splinters
- ☐ Secure joints with glue and fasteners
- ☐ Seal wood or porous surfaces with pet-safe finish
- ☐ Test stability before use
- ☐ Clean regularly and inspect for wear monthly
Frequently Asked Questions
How high should a cat bowl stand be?
The optimal height is level with your cat’s elbow when standing. On average, this ranges from 4 to 6 inches for small cats and 8 to 10 inches for larger breeds. Measure from the floor to the bottom of the chest while your cat stands naturally.
Can I use plastic bowls with a DIY stand?
Yes, but stainless steel or ceramic is preferred. Plastic can harbor bacteria, scratch easily, and may cause chin acne in some cats. If using plastic, opt for heavy-duty, BPA-free versions and replace frequently.
Is it safe to use reclaimed wood?
Only if thoroughly cleaned, sanded, and sealed. Avoid wood treated with chemicals, paints containing lead, or pieces from outdoor structures exposed to mold. Indoor furniture remnants are safest.
Conclusion: Craft a Functional Piece That Reflects Your Home and Cares for Your Cat
Creating a durable and stylish cat bowl stand at home is more than a craft project—it’s an investment in your cat’s well-being and your home’s harmony. With thoughtful design, quality materials, and attention to detail, you can build a feeding station that supports healthy posture, reduces mess, and blends seamlessly into your décor. Whether you choose a sleek modern design or a rustic upcycled piece, the result is a personalized solution that reflects care for both pet and space.


 浙公网安备
33010002000092号
浙公网安备
33010002000092号 浙B2-20120091-4
Comments
No comments yet. Why don't you start the discussion?