
Discarded aluminum cans are more than just waste—they’re a hidden treasure trove for crafters, artists, and eco-conscious makers. With minimal tools and a spark of creativity, these lightweight, malleable materials can be transformed into functional decor, wearable art, or striking sculptures. Aluminum can crafting blends sustainability with ingenuity, turning everyday trash into personalized masterpieces. Whether you're a seasoned DIYer or new to upcycling, this guide walks you through the essentials of transforming soda and beer cans into unique handmade creations.
Why Aluminum Can Crafts?
Aluminum is one of the most recyclable materials on the planet—yet millions of cans still end up in landfills each year. Crafting with them reduces environmental impact while offering an accessible, low-cost medium for artistic expression. Unlike plastic, aluminum retains its structural integrity when cut and shaped, making it ideal for intricate designs. It’s also non-toxic when cleaned properly and responds well to paint, polish, and heat treatments.
“Upcycling isn’t just about saving materials—it’s about reimagining their potential. Aluminum cans have surprising versatility in form and finish.” — Dr. Lena Torres, Sustainable Design Researcher, University of Portland
Beyond environmental benefits, aluminum can crafts encourage mindfulness in consumption and foster problem-solving skills. The process of flattening, cutting, and assembling teaches precision and patience—qualities that translate across creative disciplines.
Essential Tools and Materials
Starting your aluminum can crafting journey doesn’t require expensive equipment. Most tools are household items or easily sourced from hardware stores. Below is a checklist to get you started:
- Empty aluminum cans (cleaned and dried)
- Scissors or craft knife (preferably with replaceable blades)
- Ruler and pencil (for measuring and marking)
- Sandpaper (fine grit, 200–400)
- Pliers (needle-nose recommended)
- Acrylic paints or spray paint
- Clear sealant (matte or glossy)
- Glue (E6000 or epoxy for strong bonds)
- Drill or hole punch (for jewelry or hanging elements)
- Protective gloves and safety glasses
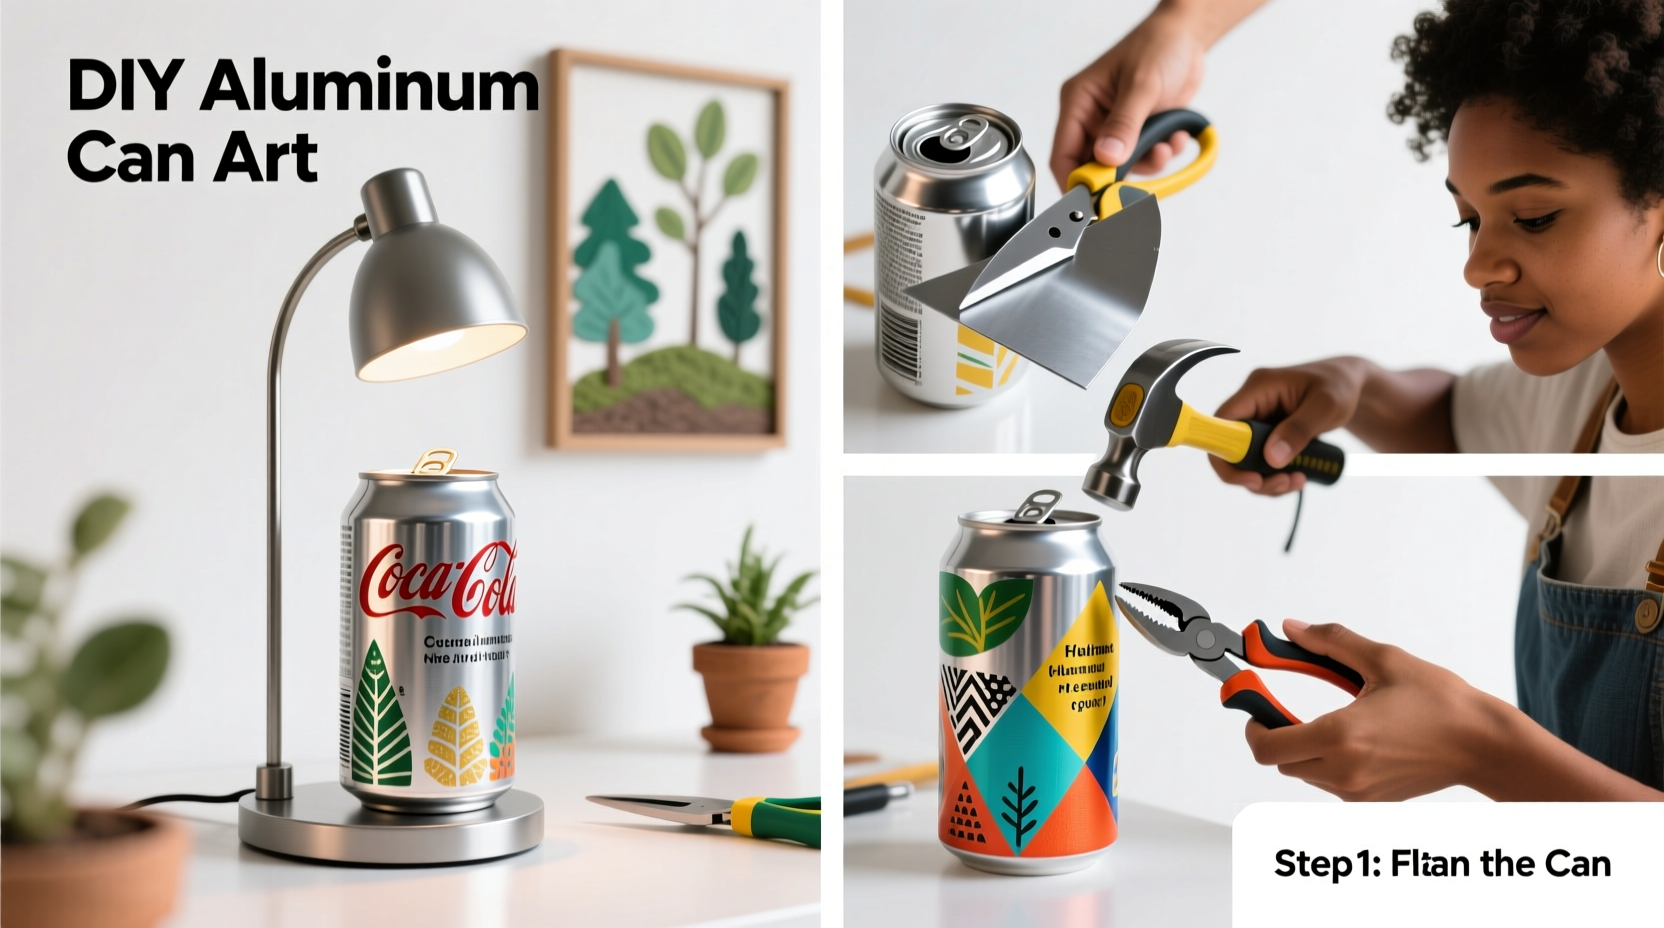
Preparing the Cans
Before crafting, proper preparation ensures safety and ease of use. Begin by removing labels and soaking cans in warm, soapy water for 10–15 minutes. Rinse thoroughly and let dry completely. Use scissors to cut off both ends of the can, then slice vertically down the side to unfurl it into a flat sheet. Sand all cut edges to eliminate sharpness. For smoother results, place the aluminum between two cloth layers and press with a warm iron.
Step-by-Step: Creating a Hanging Wind Chime
A wind chime made from aluminum cans produces soft, melodic tones and adds rustic charm to porches or gardens. Follow this timeline to build your own:
- Day 1 – Collect & Prepare: Gather 5–7 clean cans of varying sizes. Remove ends and cut into strips or rings (1–2 inches wide).
- Day 2 – Shape & Decorate: Flatten pieces and sand edges. Paint with weather-resistant outdoor paint. Allow 24 hours to dry.
- Day 3 – Assemble: Drill small holes near the top edge of each piece. Thread fishing line or thin wire through and attach to a wooden ring or driftwood base at different lengths.
- Day 4 – Finish: Seal with outdoor-grade clear coat. Attach a central striker (a bolt or metal washer) and hang from a sturdy hook.
Customization Techniques for Unique Finishes
The true magic of aluminum can crafts lies in personalization. Once shaped, the metal accepts a variety of finishes that elevate aesthetics and durability.
| Technique | How-To | Best For |
|---|---|---|
| Anodized Look | Soak cut pieces in vinegar + salt solution (1 cup vinegar, 1 tbsp salt) for 30 mins. Rinse and heat gently with a torch to create iridescent hues. | Jewelry, wall art |
| Hammered Texture | Place aluminum on a steel surface and tap with a ball-peen hammer for a dimpled, metallic sheen. | Candle holders, coasters |
| Paint & Stencil | Apply primer first, then use stencils for geometric or nature-inspired patterns. Finish with sealant. | Decorative panels, gift tags |
| Polished Shine | Buff with metal polish or a mixture of baking soda and water using a soft cloth. | Mirrored accents, modern sculpture |
For added dimension, combine aluminum with other recycled materials like bottle caps, fabric scraps, or old keys. Layered textures invite tactile engagement and visual interest.
Real Example: Community Art Project in Tucson
In 2022, a neighborhood arts collective in Tucson, Arizona launched “Can City,” a public installation made entirely from repurposed aluminum cans. Over six weeks, volunteers collected more than 2,000 cans, which were transformed into large-scale butterflies, flowers, and abstract mobiles. These were mounted on a chain-link fence along a bike path, creating a vibrant corridor that doubled as an environmental education display. The project not only beautified a neglected space but also sparked conversations about recycling and community collaboration.
One participant, Maria Delgado, shared: “I never thought a soda can could become art. Now I save every one I drink. My kids help me cut and paint them—we even made earrings for my mom’s birthday.”
Common Mistakes and How to Avoid Them
Even experienced crafters encounter challenges when working with aluminum. Awareness of pitfalls improves outcomes and safety.
- Skipping edge sanding: Unfinished edges can cause cuts. Always smooth with fine-grit paper.
- Using regular glue: Standard white glue won’t hold on metal. Opt for industrial-strength adhesives.
- Ignoring ventilation: Spray paints and sealants emit fumes. Work outdoors or in a ventilated garage.
- Overheating during texturing: Excessive heat can warp thin aluminum. Apply flame briefly and evenly.
Frequently Asked Questions
Can aluminum can crafts withstand outdoor conditions?
Yes, if properly sealed. Use UV-resistant spray paint and a waterproof clear coat to protect against moisture and sun damage. Avoid prolonged exposure to heavy rain unless designed for it.
Are these projects safe for children?
With supervision, older children (ages 10+) can participate in painting and decorating. Adults should handle cutting, drilling, and sanding due to sharp edges and tool risks.
Where can I source large quantities of cans?
Ask friends, family, or local cafes and convenience stores to save cans for you. Some recycling centers may allow collection upon request.
Conclusion: Turn Waste Into Wonder
Aluminum can crafts offer a powerful blend of creativity, sustainability, and accessibility. From delicate pendants to bold garden installations, the possibilities are limited only by imagination. Each piece tells a story—not just of design, but of renewal and resourcefulness. By mastering basic techniques and experimenting with finishes, you transform throwaways into meaningful objects that inspire conversation and care for the planet.


 浙公网安备
33010002000092号
浙公网安备
33010002000092号 浙B2-20120091-4
Comments
No comments yet. Why don't you start the discussion?