
Every year, millions of tons of clothing end up in landfills—much of it still wearable or usable. Instead of discarding garments that no longer fit your style or size, consider repurposing them into something fresh and functional. With a little creativity and basic crafting skills, you can turn outdated shirts, worn jeans, or ill-fitting dresses into one-of-a-kind handmade treasures. This guide explores inventive ways to upcycle your clothes into new creations, from home decor to accessories, all while reducing waste and expressing your personal style.
Why Upcycle Clothes?
Fast fashion has normalized disposable clothing, but the environmental toll is significant. The textile industry ranks among the top polluters globally, contributing to water contamination, greenhouse gas emissions, and massive landfill overflow. By transforming old clothes into handmade items, you extend their lifecycle, reduce demand for new production, and cultivate a more sustainable wardrobe.
Upcycling also fosters creativity. It allows you to experiment with textures, patterns, and stitching techniques without the pressure of perfection. Whether you're an experienced sewer or a beginner with scissors and glue, there’s a project suited to your skill level.
5 Creative DIY Projects to Try at Home
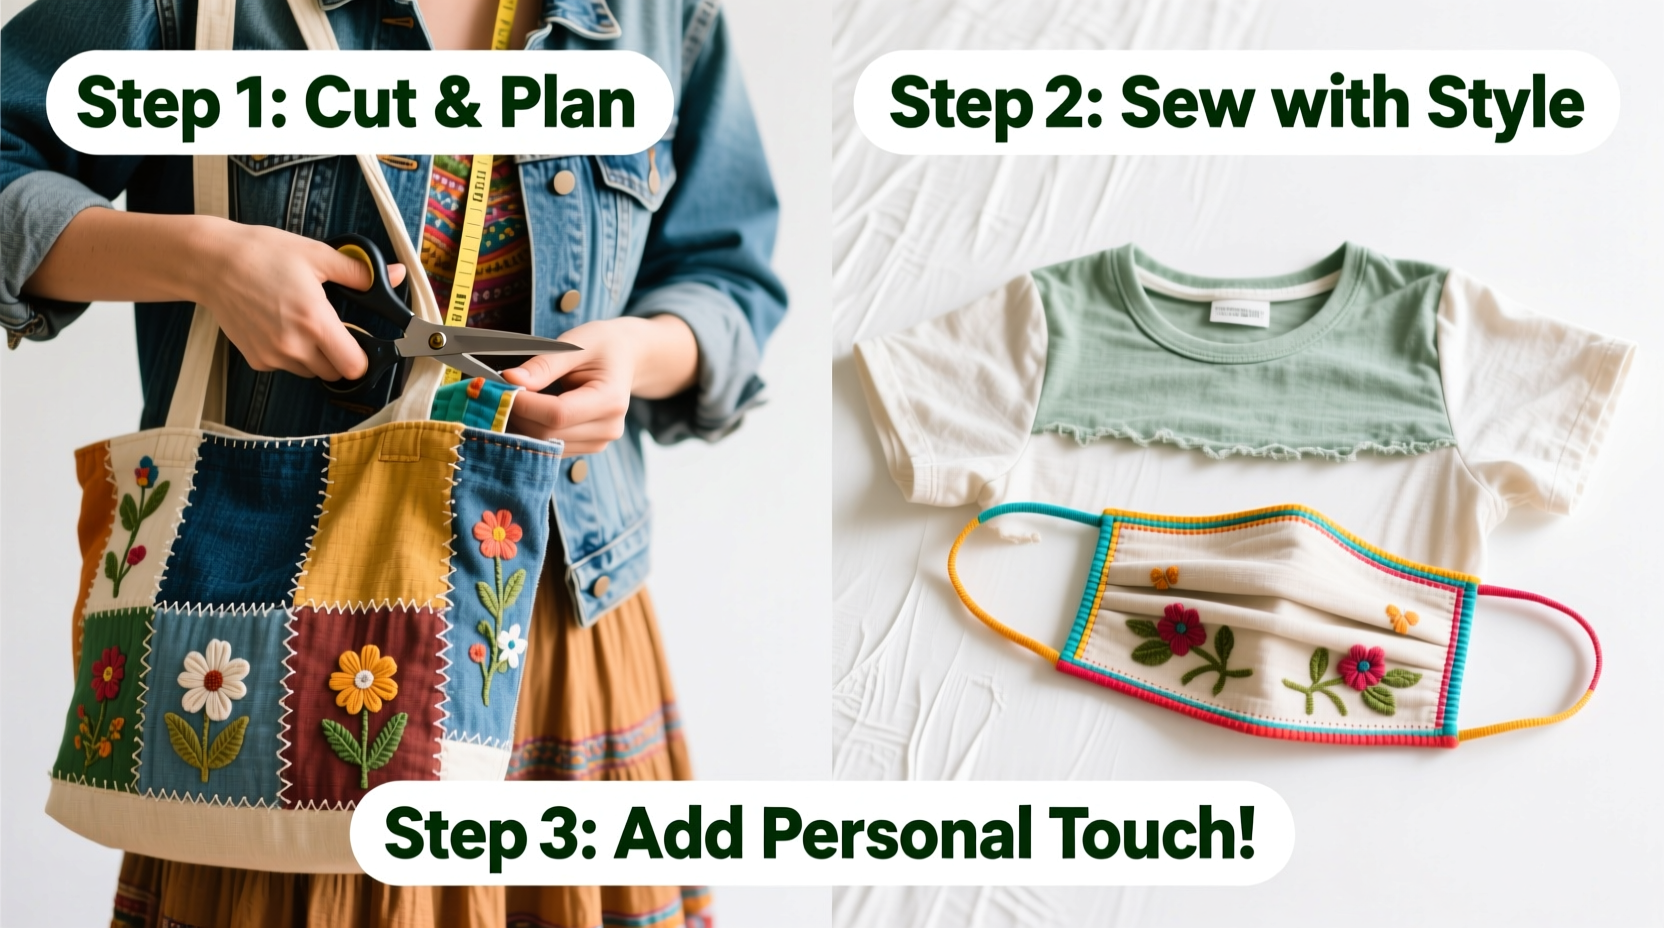
1. Turn Old T-Shirts into Reusable Shopping Bags
T-shirt tote bags are simple to make and eliminate the need for plastic. Cut off the sleeves and neckline, then sew or knot the bottom hem shut. The stretchy fabric creates a flexible bag perfect for farmers’ markets or carrying books.
Add flair by using graphic tees with bold prints or combining multiple shirts for a patchwork effect. These bags wash easily and fold compactly for storage.
2. Transform Jeans into Stylish Patchwork Pillows
Denim is sturdy and visually interesting due to fading and whiskering. Cut legs and pockets from old jeans into squares or rectangles. Arrange them in a pleasing pattern and sew together to form a pillow cover. Use contrasting thread for a modern look or add embroidery for extra detail.
Insert a store-bought cushion or stuff with leftover fabric scraps. This project works especially well with multiple pairs of jeans in varying washes.
3. Convert Dresses into Quilted Coasters or Placemats
Delicate fabrics like silk, cotton blends, or floral-printed dress material make elegant tableware. Cut fabric into uniform squares (about 4x4 inches), layer with batting, and quilt by hand or machine. Finish edges with bias tape or a simple zigzag stitch.
These coasters protect surfaces while showcasing vintage patterns. They also make thoughtful handmade gifts when paired with a set of tea towels made from matching fabric.
4. Repurpose Sweaters into Winter Accessories
Wool or knit sweaters are ideal for cold-weather crafts. Cut out arm sections to create cozy fingerless gloves. The natural ribbing fits snugly around wrists, and the remaining body fabric can become a hat or scarf.
For pet owners, small sweater pieces can be stitched into warm pet beds or booties. Always pre-wash knits to prevent post-project shrinking.
5. Make Fabric Scrap Jewelry
Thin strips of colorful fabric can be braided or rolled into necklaces, bracelets, or earrings. Roll narrow strips tightly into beads, seal with fabric glue, and string them on wire or cord. Combine different textures—like lace from a blouse collar and cotton from a shirt—to create dimensional jewelry.
This zero-waste idea uses even the smallest remnants and results in lightweight, expressive accessories.
Step-by-Step Guide: How to Create a Memory Quilt from Old Clothes
A memory quilt turns sentimental garments—childhood clothes, concert tees, or wedding attire—into a lasting keepsake. Follow this timeline to assemble your own:
- Collect garments: Gather 10–20 meaningful pieces. Wash and dry them to pre-shrink.
- Cut fabric squares: Use a rotary cutter and mat to cut 12x12 inch pieces. Focus on prominent designs or logos.
- Plan layout: Lay out squares on the floor or table. Alternate colors and textures for visual balance.
- Sew blocks together: Stitch squares in rows, then join rows with right sides facing. Press seams flat.
- Add backing and binding: Layer with batting and backing fabric. Pin layers, then quilt by stitching along seams or freehand designs.
- Finish edges: Bind with cotton tape or fabric strips for a clean border.
Allow 8–12 hours for completion, depending on size and quilting complexity. A lap-sized quilt (50x60 inches) typically requires 30 squares.
“Memory quilts preserve emotional value through tactile storytelling. Each patch carries a moment worth remembering.” — Dr. Lena Torres, Textile Historian
Essential Tools and Materials Checklist
To begin any clothing transformation project, gather these basics:
- Sharp fabric scissors
- Seam ripper (for dismantling seams cleanly)
- Needles and thread or a sewing machine
- Pins or clips
- Measuring tape and ruler
- Fabric markers or chalk
- Iron and ironing board (pressing improves finish)
- Extra notions: buttons, zippers, fusible webbing
Do’s and Don’ts of Clothing Upcycling
| Do | Don't |
|---|---|
| Pre-wash fabrics to prevent future shrinkage | Use dull scissors that fray fabric edges |
| Save buttons, zippers, and trims for future use | Cut valuable fabric without a clear plan |
| Test stitches on scraps before working on main pieces | Ignore grain lines when cutting woven fabrics |
| Store unused fabric in breathable containers | Leave projects unfinished for months—momentum helps! |
Real Example: From Office Blouses to Boutique-Style Tote
Sophie, a teacher from Portland, accumulated several button-up blouses she no longer wore. Rather than donate them unseen, she disassembled three shirts with contrasting collars and cuffs. She used the yoke and torso panels to construct a structured tote bag, incorporating the collars as decorative front flaps and repurposing buttons for closure.
The result was a professional-looking bag with personality—ideal for carrying lesson plans or weekend groceries. Sophie estimates she saved $40 compared to buying a similar item from a boutique. More importantly, she felt proud knowing her creation kept textiles out of the waste stream.
FAQ
Can I upcycle clothes without a sewing machine?
Absolutely. Many projects use fabric glue, iron-on adhesive, or simple knotting techniques. T-shirt tote bags, fabric braided rugs, and no-sew blankets are great starter options.
What if my fabric frays easily?
Fray-check liquid or masking tape along cut edges can prevent unraveling. Alternatively, use pinking shears to cut fabric, which minimizes fraying due to its zigzag blade.
How do I choose which clothes to upcycle?
Select garments with minimal stains or holes. Prioritize fabrics in good condition—even if outdated. Save heavily damaged items for scrap bins unless they have usable details like pockets or embroidery.
Final Thoughts and Call to Action
Transforming clothes into handmade items isn’t just a craft—it’s a mindset shift toward mindful consumption. Each project reconnects you with the materials you already own, encouraging resourcefulness over replacement. Whether you create a quilt from baby clothes or turn band tees into wall art, every stitch tells a story of renewal.
Start small. Pick one garment this week and give it a second life. Share your creation online with friends or in local maker groups. Inspire others to see not waste, but possibility, in the clothes they’re ready to let go.


 浙公网安备
33010002000092号
浙公网安备
33010002000092号 浙B2-20120091-4
Comments
No comments yet. Why don't you start the discussion?