
Crafting small handmade items brings joy not only in the process but also in the final result—something tangible that reflects creativity and care. One such delightful project is creating a DIY pony elephant keychain, a whimsical fusion of two beloved animals transformed into a soft, portable charm. This hybrid creature combines the playful spirit of a pony with the gentle strength of an elephant, wrapped in colorful yarn and finished with a functional keyring. Whether you're making it as a gift, a personal accessory, or a fun activity with children, this project is beginner-friendly and highly customizable.
The beauty of this craft lies in its simplicity and expressive potential. Using basic crochet or knitting techniques—or even no-sew fabric methods—you can bring your pony elephant to life in under a few hours. The following guide walks through every stage, from gathering materials to attaching the final keyring, ensuring a polished and durable result.
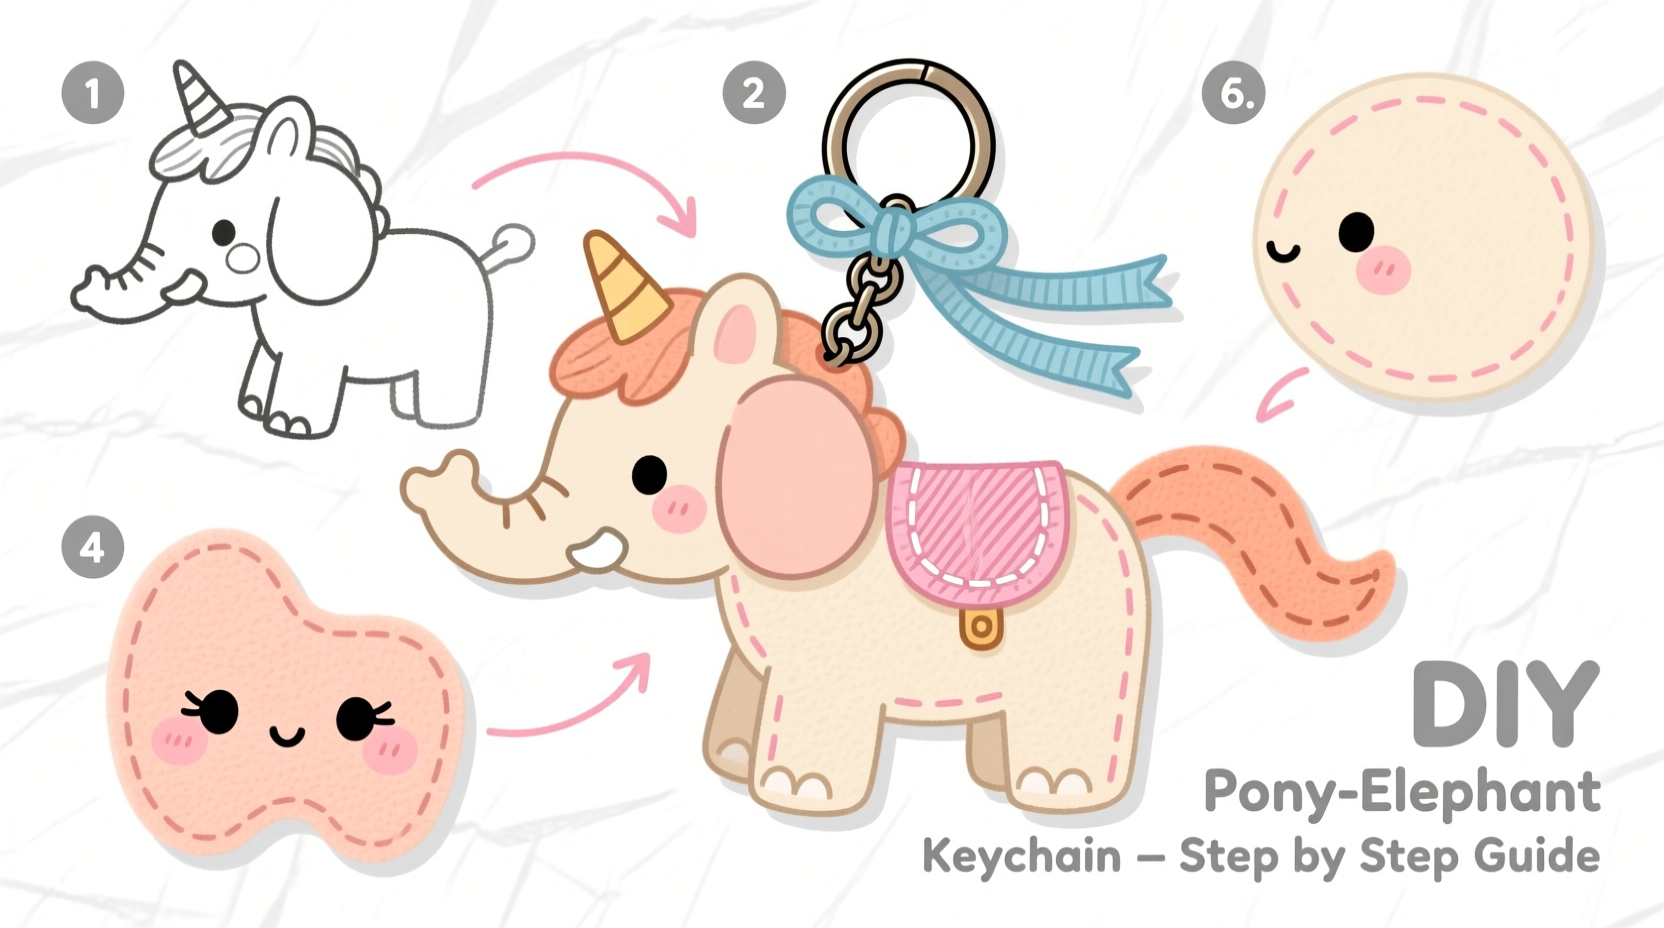
Gather Your Materials and Tools
Before beginning any craft, preparation is essential. Having all necessary supplies at hand ensures a smooth workflow and reduces frustration. For this project, you’ll need both structural components and decorative elements to achieve a balanced, appealing design.
- Soft acrylic yarn in gray (elephant body), pink or brown (mane/trunk accents), and a contrasting color for details
- Size 3.5 mm crochet hook (or knitting needles if preferred)
- Fiberfill stuffing
- Two small plastic safety eyes (6mm recommended)
- Tapestry needle for weaving ends
- Scissors
- Keyring (preferably 25–30mm diameter, nickel-free if sensitive)
- Polyester thread and embroidery needle (optional, for facial details)
- Hot glue gun or fabric glue (for securing parts if not crocheted together)
Step-by-Step Assembly Process
This section outlines a crochet-based method, which offers tight stitching and excellent shape retention. If you're unfamiliar with crochet, basic skills like chain (ch), single crochet (sc), and increasing/decreasing are sufficient. The pattern follows amigurumi principles—small stuffed toys worked in continuous rounds.
- Ears (Make 2): Start with gray yarn. Chain 2, work 6 sc into the second chain from hook (magic ring alternative). Increase evenly to 12 stitches over the next round, then work one plain round. Flatten and close the top by slip stitching across. Flatten into ear shape and set aside.
- Trunk (Make 1): Chain 8, then work back in single crochet for 7 rows to form a flat strip. Fold and seam edges to create a tube. Stuff lightly and curve slightly upward. This doubles as the pony’s muzzle and elephant’s trunk.
- Head (Main Body): Begin with gray yarn in a magic ring. Work increases over 6 rounds to reach about 20 stitches. Insert safety eyes between rounds 5 and 6, spaced appropriately. Continue crocheting downward, maintaining the oval shape. At round 10, attach ears on either side using yarn tail or glue. Leave an opening, stuff firmly, then close with an invisible finish.
- Mane (Pony Element): Cut strands of pink or brown yarn (approx. 15cm long). Use a crochet hook to pull loops through along the top ridge of the head, creating a tied fringe. Trim evenly or leave shaggy for character.
- Legs (Optional Mini Stilts): Create four short tubes (6–8 rounds tall) tapered at the bottom. Attach two near the front and two at the back of the head base. These suggest legs without full structure, keeping the design compact.
- Final Touches: Embroider a small smile beneath the trunk with black thread. Add blush spots using pink embroidery floss if desired. Ensure all loose ends are woven in securely.
Design Variations and Creative Twists
One of the joys of handmade crafts is personalization. The pony elephant concept is inherently imaginative, so don’t hesitate to experiment. Consider these variations to suit different tastes or occasions:
- Color Themes: Use pastel yarns for a baby shower gift, glitter yarn for a festive look, or monochrome tones for minimalist appeal.
- Texture Play: Combine fluffy “eyelash” yarn for the mane with smooth cotton for the body to add tactile interest.
- Themed Accessories: Sew on a tiny hat, bow, or saddle made from felt. A miniature bridle drawn with embroidery thread enhances the pony aspect.
- No-Crochet Version: Trace and cut two identical animal shapes from felt. Sew around the edge, leaving space to insert stuffing and a flat button magnet or keyring. Great for younger crafters.
“Amigurumi teaches patience and precision, but its greatest reward is the emotional connection people feel to handmade creatures.” — Lila Nguyen, Textile Artist & Craft Instructor
Do’s and Don’ts: Crafting Best Practices
| Do’s | Don’ts |
|---|---|
| Count your stitches regularly to avoid accidental increases or decreases. | Don’t pull too tightly when decreasing—this can distort the shape. |
| Use stitch markers to track the beginning of each round. | Don’t leave long yarn tails exposed; weave them in thoroughly. |
| Test the firmness of stuffing before closing the piece. | Don’t attach safety eyes where they can be easily pulled off by small children. |
| Wash test a swatch of yarn before finalizing your material choice. | Don’t rush the finishing—neat seams and hidden knots elevate the look. |
Real-Life Example: A Gift That Sparked Joy
Sophie, a middle school art teacher from Portland, wanted to create meaningful end-of-year gifts for her students. Instead of generic tokens, she designed a series of animal hybrid keychains—one being the pony elephant—to reflect each student’s personality. One shy student, known for loving elephants and drawing horses during free time, received a lavender-gray version with a sparkly purple mane. Sophie included a handwritten note: “Strong like an elephant, free-spirited like a pony—just like you.”
The student wore the keychain on her backpack all summer and brought it back in September as a good luck charm. Her mother later emailed Sophie, saying, “She talks about that little creature like it’s real. Thank you for seeing her.” This simple craft became more than decoration—it was recognition, memory, and emotional resonance in yarn form.
Frequently Asked Questions
Can I make this without knowing how to crochet?
Absolutely. You can use pre-made felt pieces or purchase a small plush animal base and modify it—add a trunk to a pony-shaped charm or paint on features. Fabric glue and scissors are all you need for a no-stitch version.
Is this safe for young children?
If intended for kids under 3, replace safety eyes with embroidered ones and ensure all parts are securely attached. Avoid small detachable accessories. Consider sewing the keyring shut or using a cord loop instead of metal rings.
How do I clean the keychain if it gets dirty?
Spot clean with a damp cloth and mild soap. Do not submerge unless the yarn label specifies machine washability. Allow to air dry completely away from direct heat or sunlight to prevent fading and deformation.
Conclusion: Bring Your Imagination to Life
The DIY pony elephant keychain is more than a craft—it’s a celebration of imagination, craftsmanship, and heartfelt expression. With minimal materials and focused attention, you can create something uniquely yours or perfectly suited to someone else’s spirit. Each stitch, color choice, and detail reflects intention, turning ordinary yarn into a token of warmth and playfulness.


 浙公网安备
33010002000092号
浙公网安备
33010002000092号 浙B2-20120091-4
Comments
No comments yet. Why don't you start the discussion?