
Creating a custom dog collar at home blends practicality with personal expression. Whether you're crafting for your own pet or considering a small handmade business, designing a collar allows you to control fit, materials, and aesthetics. With basic sewing tools and a bit of creativity, you can produce a durable, comfortable accessory tailored to your dog’s size, temperament, and style. This guide walks through the entire process—from measuring your dog to adding hardware—with precision and care.
Why Make Your Own Dog Collar?
Store-bought collars often come in standard sizes and generic designs. Homemade versions let you choose high-quality webbing, soft linings, and unique embellishments while ensuring a perfect fit. You can also accommodate special needs—like wider bands for dogs with tracheal sensitivity or reflective strips for nighttime visibility.
Beyond functionality, custom collars make heartfelt gifts. A collar embroidered with a dog’s name or decorated with themed fabric reflects thoughtfulness that mass-produced items rarely match.
Materials and Tools You’ll Need
The success of your collar depends on using the right components. Below is a comprehensive list of essentials:
- Nylon or polyester webbing – 3/4 inch for small dogs, 1 inch for medium to large breeds
- Fusible interfacing (optional) – Adds stiffness and structure
- Cotton fabric – For lining or decorative overlays
- D-ring – Attaches leash securely
- Buckle set – Side-release or ladder-lock style
- Adjustable slider – For sizing adjustments
- Heavy-duty thread – Polyester or UV-resistant outdoor thread
- Sewing machine – With a strong needle (size 14 or 16)
- Scissors, ruler, measuring tape, pins, and clips
- Lighter or fray check – To seal cut ends of webbing
- Iron – For fusing interfacing and pressing seams
“Custom collars made with reinforced stitching and quality hardware last significantly longer than budget retail options.” — Lena Torres, Pet Product Designer
Step-by-Step Construction Guide
Follow this detailed sequence to build a secure, well-finished collar from scratch.
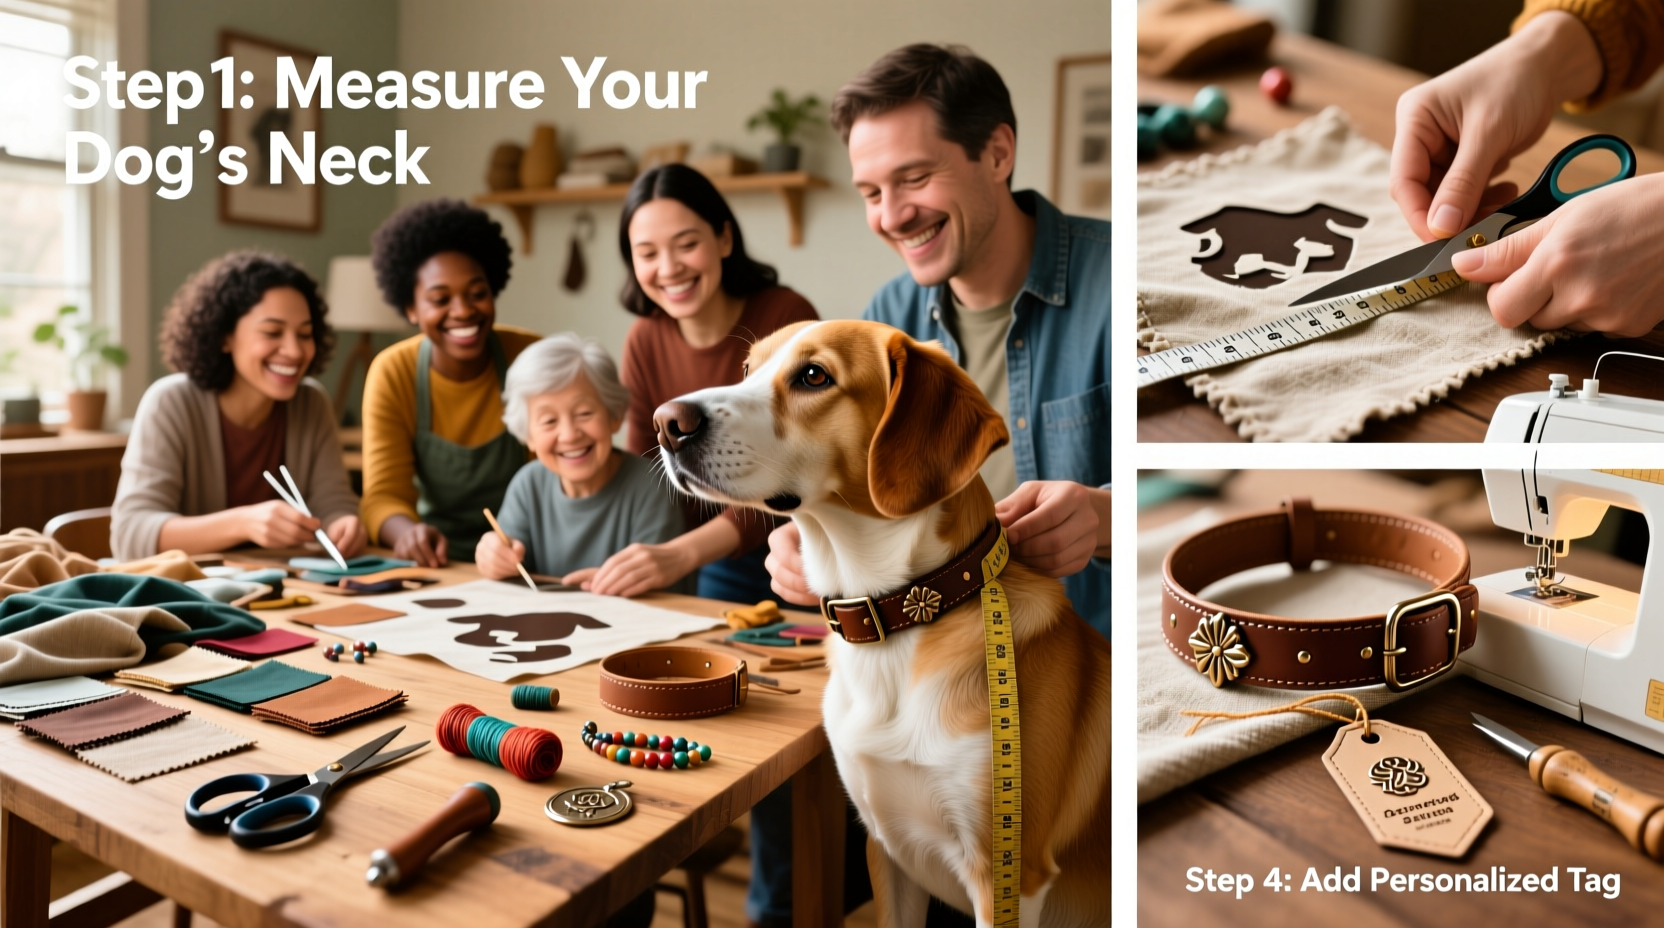
- Measure your dog’s neck: Use a soft tape measure around the middle of the neck, just behind the ears. Add 2 inches for comfort and adjustability. For example, if the neck measures 14 inches, cut the webbing to 16–17 inches.
- Cut the webbing: Using sharp scissors, cut the main strap to length. Seal both ends with a lighter to prevent fraying—pass the edge quickly through the flame and press flat with a non-metal tool.
- Prepare the lining (optional): Cut cotton fabric 1 inch shorter than the webbing and wide enough to wrap around it. Iron fusible interfacing onto the wrong side of the fabric for stability.
- Attach the D-ring: Fold one end of the webbing over 1 inch and pin the D-ring inside the fold, centered. Sew a box-and-X pattern with heavy thread for maximum strength.
- Insert the buckle: At the opposite end, slide the male part of the buckle onto the webbing before folding and securing it with multiple rows of stitching. Ensure the webbing slides freely through the female buckle piece.
- Add the slider: Slide the adjusting bar onto the webbing before attaching the second end. Position it about 1–2 inches from the end so there's room for adjustment.
- Sew reinforcement bars: Across all stress points—D-ring, buckle ends, slider—stitch back and forth several times. Each bar should be at least 1 inch long and densely sewn.
- Optional: Apply fabric overlay: Wrap the cotton strip around the top layer of webbing and hand-stitch or machine-sew along the edges for a soft, decorative finish.
- Final inspection: Tug each component firmly. Check for loose threads, uneven stitching, or misaligned hardware.
Pro Tips During Assembly
Design Ideas and Personalization
Once the structural work is complete, personalize your collar to reflect your dog’s personality—or your brand identity if selling.
- Embroidery: Use a stabilizer and embroidery machine to add names, paw prints, or fun motifs.
- Patches or iron-ons: Attach licensed character patches or custom badges with heat sealing.
- Reflective piping: Sew in narrow reflective thread or trim for evening safety.
- Themed fabrics: Halloween prints, floral patterns, or nautical stripes bring seasonal flair.
- Hand-painted details: Use fabric paint to create one-of-a-kind artwork on cotton overlays.
| Design Feature | Best For | Caution |
|---|---|---|
| LED lights | Night visibility | Ensure battery pack is waterproof and secured |
| Charm attachments | Style enhancement | May snag; not ideal for active dogs |
| Neoprene padding | Comfort for sensitive necks | Adds bulk; requires precise cutting |
| Personalized tags | ID and style | Engrave contact info directly on metal tag |
Real Example: Bella the Rescue Beagle
Sarah, a pet owner in Portland, made a custom collar for her rescue beagle who had skin irritation from cheap plastic-lined collars. She used soft cotton lining, a wide 1-inch hemp webbing base, and added a small embroidered bone with Bella’s name. The result was a breathable, hypoallergenic collar that didn’t rub her neck. After six months of daily use, the stitching remained intact and Bella stopped scratching at her neck. Sarah now makes collars for other rescue dogs in her community, using donated fabrics and recycled buckles.
Common Mistakes to Avoid
Even experienced crafters can make errors that compromise safety or durability. Here are frequent pitfalls:
- Using weak thread: Regular cotton thread breaks under tension. Always use bonded nylon or outdoor-grade thread.
- Skipping reinforcement stitches: Single lines of stitching at stress points will fail over time.
- Incorrect sizing: Too tight restricts breathing; too loose risks escape. Two fingers should fit comfortably between collar and neck.
- Ignoring hardware quality: Cheap buckles crack. Invest in YKK or ITW Nexus brands.
- Over-decorating: Excessive charms or beads can catch on fences or furniture.
FAQ
How long does it take to make a custom dog collar?
For beginners, allow 1.5 to 2 hours including measuring, cutting, and sewing. Experienced crafters can complete one in 45 minutes.
Can I wash a homemade dog collar?
Yes, but hand-wash gently with mild soap and air dry. Machine washing may weaken stitching and damage decorations.
What’s the safest way to add my dog’s name?
Embroider directly onto the webbing or attach a metal tag engraved with contact information. Avoid relying solely on fabric labels that can tear off.
Final Checklist Before Gifting or Use
- Double-check all seams for skipped stitches
- Confirm the buckle locks securely and releases easily
- Ensure D-ring rotates freely for leash movement
- Verify no sharp edges on hardware or cut ends
- Test fit on dog: two fingers should slide underneath comfortably
- Inspect monthly for wear, especially near the buckle and D-ring
Conclusion: Craft with Care and Confidence
Making a custom dog collar at home is more than a craft project—it’s an act of love and responsibility. When done correctly, your creation provides safety, comfort, and a touch of individuality that store-bought accessories often lack. Every stitch contributes to your dog’s daily experience, whether they’re trotting through a park or lounging at home.
Start with simple designs, master the fundamentals of hardware attachment and reinforcement, then experiment with colors, textures, and personal touches. As your skills grow, so will your confidence in creating functional art that enhances your pet’s life.


 浙公网安备
33010002000092号
浙公网安备
33010002000092号 浙B2-20120091-4
Comments
No comments yet. Why don't you start the discussion?