
Two-way earrings—jewelry pieces designed to be worn in more than one configuration—are gaining popularity for their versatility and personal expression. Whether you’re dressing up for a night out or simplifying your daily accessories, these transformable earrings let you switch styles without changing jewelry. What makes them even more appealing is the ability to craft them yourself at home. With basic tools and a bit of creativity, you can design custom pairs that reflect your style, budget, and imagination.
This guide walks through everything you need to know to make your own two-way earrings: from choosing materials and planning designs to assembling functional, beautiful pieces. Whether you're a beginner or an experienced crafter, the process is accessible, rewarding, and full of creative potential.
Understanding Two-Way Earrings: How They Work
Two-way earrings are designed with interchangeable components or reversible structures. One earring can be styled in multiple ways—such as dangle vs. stud, front-back reversible elements, or modular attachments that clip on and off. The key is versatility without sacrificing elegance.
Common types include:
- Dual-function posts: A stud that converts into a drop earring with an added back.
- Reversible drops: Earrings with two distinct sides (e.g., matte and shiny, floral and geometric).
- Modular systems: Components like charms or chains that attach via jump rings or magnetic connectors.
The best designs balance function and fashion. A well-crafted two-way earring should feel secure, look intentional in both forms, and transition smoothly between styles.
“The beauty of two-way earrings lies in their intelligent simplicity. You’re not just making jewelry—you’re designing wearable solutions.” — Lila Chen, Independent Jewelry Designer
Materials and Tools You’ll Need
Before diving into construction, gather the right supplies. Most materials are affordable and widely available at craft stores or online retailers specializing in jewelry-making.
| Material/Tool | Purpose | Beginner-Friendly? |
|---|---|---|
| Earring hooks or studs | Base structure for attachment | Yes |
| Jewelry pliers (chain-nose, round-nose, flat) | Bending wire, opening jump rings | Moderate learning curve |
| Jump rings (4–6mm) | Connect components securely | Yes, with practice |
| Beads (glass, metal, resin) | Decorative elements | Yes |
| Headpins/wire | Create dangles or bead links | Yes |
| Magnetic clasps (optional) | For quick-change designs | Yes, but requires precision |
| Epoxy glue or UV resin | Secure non-metal parts | Yes |
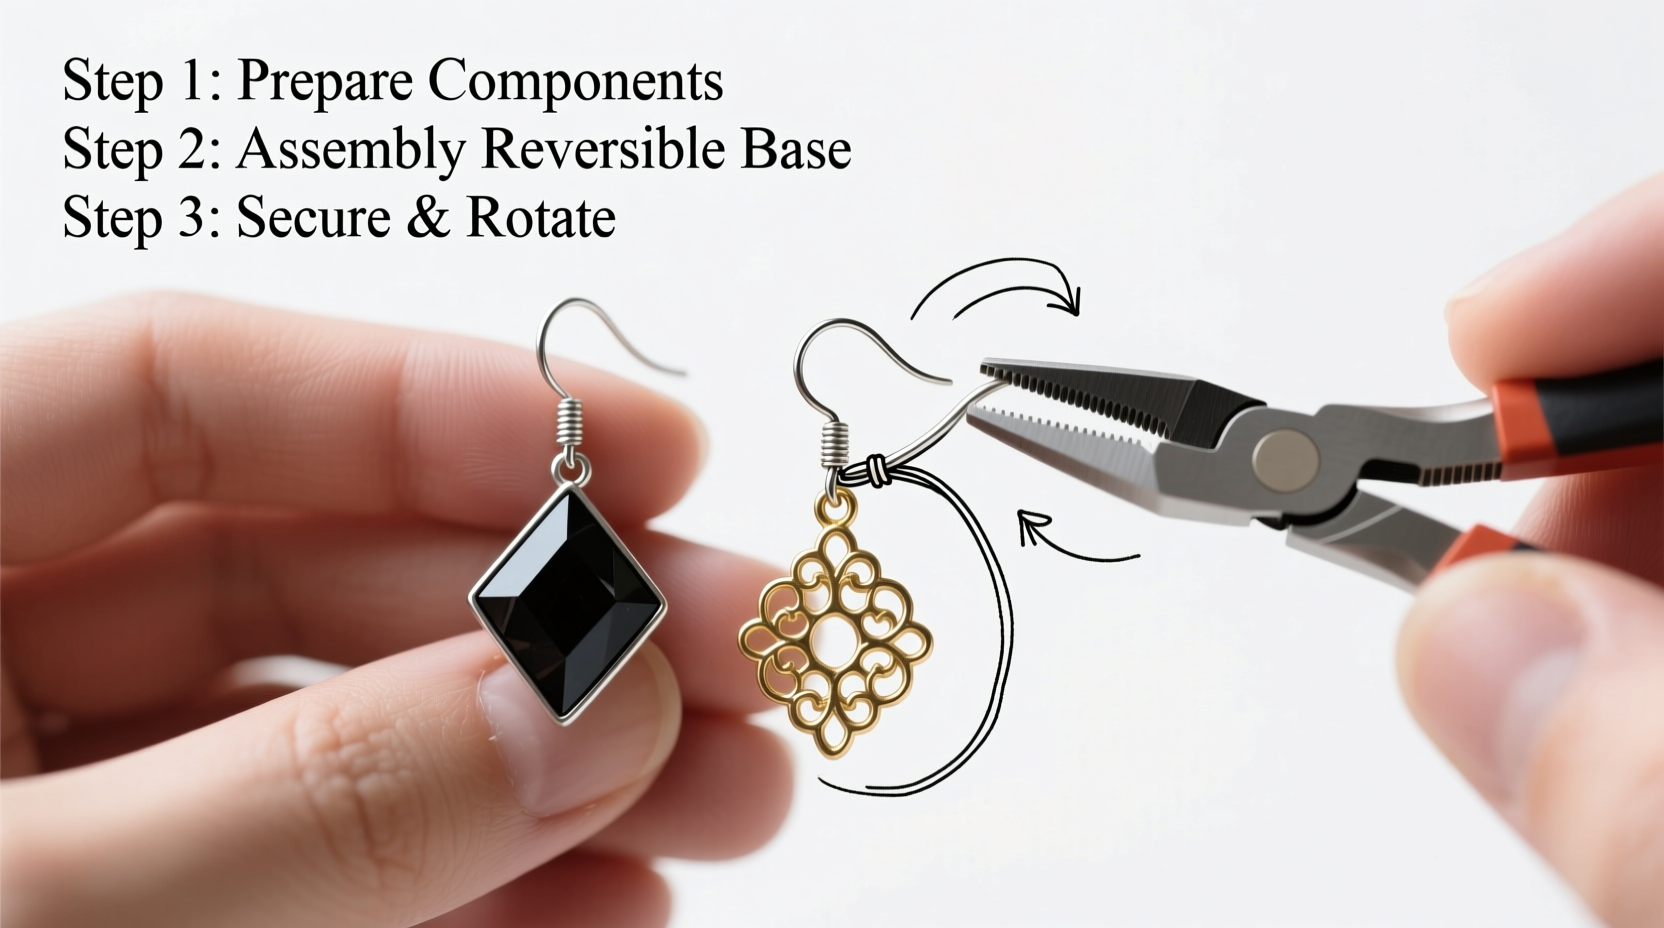
Step-by-Step Guide to Building Your First Pair
Follow this timeline to create a simple yet elegant two-way earring using a modular dangle system. This design allows you to wear the earring as a minimalist stud or add a decorative drop for evening wear.
- Design Concept (15 minutes): Sketch your idea. Decide which elements will stay fixed and which will be removable. For example, a silver disc stud with a detachable tassel.
- Prepare Components (30 minutes): Cut headpins, thread beads, and create dangles. Use round-nose pliers to form loops at the top of each dangle for connecting to jump rings.
- Assemble Base Earring (20 minutes): Attach the stud post to a small jump ring. Connect the primary element (e.g., a metal disc) so it hangs slightly below the earlobe.
- Create Detachable Dangle (20 minutes): Make a secondary drop (e.g., a beaded chain or charm). Attach it to another jump ring or use a tiny lobster clasp for easy attachment.
- Test Functionality (10 minutes): Try on the earring with and without the dangle. Ensure the connection is secure but easy to operate.
- Final Polish (10 minutes): Check all connections, trim excess wire, and clean metal surfaces with a polishing cloth.
Once complete, you have a functional pair that transitions from day to night. Label each component clearly if creating multiple sets.
Avoiding Common Design Mistakes
Even experienced crafters can fall into traps when designing transformable jewelry. Here’s what to watch for:
- Overcomplicating the mechanism: Too many moving parts increase the risk of loss or breakage. Stick to one transformation point per earring.
- Neglecting weight balance: A heavy dangle paired with a flimsy stud can cause discomfort or sagging. Test the combined weight before finalizing.
- Using weak connectors: Thin jump rings or poorly closed loops may snap. Opt for 18-gauge wire or stronger.
- Ignoring finish consistency: Mixing finishes (e.g., rose gold and silver) can look mismatched unless intentionally designed.
Real Example: Maya’s Convertible Hoops
Maya, a hobbyist in Portland, wanted earrings that worked for her office job and weekend art shows. She designed a pair of small gold hoops with a hidden groove on the outer edge. Using micro magnets embedded in tiny resin leaves, she created interchangeable charms that snapped on and off seamlessly.
The result? A sleek hoop for work, and a bohemian version with leaf accents for creative events. After sharing her process on social media, she received dozens of requests to teach a workshop. Her secret? Starting simple and iterating based on real-world feedback.
“I made three versions before getting the magnet strength right,” she said. “But now I have five pairs I rotate weekly.”
Expert Tips for Creative Customization
To elevate your designs beyond basics, consider these advanced ideas:
- Use color-blocking: Choose contrasting beads or metals for each side, allowing dramatic shifts in mood.
- Incorporate nature-inspired shapes: Leaves, feathers, or geometric cutouts can flip to reveal different textures.
- Add motion: Include small spinning elements or kinetic chains that move differently in each configuration.
- Personalize with initials or symbols: Engraved discs or birthstone accents make meaningful two-way gifts.
“The most memorable jewelry tells a story. With two-way earrings, you get to tell two.” — Rafael Torres, Artisan Jewelry Instructor
Frequently Asked Questions
Can I make two-way earrings without soldering or advanced tools?
Absolutely. Most designs rely on jump rings, clips, and adhesive connectors. Soldering is optional and typically used only for permanent metal fusing in professional settings.
How do I ensure the removable parts don’t get lost?
Attach dangles with secure lobster clasps or strong magnets. Store extras in a labeled compartment within your jewelry box. Some designers include a tiny carrying pouch sewn into gift packaging.
Are two-way earrings suitable for sensitive ears?
Yes, as long as you use hypoallergenic materials like surgical steel, titanium, or nickel-free sterling silver for all components touching the skin.
Checklist: Building Your Next Pair
Use this checklist to streamline future projects:
- ☐ Define the two wearing styles clearly
- ☐ Select matching metal tones and finishes
- ☐ Measure total length and weight for comfort
- ☐ Test connector strength (magnets, clasps, rings)
- ☐ Create a prototype before making a second pair
- ☐ Document your design for replication or selling
Start Creating Today
Crafting two-way earrings isn’t just about making jewelry—it’s about solving a styling challenge with creativity and craftsmanship. Each pair becomes a conversation starter, a personal signature, and proof that thoughtful design enhances everyday life.
You don’t need a studio or expensive tools to begin. Start with a single pair, experiment with combinations, and refine your technique. Whether you keep them, gift them, or sell them, your handmade two-way earrings carry a unique value: they were imagined, built, and perfected by you.


 浙公网安备
33010002000092号
浙公网安备
33010002000092号 浙B2-20120091-4
Comments
No comments yet. Why don't you start the discussion?