
Transforming a beloved Disney doll into a large plush pillow is more than just a craft—it’s a way to preserve memories while creating something functional and cozy. Whether the doll has seen years of play, no longer fits its original purpose, or simply holds sentimental value, repurposing it into a soft, huggable pillow extends its life in a new form. This guide walks you through every stage of the transformation with precision, creativity, and care.
Selecting the Right Doll for Transformation
Not every Disney doll is equally suited for conversion into a plush pillow. The ideal candidate should have a recognizable face, durable fabric body, and minimal damage to key features like eyes, hair, and facial embroidery. Vinyl-headed dolls can be more challenging due to rigidity, but they offer expressive faces that make excellent focal points on a pillow.
Consider these factors when choosing your doll:
- Size: Larger dolls (16–20 inches) provide more surface area and are easier to integrate into a pillow design.
- Material: Soft-bodied dolls made of cloth or plush fabric are simpler to modify than those with hard plastic limbs.
- Emotional Value: Reserve this project for dolls that are retired from active play but still cherished.
- Articulation: Dolls with poseable joints may require extra reinforcement when embedding into filling.
Gathering Your Materials and Tools
This project blends sewing, stuffing, and structural adaptation. Having the right supplies ensures a clean, professional result. Below is a checklist of essentials:
📋 Checklist: What You’ll Need
- Disney doll (cleaned and prepped)
- Fabric scissors
- Sewing machine or needle and thread (polyester recommended)
- Matching thread color
- Plush or cotton fabric (1 yard, depending on pillow size)
- Polyester fiberfill stuffing (2–3 lbs)
- Pins or clips
- Tailor’s chalk or fabric marker
- Measuring tape
- Embroidery floss (optional, for added detail)
- Zipper or Velcro (if you want a removable cover)
The choice of outer fabric impacts both comfort and durability. Fleece, minky, or velour offer softness and stretch, ideal for hugging. Cotton blends are breathable and easy to sew but less cuddly. Avoid stiff or slippery materials like satin unless used as accent panels.
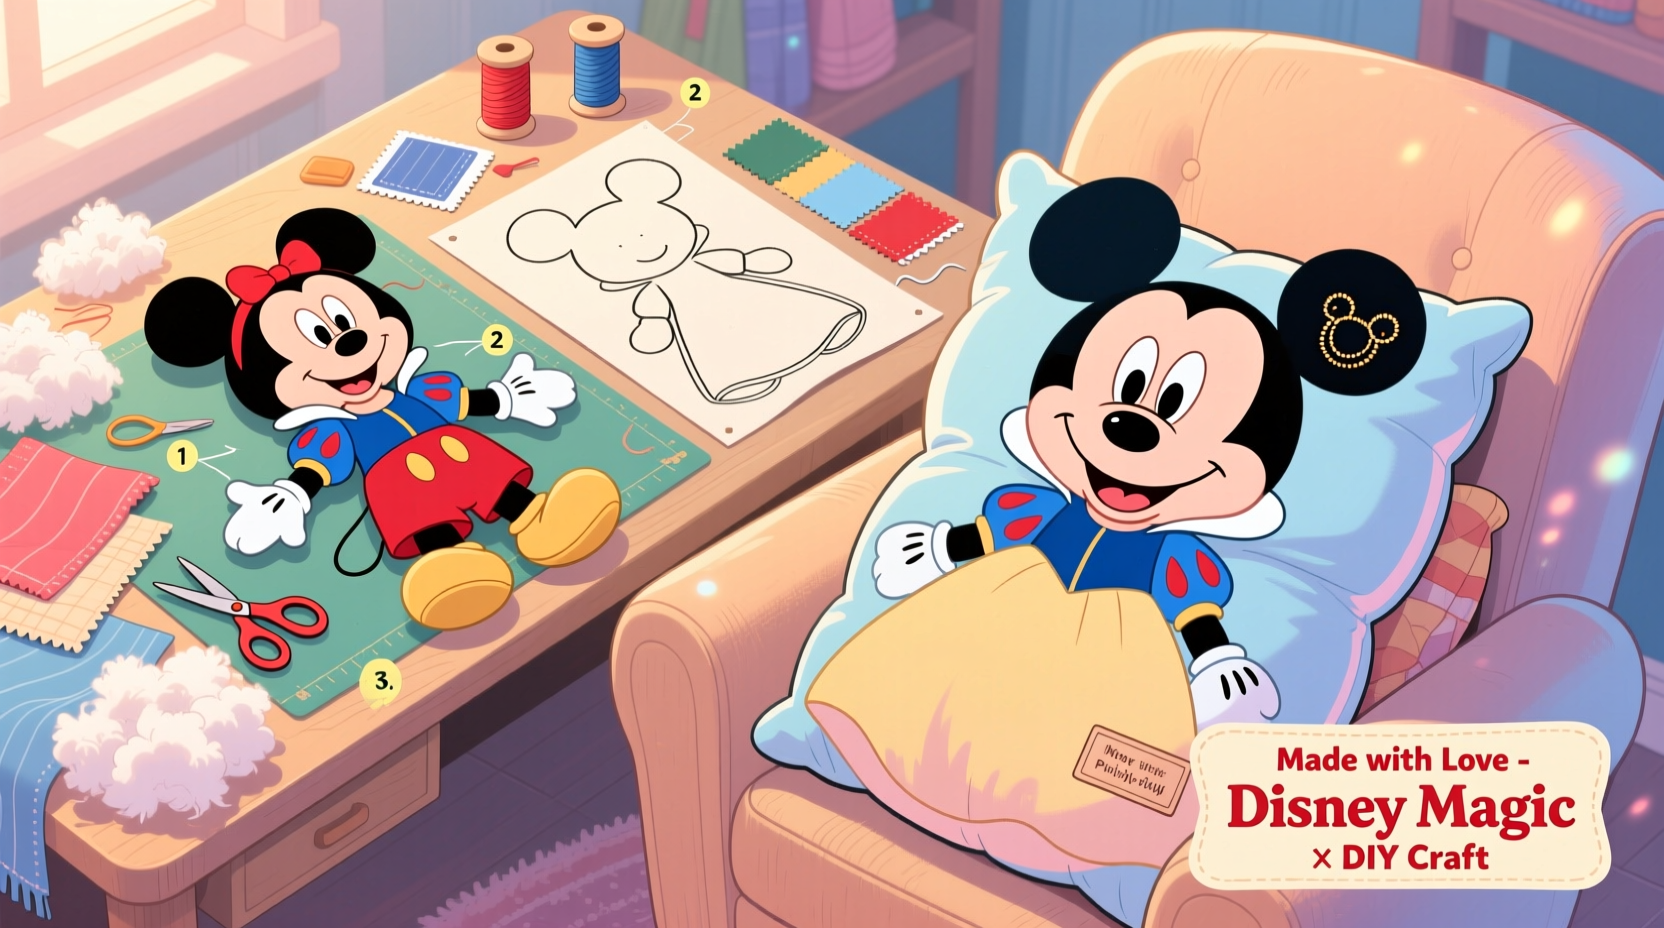
Step-by-Step Transformation Process
Follow this structured timeline to convert your Disney doll into a large, plush pillow safely and effectively.
- Pre-Clean the Doll: Gently hand-wash or spot-clean the doll using mild detergent. Let it air dry completely to prevent mold or odor inside the final pillow.
- Dismantle Non-Essential Parts: Remove arms, legs, or accessories if they interfere with flat integration. Keep parts in a labeled bag in case you want to reattach them decoratively.
- Design the Pillow Shape: Decide whether the doll will sit at the center, peek out from one end, or be fully enclosed. A rectangular or square shape (18x18 inches) works best for standard proportions.
- Cut and Pin Fabric: Cut two identical pieces of fabric according to your desired pillow size. Place the doll face-down on the inner side of one piece, aligning shoulders or torso where the face will emerge. Trace around the head or upper body lightly with tailor’s chalk.
- Create an Opening: Carefully cut a small slit along the traced outline. This opening will allow the doll’s head (or torso) to protrude through the fabric later.
- Attach the Doll: Push the doll’s head gently through the slit from the back. Use strong, hidden stitches to secure the neck or shoulder seam to the fabric, ensuring it won’t pull through during use.
- Sew the Pillow Shell: Place the second fabric piece on top (right sides together), pin around the edges, and sew with a ½-inch seam allowance. Leave a 4–5 inch gap for turning and stuffing.
- Turn and Stuff: Flip the pillow right-side out. Begin stuffing firmly but evenly, focusing extra fill around the doll’s body to prevent lumps. Ensure the face remains smooth and undistorted.
- Close the Seam: Hand-stitch the opening closed using a ladder stitch for invisibility. Reinforce stitching near the doll’s attachment point.
- Final Touches: Add ribbon bows, embroidered names, or themed patches to personalize the design.
Do’s and Don’ts During the Conversion
| Do | Don't |
|---|---|
| Secure the doll’s head or torso firmly to prevent shifting. | Overstuff to the point of distorting the doll’s facial features. |
| Use double stitching on high-tension areas like the neck. | Wash the finished pillow in a machine unless fabric allows. |
| Add a zipper for future cleaning access. | Cut too large an opening—this weakens structural integrity. |
| Test fabric compatibility with a small swatch first. | Ignore internal seams—reinforce where the doll meets the pillow. |
“Repurposing vintage toys into functional art requires respect for the original design and craftsmanship. The goal isn’t to erase history, but to evolve it.” — Lila Mendez, Textile Artist & Toy Restoration Specialist
Real Example: Transforming a Vintage Ariel Doll
Maria, a collector from Portland, had a 1995 Disney Princess Ariel doll her grandmother gifted her at age five. Over time, the vinyl face cracked slightly, and the dress was beyond repair. Rather than discard it, she transformed the doll into a 20-inch mermaid-themed pillow.
She preserved Ariel’s head and red hair, cutting a precise hole in a teal minky fabric square. After securing the neck with reinforced whipstitches, she layered blue and purple tulle beneath the tail section to simulate waves. She added a hidden zipper along the bottom edge, allowing occasional airing of the stuffing. The result became a centerpiece in her daughter’s nursery—a tribute across generations.
FAQ
Can I wash the finished doll pillow?
Spot cleaning is safest. If the outer fabric is machine-washable and you’ve included a zipper, remove the cover and wash gently. Never submerge the entire pillow if the doll contains glued or painted details.
What if my doll doesn’t have a soft body?
Rigid bodies can still be incorporated. Focus on embedding only the upper torso or head, letting the rest remain external. Use dense stuffing around hard edges to soften the feel.
How long does the entire process take?
For a beginner, expect 4–6 hours spread over two sessions—especially if hand-sewing. Experienced crafters can complete it in 2–3 hours.
Conclusion: Bring Magic Back to Life
A Disney doll carries stories, emotions, and childhood wonder. By transforming it into a large plush pillow, you’re not discarding the past—you’re reimagining it. This project blends nostalgia with practicality, offering a unique keepsake that’s both display-worthy and comforting to hold. Every stitch honors the original charm while adapting it to a new chapter of use and love.


 浙公网安备
33010002000092号
浙公网安备
33010002000092号 浙B2-20120091-4
Comments
No comments yet. Why don't you start the discussion?