
Crafting your own hat is more than just a creative outlet—it’s an opportunity to express individuality, experiment with textures and forms, and produce something both functional and artistic. Whether you're drawn to the elegance of a wide-brimmed sun hat, the structure of a fedora, or the whimsy of a fabric-covered fascinator, handmade hats offer a personal touch no store-bought accessory can replicate. With the right tools, materials, and guidance, anyone can transform simple fabrics, felts, or even recycled materials into a wearable masterpiece.
Gathering Your Materials and Tools
The foundation of any successful hat-making project lies in preparation. Before shaping or stitching begins, ensure you have the essential supplies on hand. The exact materials will vary depending on the type of hat you’re creating, but most projects require a core set of items.
| Material/Tool | Purpose | Recommended For |
|---|---|---|
| Felt, straw braid, or fabric | Main body of the hat | Fedoras, cloches, sun hats |
| Blocking form (hat block) | Shaping the hat over a mold | Structured felt hats |
| Millinery wire | Reinforcing brims and edges | Brim stability |
| Pins, needles, and strong thread | Sewing and securing layers | All fabric-based hats |
| Steamer or iron | Molding felt or straw | Felting and shaping |
| Scissors and measuring tape | Cutting and sizing | Precision work |
Choosing Your Hat Style and Design
Before cutting any material, decide on the silhouette that best suits your face shape, intended use, and aesthetic preference. A classic cloche flatters oval and heart-shaped faces, while wide-brimmed hats provide sun protection and dramatic flair. Consider sketching a quick design or collecting visual inspiration from fashion archives, vintage photographs, or nature.
Ask yourself: Is this hat meant for everyday wear, a special occasion, or purely artistic display? Function influences form. A garden party fascinator might feature feathers and beads, whereas a hiking sun hat prioritizes ventilation and durability.
“We often underestimate how much a well-crafted hat can elevate confidence. It’s not just an accessory—it’s armor.” — Lila Montgomery, Millinery Designer & Educator
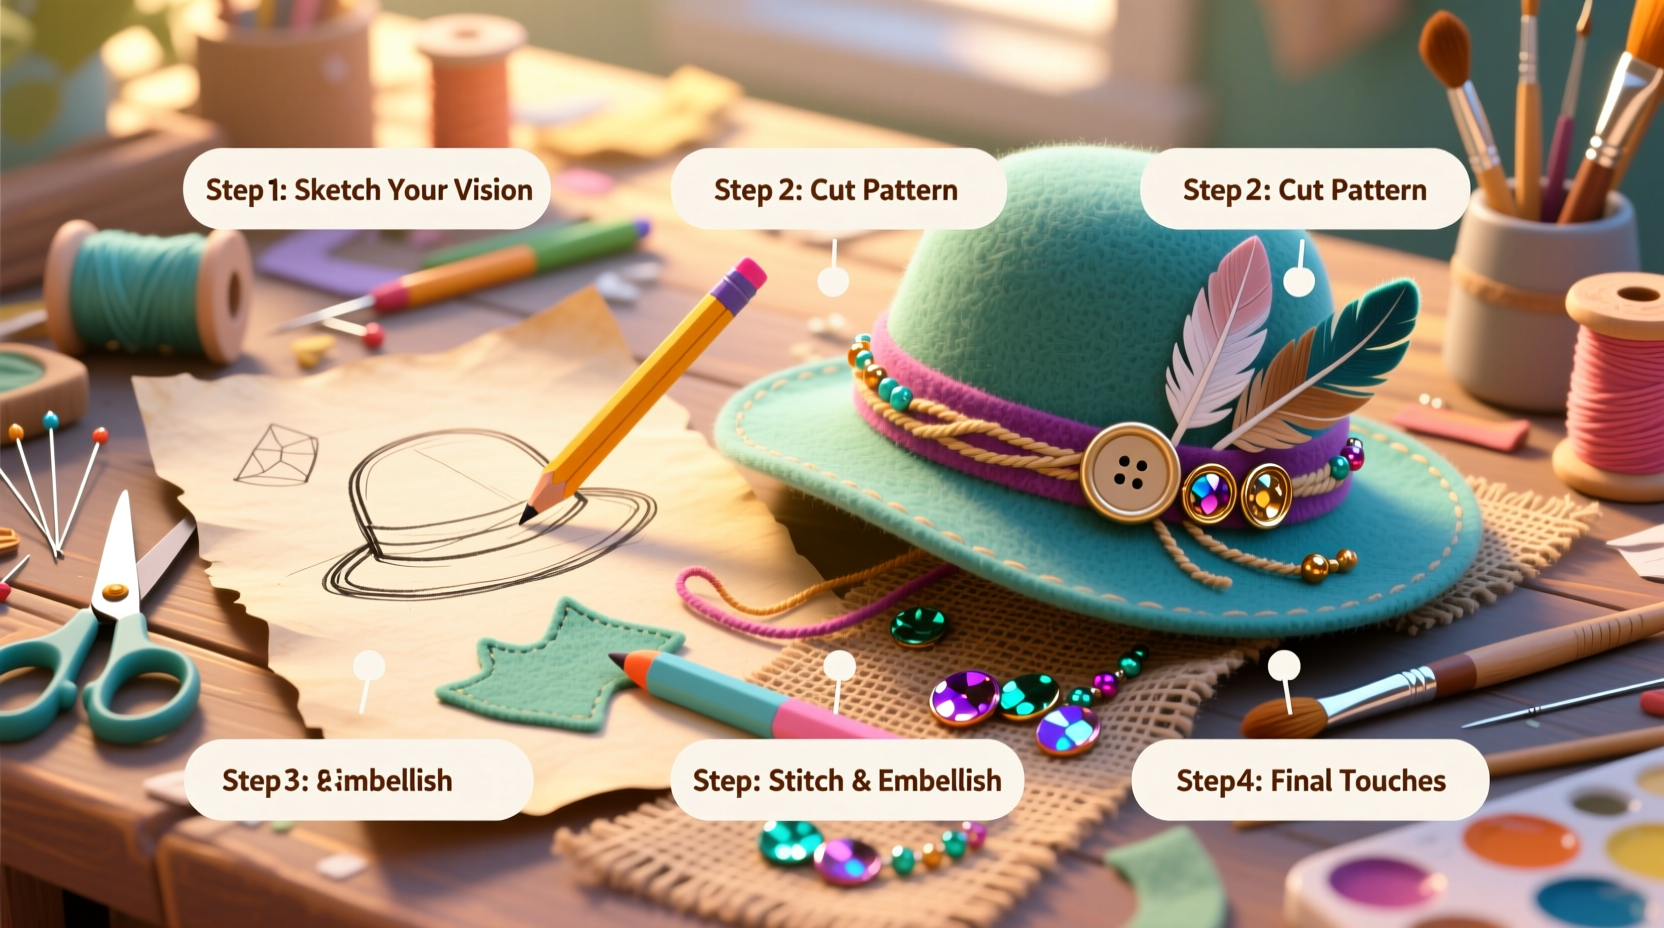
Step-by-Step Guide to Crafting a Felt Fedora
This timeline walks through constructing a structured felt fedora using traditional millinery techniques. While professional hat blocks are ideal, beginners can adapt household objects like bowls or vases as temporary molds.
- Measure your head: Use a flexible tape to measure around the forehead and crown. Add 1/2 inch for seam allowance and comfort.
- Select and cut the felt: Choose high-quality wool or rabbit felt. Cut a circular crown piece and a long rectangular brim strip based on your measurements.
- Shape the crown: Dampen the felt slightly and stretch it over a rounded mold (like a melon or wooden block). Use steam to soften and mold the felt, then let it dry completely—this can take several hours.
- Create the brim: Attach millinery wire along the outer edge of the brim piece. Fold fabric over the wire and stitch it in place to prevent fraying and maintain shape.
- Sew brim to crown: Align the base of the crown with the inner edge of the brim. Pin in place and hand-stitch using a whipstitch for flexibility and strength.
- Add finishing touches: Trim excess material, insert a sweatband inside the crown for comfort, and attach a ribbon band around the base of the crown to hide seams and enhance appearance.
- Decorate: Embellish with feathers, brooches, or hand-stitched embroidery. Keep balance in mind—too much weight on one side can tilt the hat.
Alternative Techniques for Beginners
Not all hat-making requires advanced tools or expensive materials. For those just starting out, these accessible methods offer satisfying results with minimal investment.
- No-Sew Fabric Hats: Use fusible webbing or fabric glue to assemble soft caps from cotton or linen. Ideal for children’s costumes or summer bonnets.
- Straw Braid Weaving: Purchase pre-dyed straw braid and coil it into a spiral, sewing each layer to the next. This method builds a natural sun hat gradually and meditatively.
- Upcycled Denim Hats: Transform old jeans into rugged trucker-style hats using stiff interfacing for structure.
These approaches allow experimentation without the pressure of perfection. Mistakes become part of the charm, especially in folk-inspired or bohemian styles.
Mini Case Study: From Sketch to Runway
Sophie Tran, a self-taught designer from Portland, began making hats after inheriting her grandmother’s sewing machine. Her first attempt—a lopsided beret made from thrifted velvet—was worn unapologetically to a local art market. Encouraged by compliments, she studied historical patterns and joined an online millinery group.
Within a year, Sophie developed a signature look: asymmetrical shapes with hand-dyed silks and reclaimed vintage lace. She entered a regional fashion showcase and won “Best Accessory” with a sculptural black hat inspired by origami. Today, she teaches weekend workshops and sells custom pieces online.
Her journey underscores a vital truth: creativity thrives not in perfection, but in persistence and personal vision.
Common Pitfalls and How to Avoid Them
Even experienced crafters encounter setbacks. Recognizing common issues early helps save time and materials.
| Problem | Why It Happens | Solution |
|---|---|---|
| Brims curl upward | Insufficient wiring or uneven tension | Insert continuous millinery wire and secure at intervals |
| Hat feels too tight | Inaccurate head measurement or shrinkage during blocking | Always add ease; test fit before final assembly |
| Decoration sags or detaches | Weak adhesives or poor anchoring | Use fabric-backed glue or sew heavy elements securely |
| Felt loses shape in humidity | Low-grade material or lack of sizing | Choose tightly milled felt; apply light starch spray for stiffness |
Checklist: Preparing for Your First Hat Project
- ☐ Decide on hat style and purpose
- ☐ Measure head circumference accurately
- ☐ Gather all necessary tools and materials
- ☐ Test materials with scrap pieces (e.g., steam felt sample)
- ☐ Create a mock-up using inexpensive fabric if needed
- ☐ Set up a clean, well-lit workspace with ample room for spreading materials
- ☐ Allow 2–3 hours for uninterrupted crafting time
FAQ
Can I make a hat without a hat block?
Yes, especially for soft or casual styles. Bowls, balloons, or even crumpled paper can serve as temporary forms. For structured hats, however, investing in a basic wooden block greatly improves results.
What’s the easiest hat for beginners?
A simple fabric sun hat with a gathered crown and wired brim is ideal. It teaches fundamental skills like measuring, sewing curves, and working with wire, while yielding a practical result.
How do I care for a handmade hat?
Store it in a dust-free environment, away from direct sunlight. Clean gently with a soft brush or damp cloth. Avoid folding or stacking other items on top, which can distort the shape.
Bring Your Vision to Life
Creating a hat is an act of intimate craftsmanship—one that blends patience, imagination, and technical skill. Every stitch, fold, and embellishment reflects your taste and intention. Whether you follow traditional methods or invent your own hybrid techniques, the process itself is transformative. You’re not just making a hat; you’re shaping identity, reclaiming slow creativity in a fast world, and joining a lineage of artisans who’ve turned fiber into statement.


 浙公网安备
33010002000092号
浙公网安备
33010002000092号 浙B2-20120091-4
Comments
No comments yet. Why don't you start the discussion?