
Crafting is more than just a pastime—it’s a way to express creativity, personalize spaces, and create meaningful handmade gifts. One of the most timeless and elegant crafts you can make at home is a paper rose. Whether you're decorating for an event, enhancing your living room with sustainable décor, or preparing a heartfelt gift, a handcrafted rose adds charm and sophistication. This guide walks you through every stage of creating a lifelike paper rose using accessible materials and proven techniques.
Why Craft Paper Roses?
Paper roses are versatile, durable, and surprisingly realistic when made with care. Unlike fresh flowers, they don’t wilt, require no maintenance, and can last for years if stored properly. They’re also eco-friendly—especially when made from recycled paper—and ideal for themed events like weddings, anniversaries, or spring décor.
More than aesthetics, crafting has documented psychological benefits. According to a 2022 study published in the Journal of Applied Arts & Health, repetitive manual tasks like folding, cutting, and shaping paper can reduce stress and improve focus. Creating something beautiful with your hands fosters a sense of accomplishment and mindfulness.
Materials You’ll Need
Gathering the right supplies ensures a smooth crafting process. Below is a checklist of everything required to make one medium-sized rose (about 3–4 inches in diameter). You can scale up for bouquets or centerpieces.
Basic Materials Checklist
- Square sheets of colored craft paper or tissue paper (red, pink, or white)
- Green floral wire (18–20 gauge)
- Floral tape (green)
- Scissors (precision tip recommended)
- Glue stick or low-temperature hot glue
- Ruler and pencil
- Round object (like a coin) for tracing petal shapes
- Paintbrush (optional, for adding subtle color gradients)
Optional Enhancements
- Watercolor paints or ink pads for shading petal edges
- Embossing tool or blunt pencil for curling petals
- Recycled book pages or sheet music for vintage-style roses
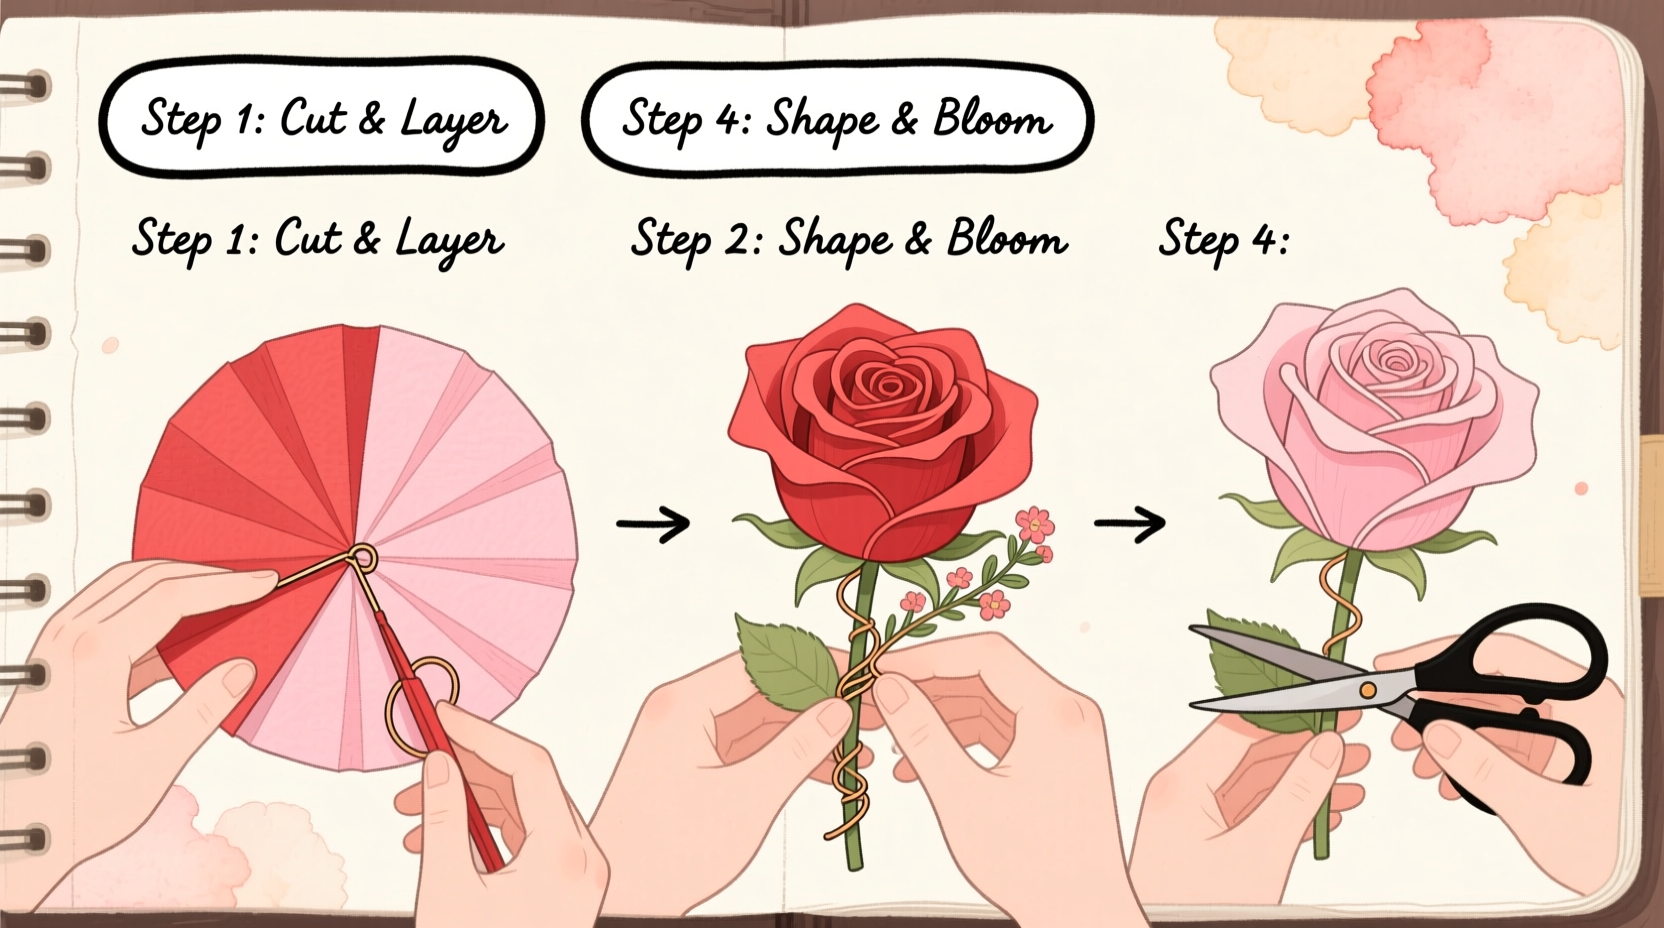
Step-by-Step Guide to Crafting Your Rose
Follow this detailed timeline to shape, assemble, and finish a realistic-looking paper rose. The entire process takes about 30–45 minutes once you’re familiar with the steps.
- Prepare the Petals: Cut five to seven petal templates from scrap paper. Trace a teardrop shape using a coin for the rounded base and tapering to a point. Sizes should vary: smallest (1 inch), medium (1.5 inches), largest (2 inches).
- Cut the Paper: Transfer the templates onto your chosen colored paper. Cut out two sets of each size—one for outer petals, one for inner layers. Slightly irregular edges add realism.
- Shape the Petals: Gently curl the top edges outward using a pencil or embossing tool. For depth, press the center of each petal downward on a soft surface to create a natural cup shape.
- Create the Center Bud: Take the smallest petal, apply a dab of glue at the pointed tip, and roll it tightly into a cone. This becomes the heart of your rose. Attach the next smallest petal around it, overlapping slightly and gluing at the base.
- Build Layer by Layer: Continue adding petals in ascending order of size. Position inner petals upright to mimic tight bloom; outer petals should flare outward. Rotate each new layer slightly for a natural spiral effect.
- Attach the Stem: Insert the floral wire through the base of the completed bloom. Secure it with glue, then wrap the joint tightly with floral tape, stretching it slightly as you go to activate its adhesive properties.
- Add Leaves (Optional): Cut leaf shapes from green paper. Score a line down the center for veining. Attach one or two leaves partway down the stem using floral tape.
- Final Touches: Lightly brush dark red or pink watercolor along petal edges for shadow and dimension. Let dry completely before handling.
Common Mistakes and How to Avoid Them
Even experienced crafters encounter pitfalls. The following table outlines frequent errors and practical solutions.
| Common Mistake | Why It Happens | How to Fix It |
|---|---|---|
| Rose looks flat or stiff | Petals weren’t shaped or curled | Use a pencil to gently bend edges and press centers inward |
| Bloom falls apart | Insufficient glue or loose wrapping | Apply glue sparingly but consistently; secure stem with tight floral tape wraps |
| Petals tear during shaping | Paper too thin or handled roughly | Use crepe paper or reinforce with light spray starch |
| Stem looks unnatural | Floral tape not stretched or applied unevenly | Stretch tape as you wrap—it bonds better and looks smoother |
“Handmade paper flowers aren’t about perfection—they’re about capturing the essence of nature through texture, movement, and layered detail.” — Lila Monroe, Botanical Paper Artist & Instructor
A Real Example: Maria’s Wedding Centerpiece Project
Maria, a DIY enthusiast from Portland, decided to craft 50 paper roses for her sister’s wedding reception. She used vintage book pages for a romantic literary theme and added gold-leaf edges for elegance. By following a consistent template and batch-processing petals, she completed all blooms in three weekends. Guests assumed they were silk flowers. “People kept reaching out to touch them,” she said. “That moment when someone realized they were handmade—that was priceless.”
Her key insight? Preparation matters. She pre-cut and organized all petal sizes in labeled envelopes, which cut assembly time in half. She also tested different papers beforehand, discovering that lightweight cardstock held shape better than standard tissue paper.
Frequently Asked Questions
Can I make these roses waterproof?
While paper isn’t inherently waterproof, you can lightly mist finished roses with aerosol fixative or clear acrylic spray (tested on a sample first). Avoid direct moisture exposure for longevity.
What kind of paper gives the most realistic look?
Crepe paper is widely favored for its stretch and texture. It responds well to shaping and mimics the softness of real petals. Tissue paper works for delicate, translucent effects, while lightweight craft paper holds structure better for larger blooms.
How do I store handmade roses long-term?
Store in a dry, cool place away from sunlight. Place in a box with acid-free tissue between blooms to prevent color transfer. Avoid compression—don’t stack heavy items on top.
Expand Your Craft: Ideas Beyond the Single Rose
Once you’ve mastered the basic rose, consider these creative applications:
- Wreaths: Arrange 8–12 roses in a circular foam base with complementary greenery.
- Wall Art: Mount a cluster of roses in a shadow box frame for botanical wall décor.
- Gift Toppers: Attach a mini rose to a wrapped present instead of a bow.
- Bouquets: Combine with handmade lilies or daisies for a full arrangement.
For seasonal themes, use pastels for spring, deep reds for holidays, or black-dyed paper for gothic décor. Kids can participate too—simplify by using pre-cut shapes and glue sticks.
Conclusion: Bring Beauty Into Your Home, One Petal at a Time
Making a beautiful rose craft at home blends artistry, patience, and personal expression. What begins as a simple piece of paper transforms into a lasting symbol of care and creativity. Whether displayed on a shelf, gifted to a loved one, or used to celebrate a special occasion, your handmade rose carries meaning far beyond its materials.


 浙公网安备
33010002000092号
浙公网安备
33010002000092号 浙B2-20120091-4
Comments
No comments yet. Why don't you start the discussion?